Limit permission to delete resources by Company's IP address
Limit EC2 delete permissions by Company’s IP address
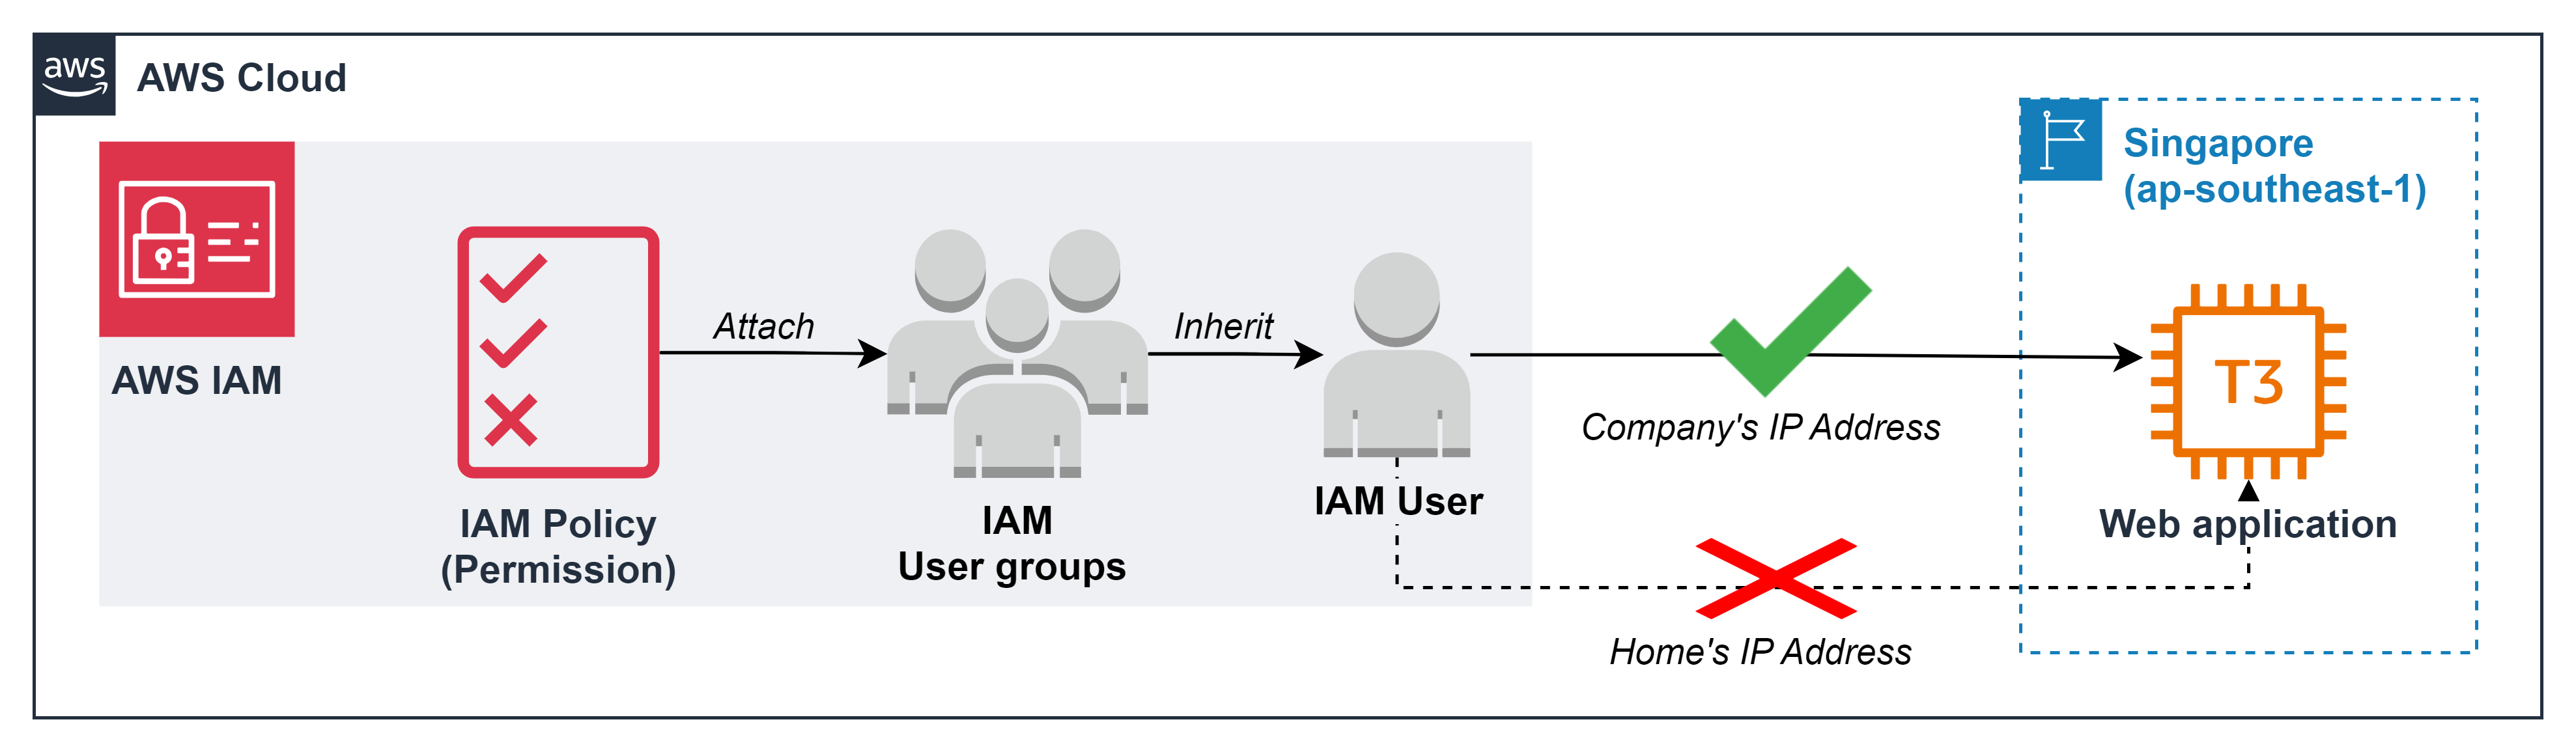
With the criteria of zero trust and least privilege permission, deleting resources always needs to comply with very strict requirements such as:
- Can only be deleted - when accessing the AWS account from the company’s IP address
- Only specifically tagged resources can be deleted
- Only resources in the previously allowed list can be deleted
- …..
In the framework of this lab, we will perform the part: only delete EC2 - when accessing the AWS account from the company’s IP address
Get IP address
- Suppose you are accessing your AWS account from your Office. You need to visit the following website to know office’s IP address. https://nordvpn.com/what-is-my-ip/
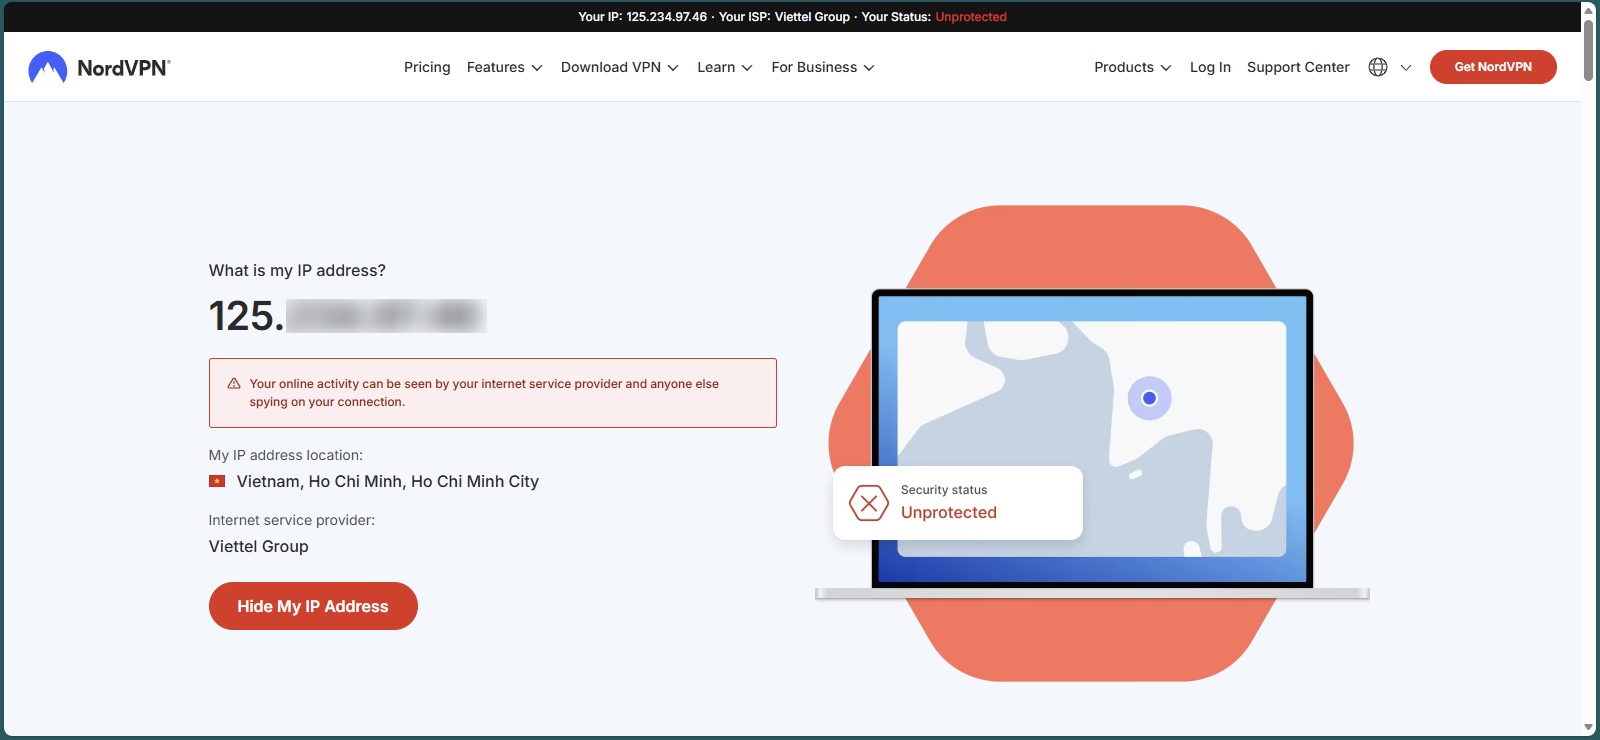
- IP address: 125.xxx.xxx.xxxx
Create IAM Policy
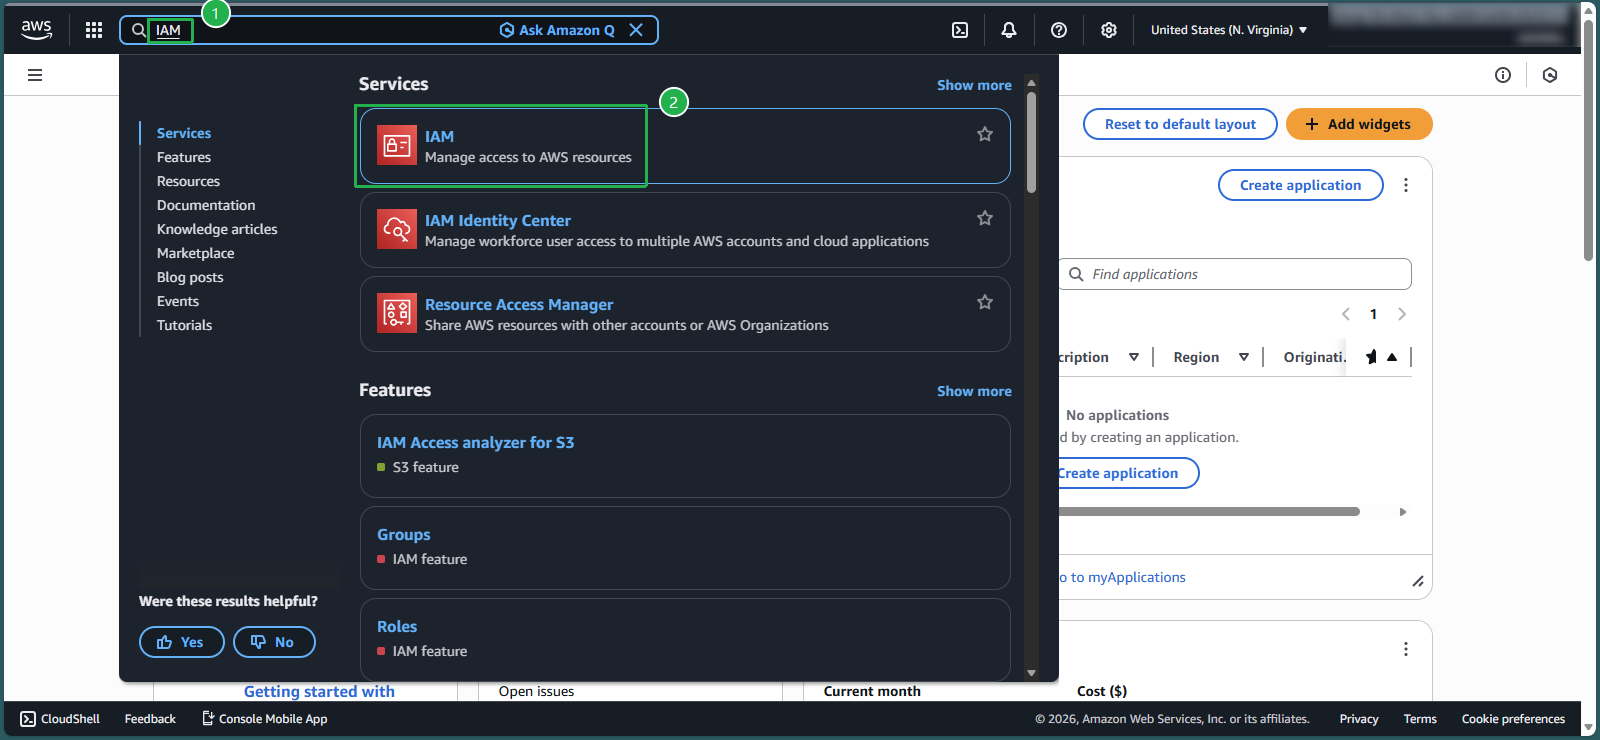
- In the AWS console, in the search box, enter
IAM - Select IAM service
- On the left side of the screen, select
Policies - Select Create policy
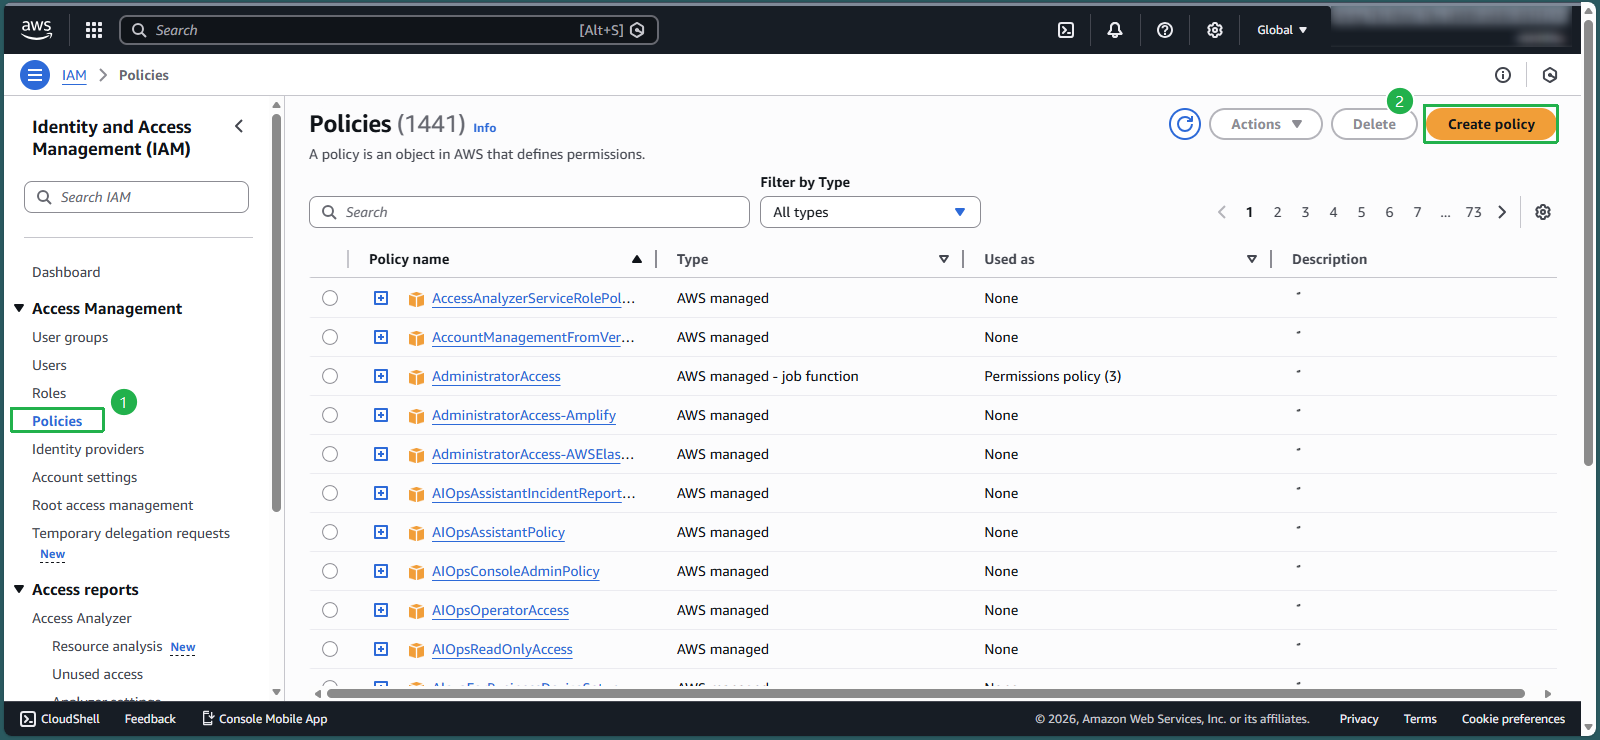
- Create policy in JSON data format instead of Visual. Select
JSON - Scan the entire current code and press the Delete button
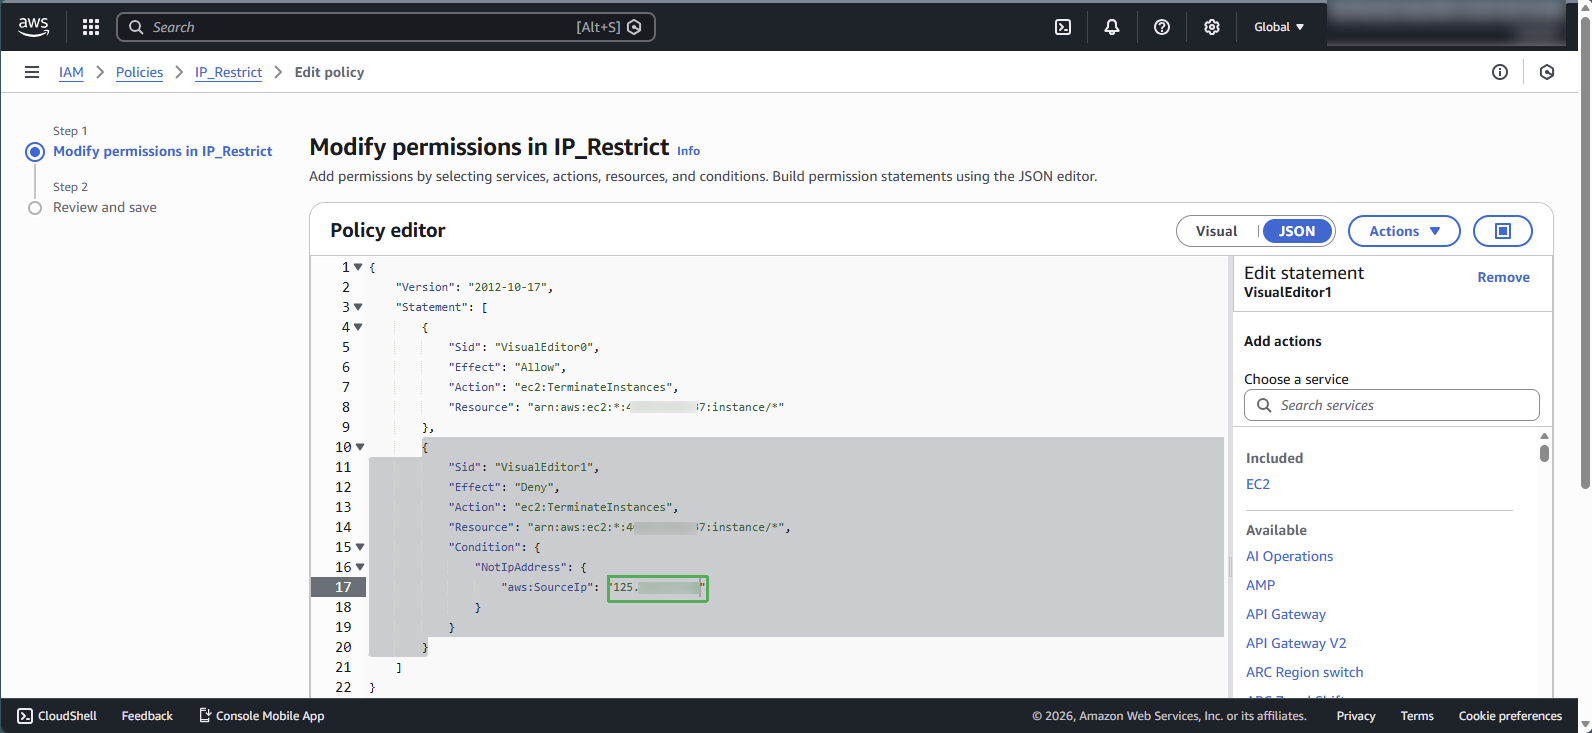
- Copy the following code into the Policy editor box, with the meaning: Users only have the right to delete EC2 with the IP address accessing the AWS account at your office
Noted: in line aws:SourceIp instead of entering the number sequence 125.xxx.xxx.xxxx which is the IP address you took in step 1, you need to change it to another number sequence. For example: change 125.xxx.xxx.xxxx with 55.165.049.118 which is your home IP address - we do this to prove step 4
{
    "Version": "2012-10-17",
    "Statement": [
        {
            "Sid": "VisualEditor0",
            "Effect": "Allow",
            "Action": "ec2:TerminateInstances",
            "Resource": "arn:aws:ec2:*:148922931563:instance/*"
        },
        {
            "Sid": "VisualEditor1",
            "Effect": "Deny",
            "Action": "ec2:TerminateInstances",
            "Resource": "arn:aws:ec2:*:148922931563:instance/*",
            "Condition": {
                "NotIpAddress": {
                    "aws:SourceIp": "55.165.049.118"
                }
            }
        }
    ]
}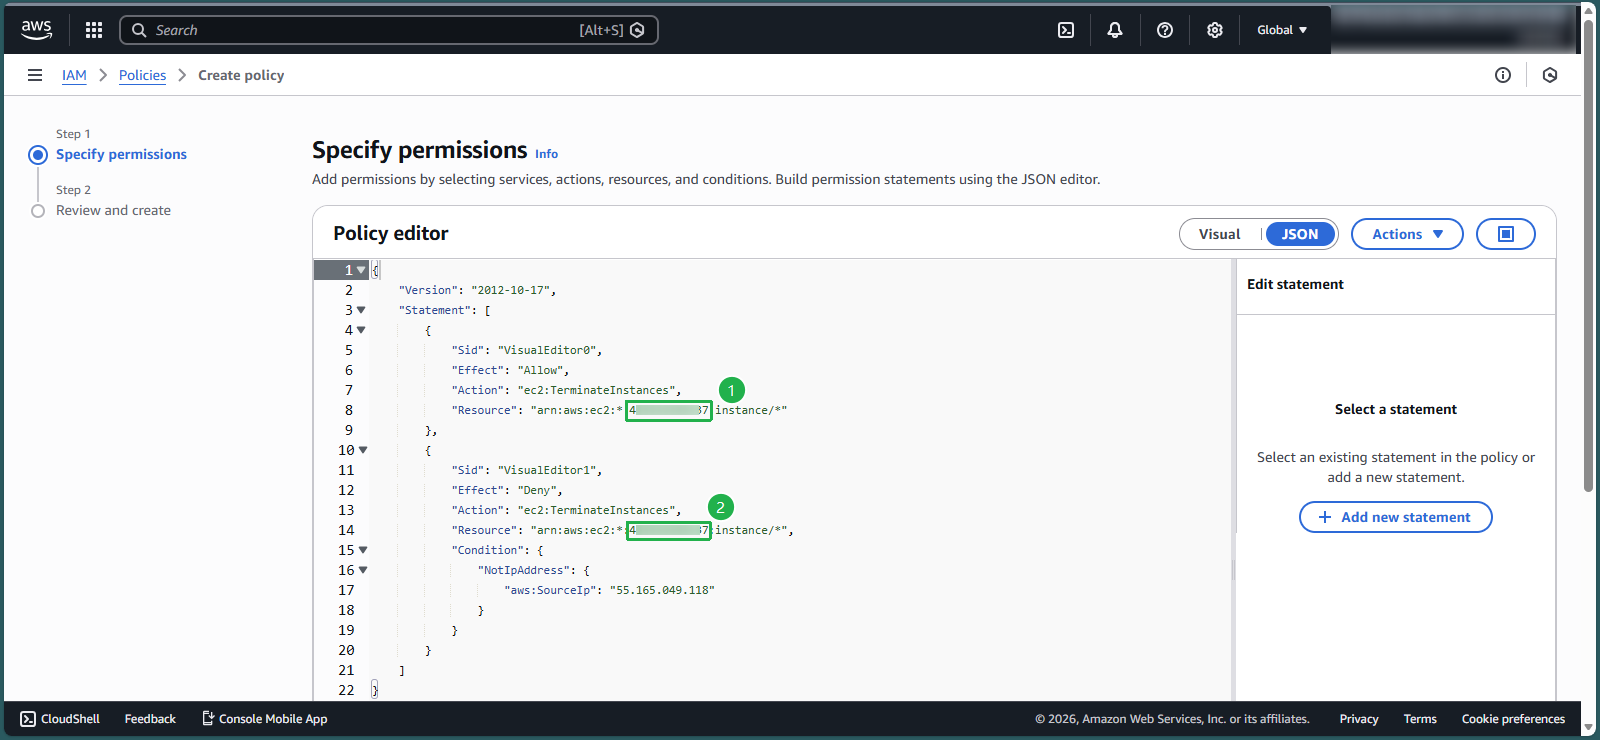
- Select next
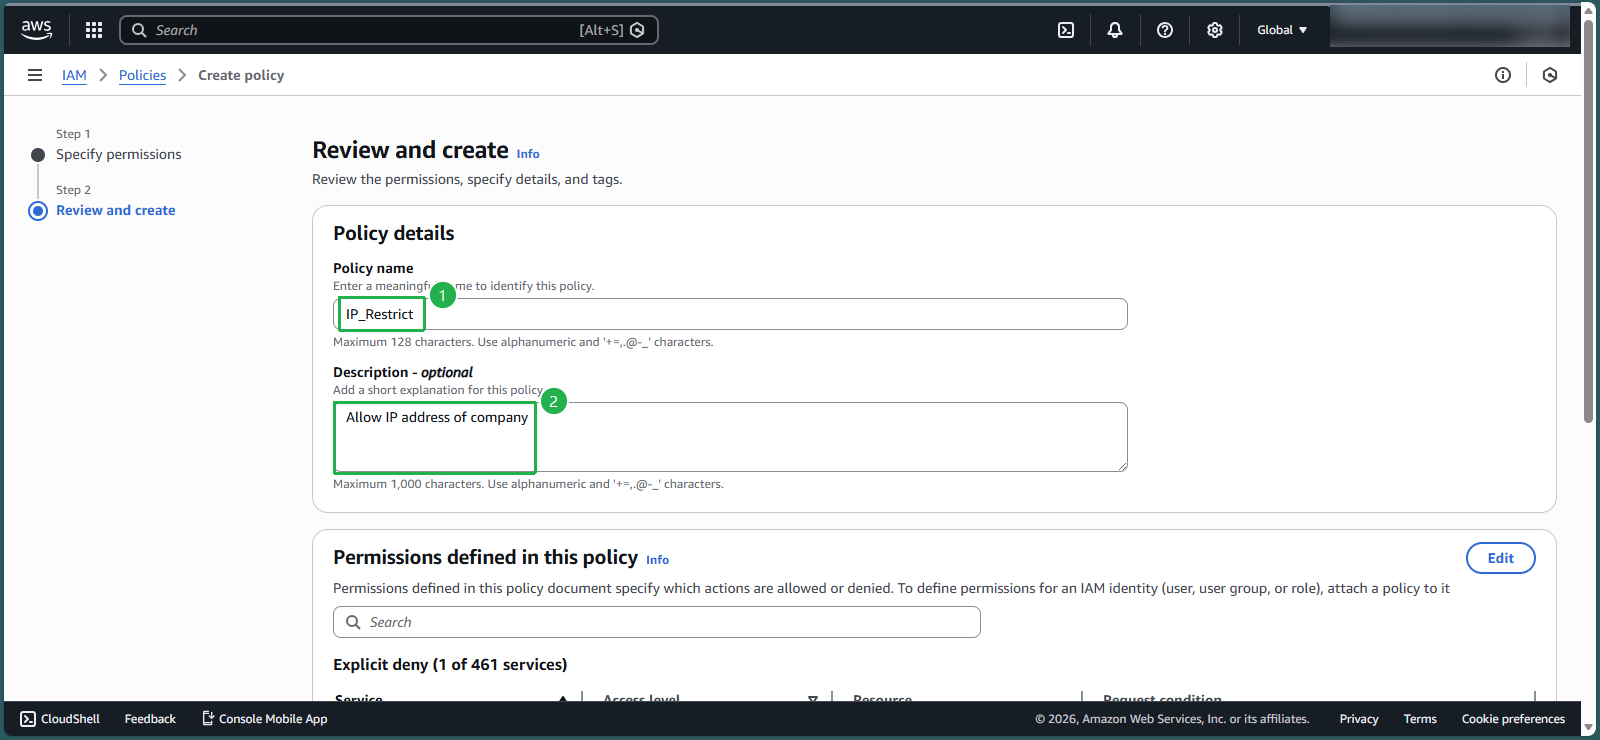
- In the Policy name section, enter:
IP_Restrict - In the Description section, enter:
Allow IP address of company
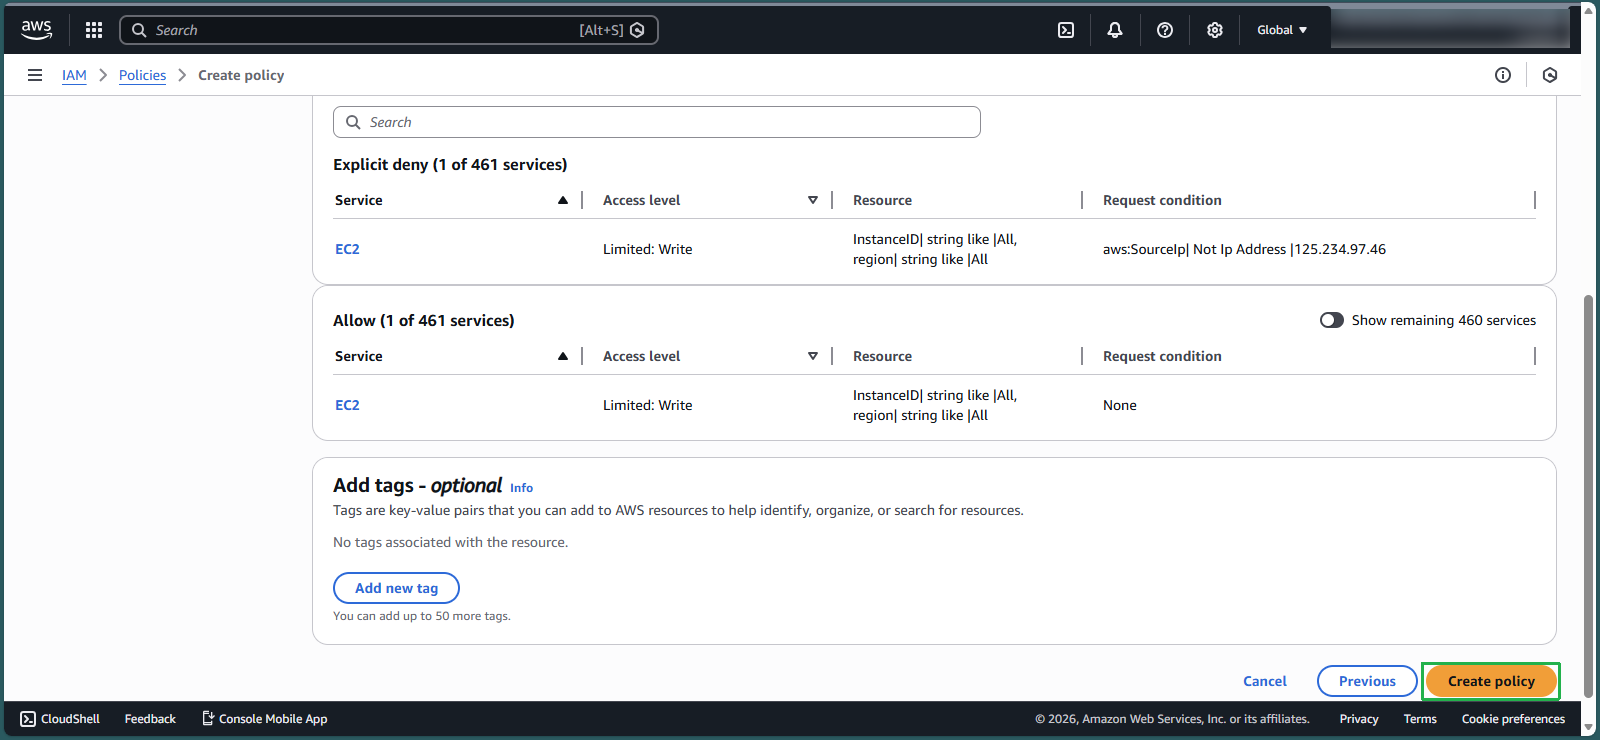
- Scroll to the bottom of the page and select Create policy
- In the AWS console, in the search box, enter
Add policy IP_Restrict to group CostTest
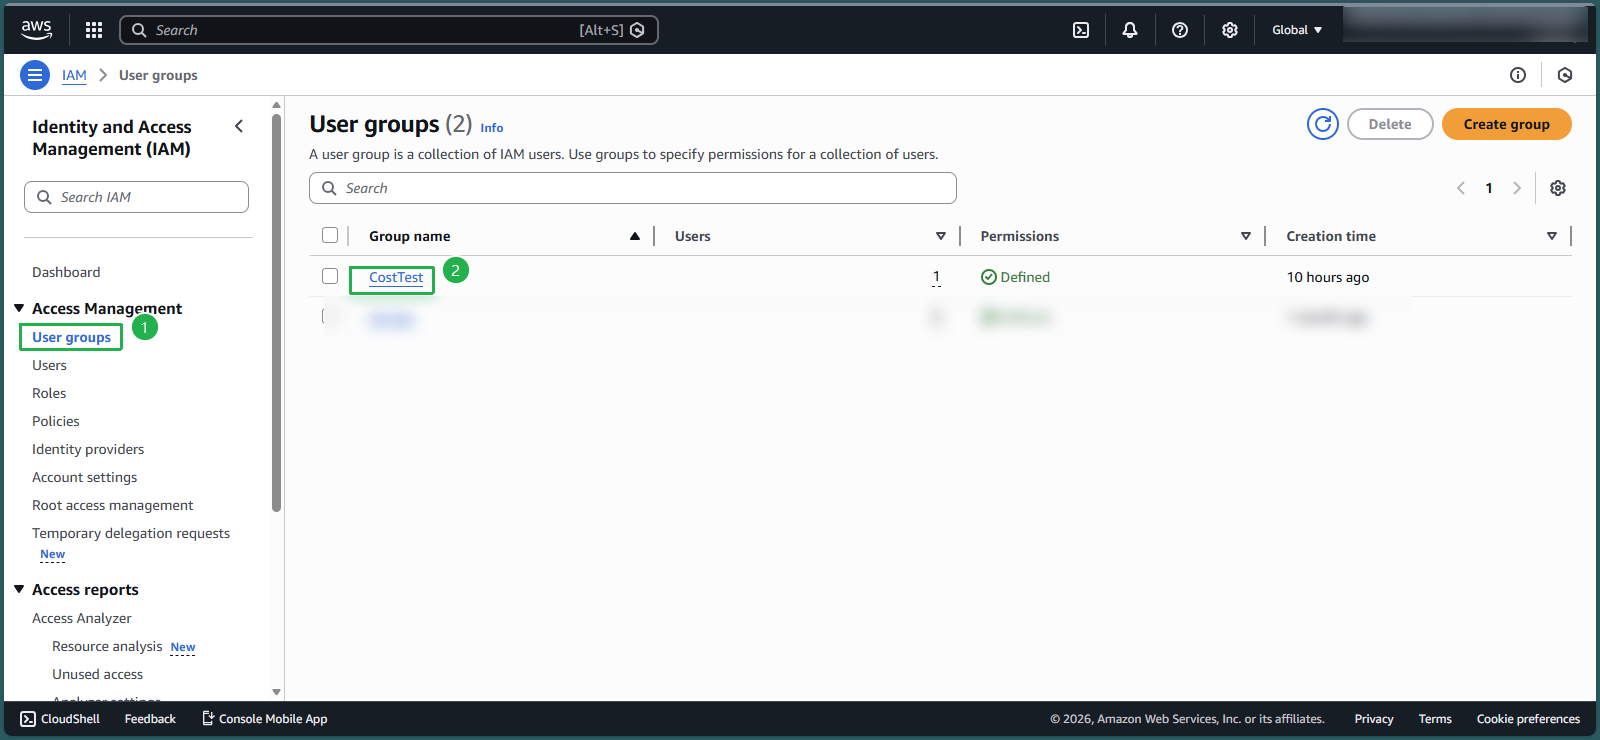
- At IAM Console, left section - select User groups
- Select CostTest
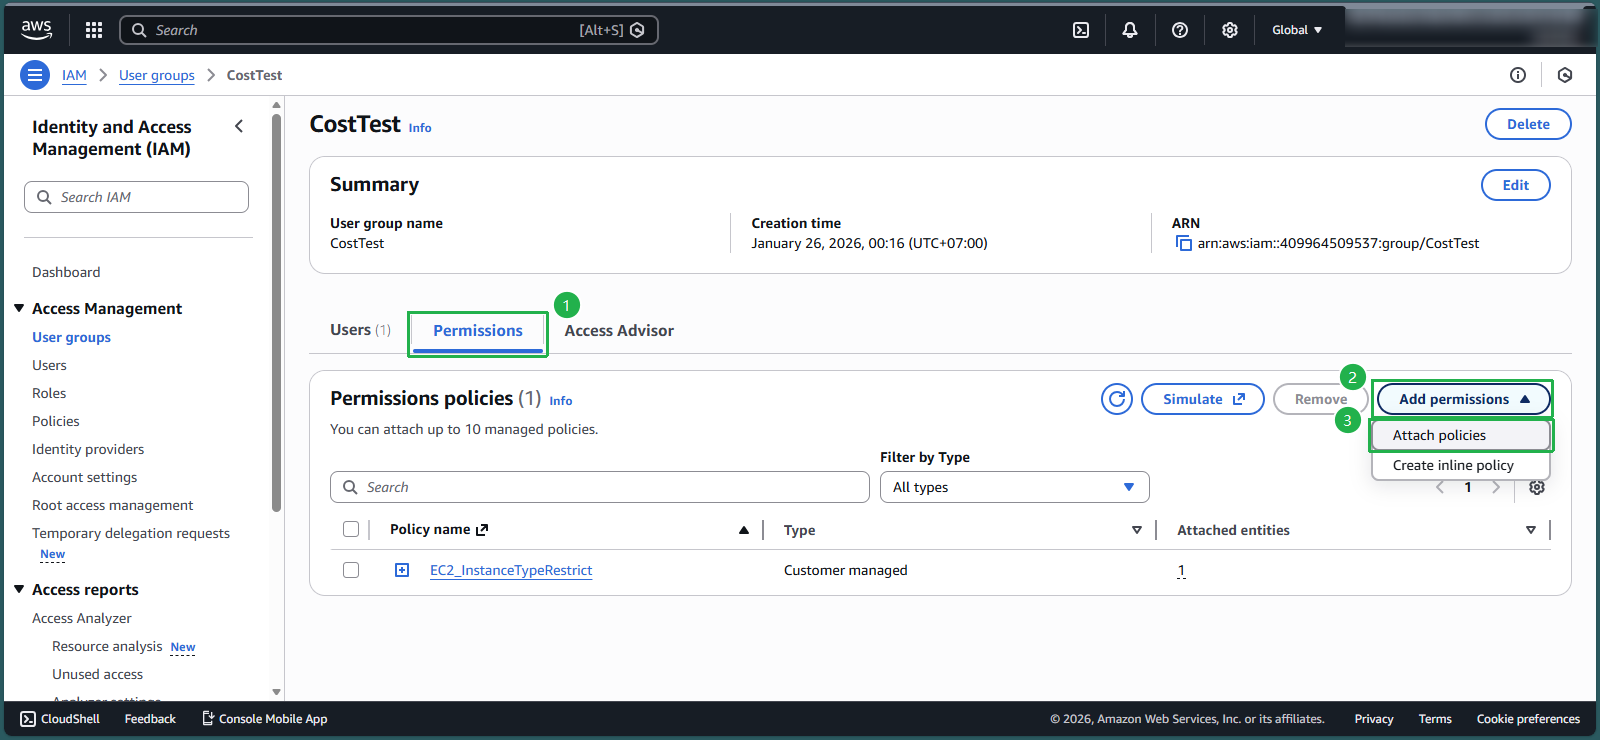
- Select Permissions
- Select Add permissions, select Attach policies
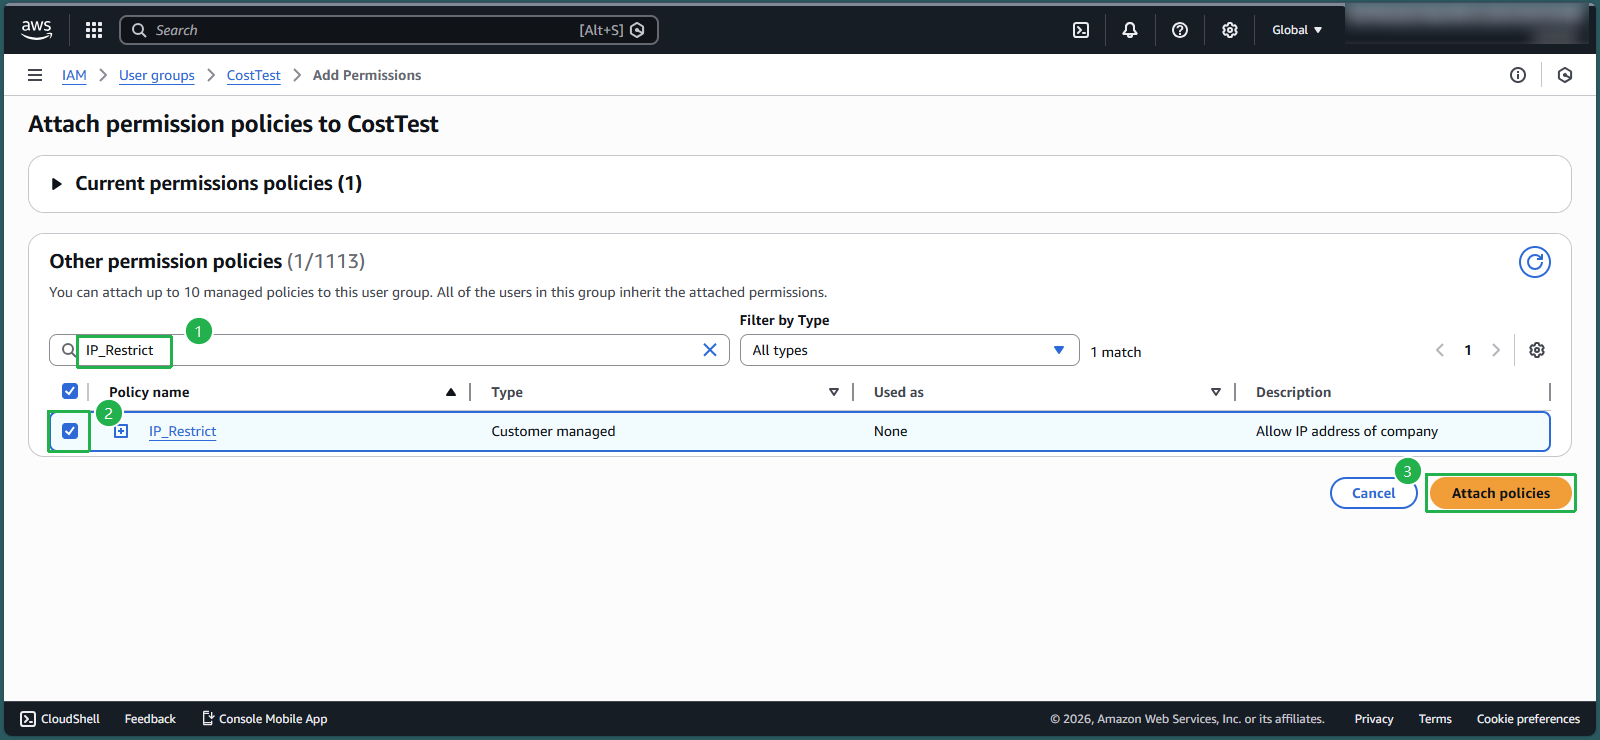
- In the search box 🔍, enter
IP_Restrict. - Check the box symbol □ to select a policy, select Attach policies
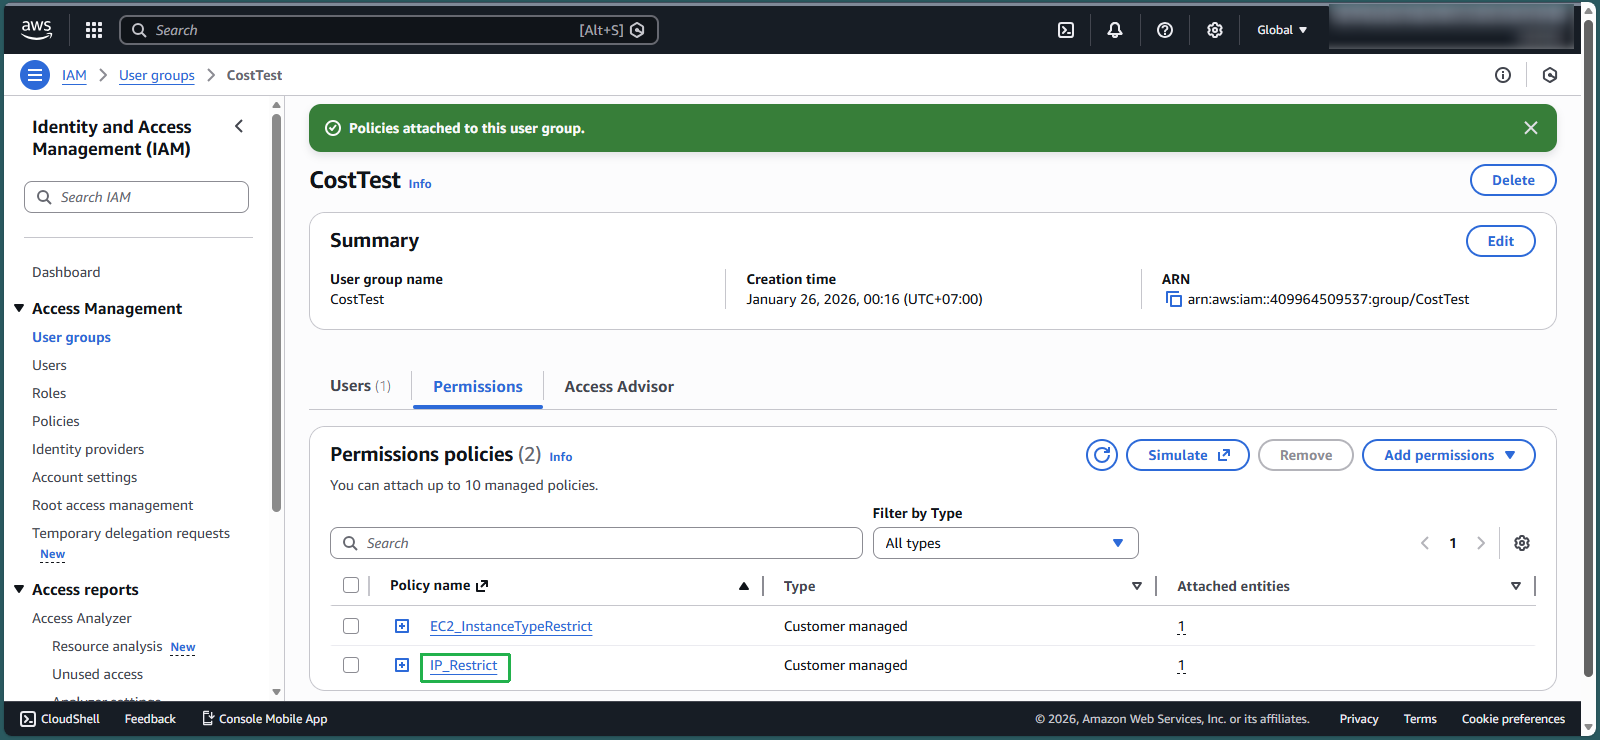
- Check Permissions policies
- Now in the CostTest group there is policy IP_Restrict and policy EC2_InstanceTypeRestrict that you created in lab 8.3
Check Permissions policies
- Log in to TestUser with the information you created in lab 8.1, step 4
- Make sure you are in Region Singapore
- In the search box 🔍, enter
EC2 - At the EC2 interface, in the middle of the page, select Launch instance
- In the Name section, enter
EC2_IP
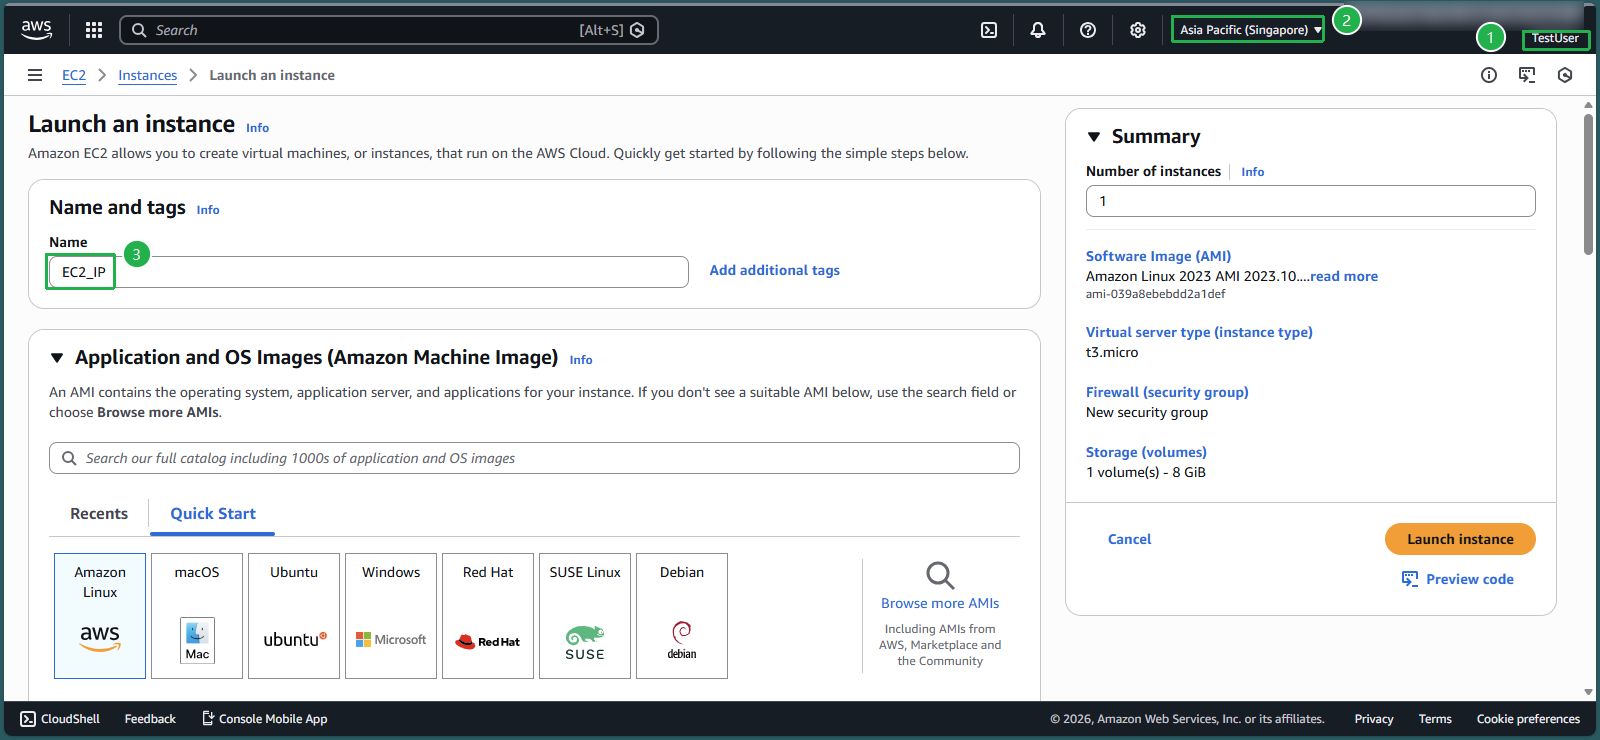
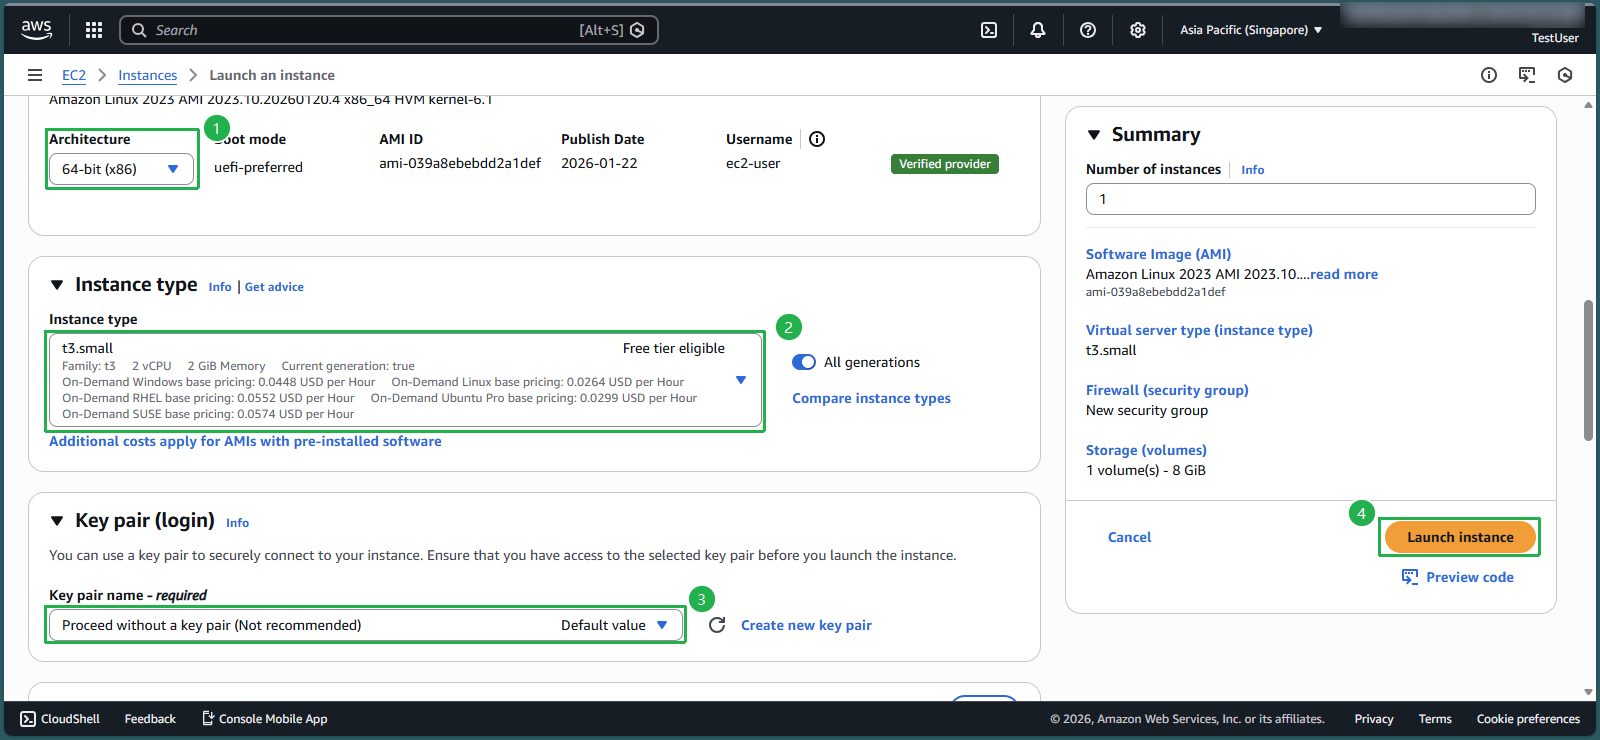
- In the Architecture section, keep the value 64-bit (x86)
- In the Instance type section, select the triangle symbol, enter
t3.small - In the key pair name section, select the triangle symbol, select Proceed without a key pair (Not recommended)
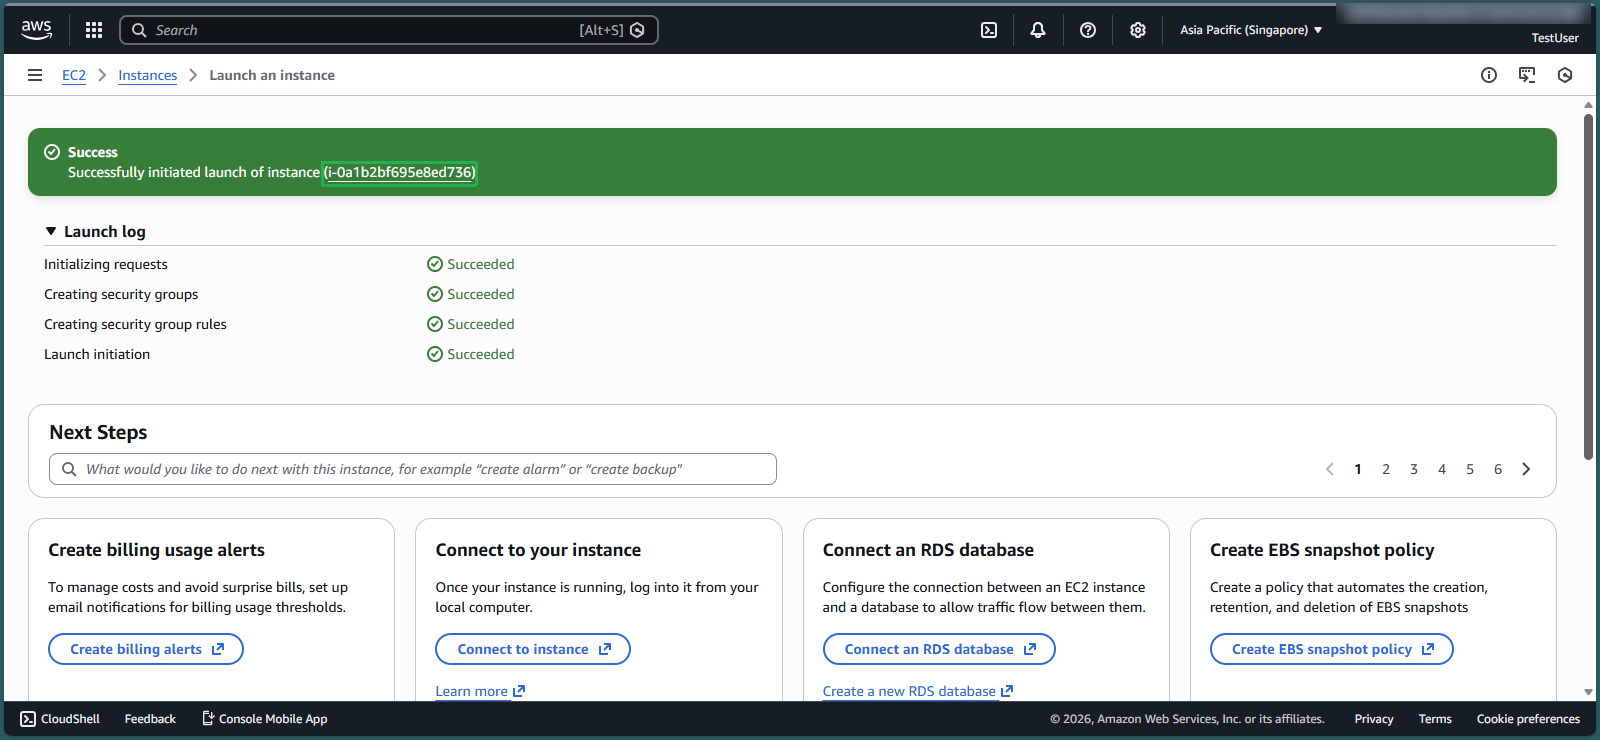
- Select launch instance
- Select Instance ID that has just been successfully created
- Check the box symbol to select EC2 instance
- Select Instance state
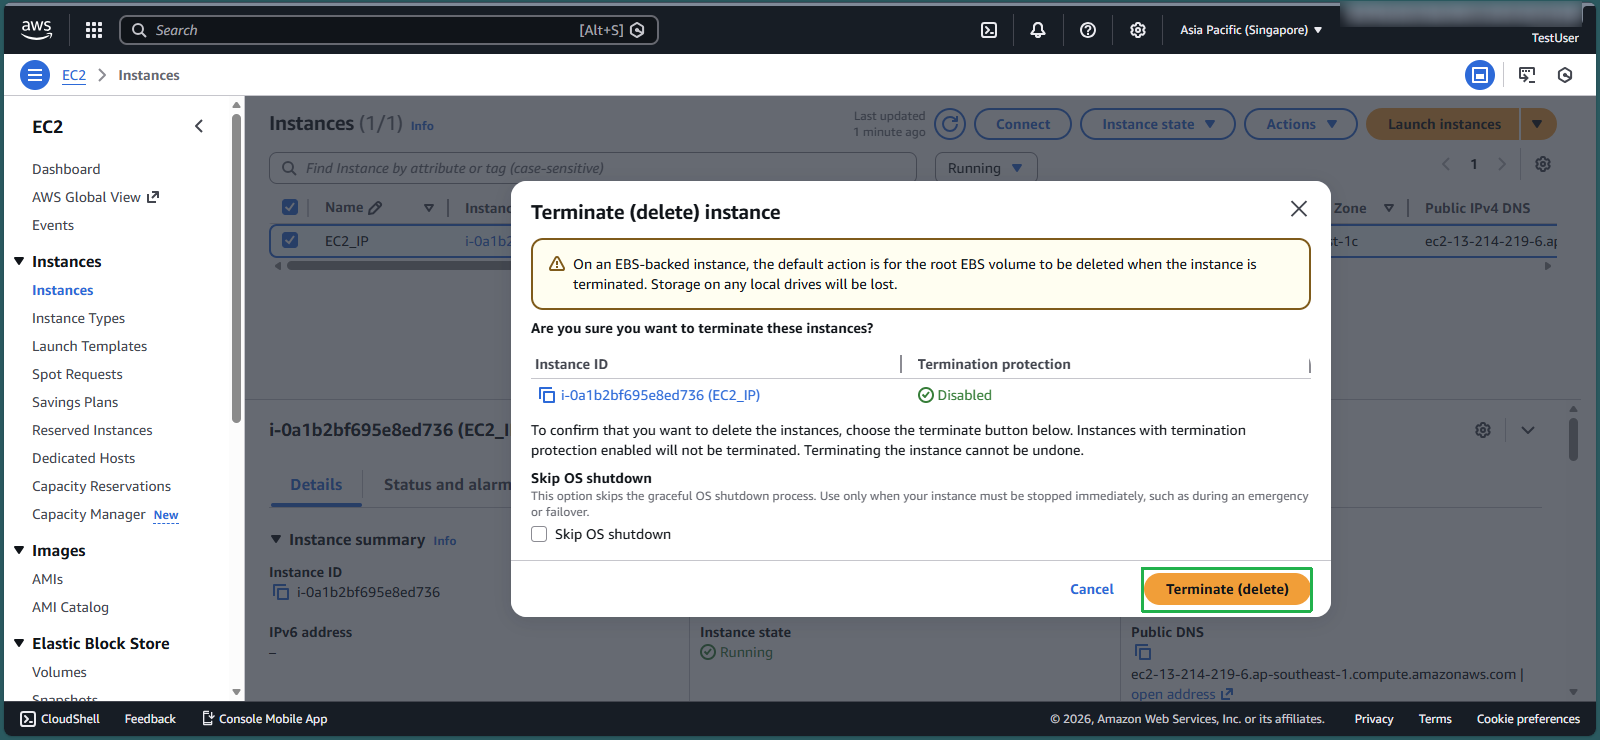
- Select Terminate instance
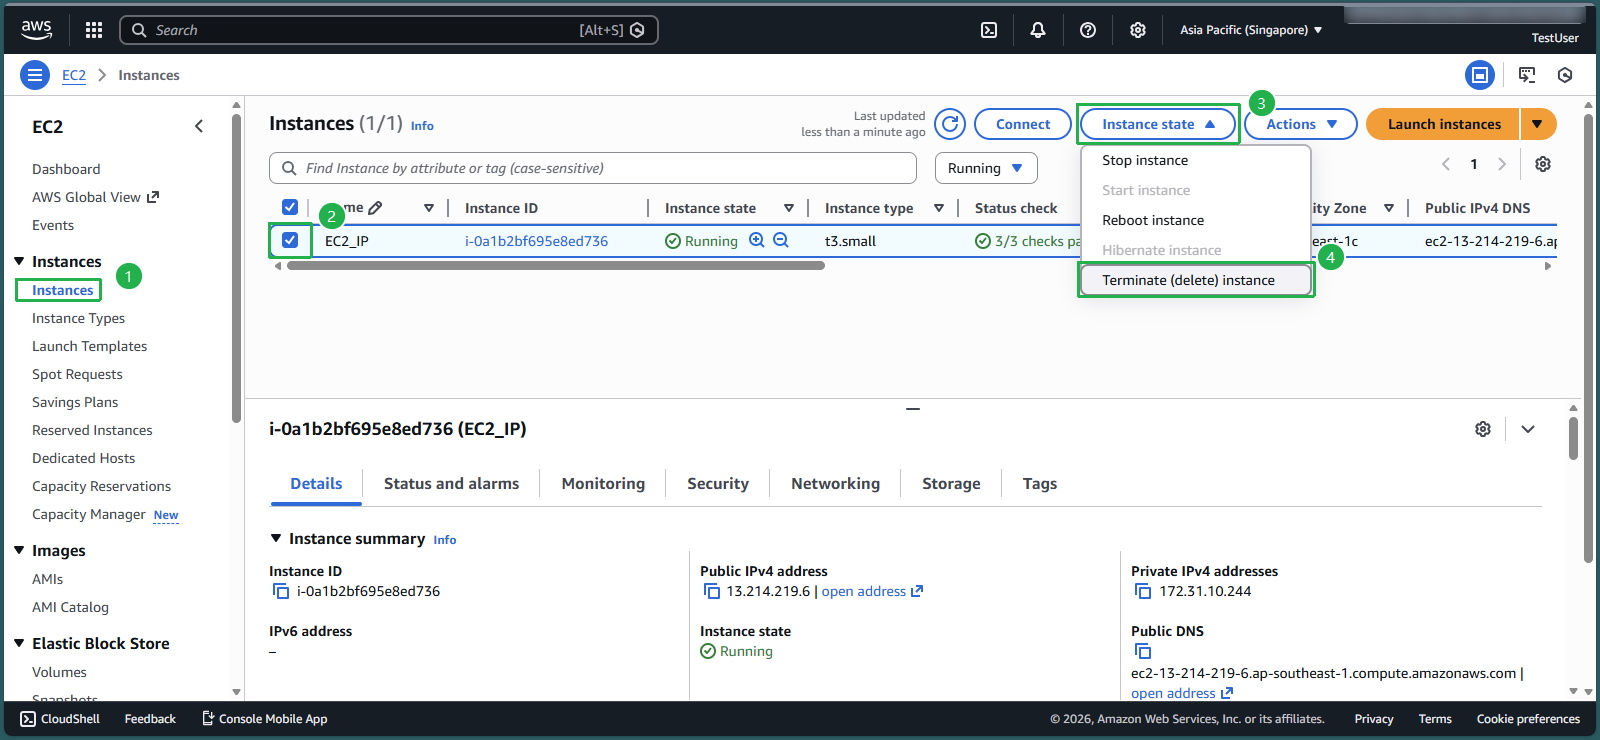
- Select Terminate
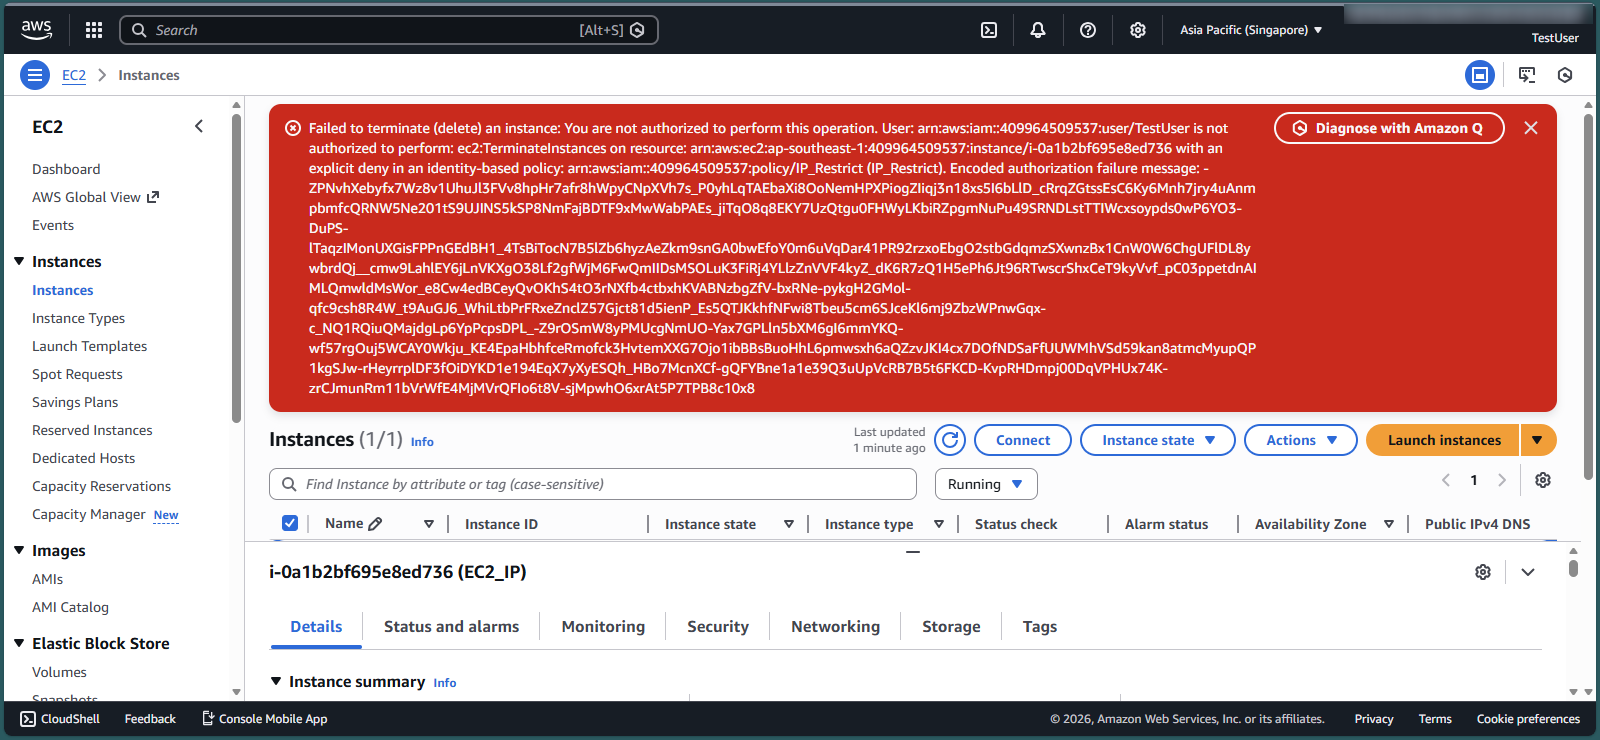
- The system reports an error as shown in the picture because you are not authorized to delete EC2. This demonstrates the success of your policy creation in step 2 - with an IP address different from the company’s IP address.
Check Permissions policies with correct IP address
- In the IAm interface, select Policies
- In the search box, enter IP_Restrict
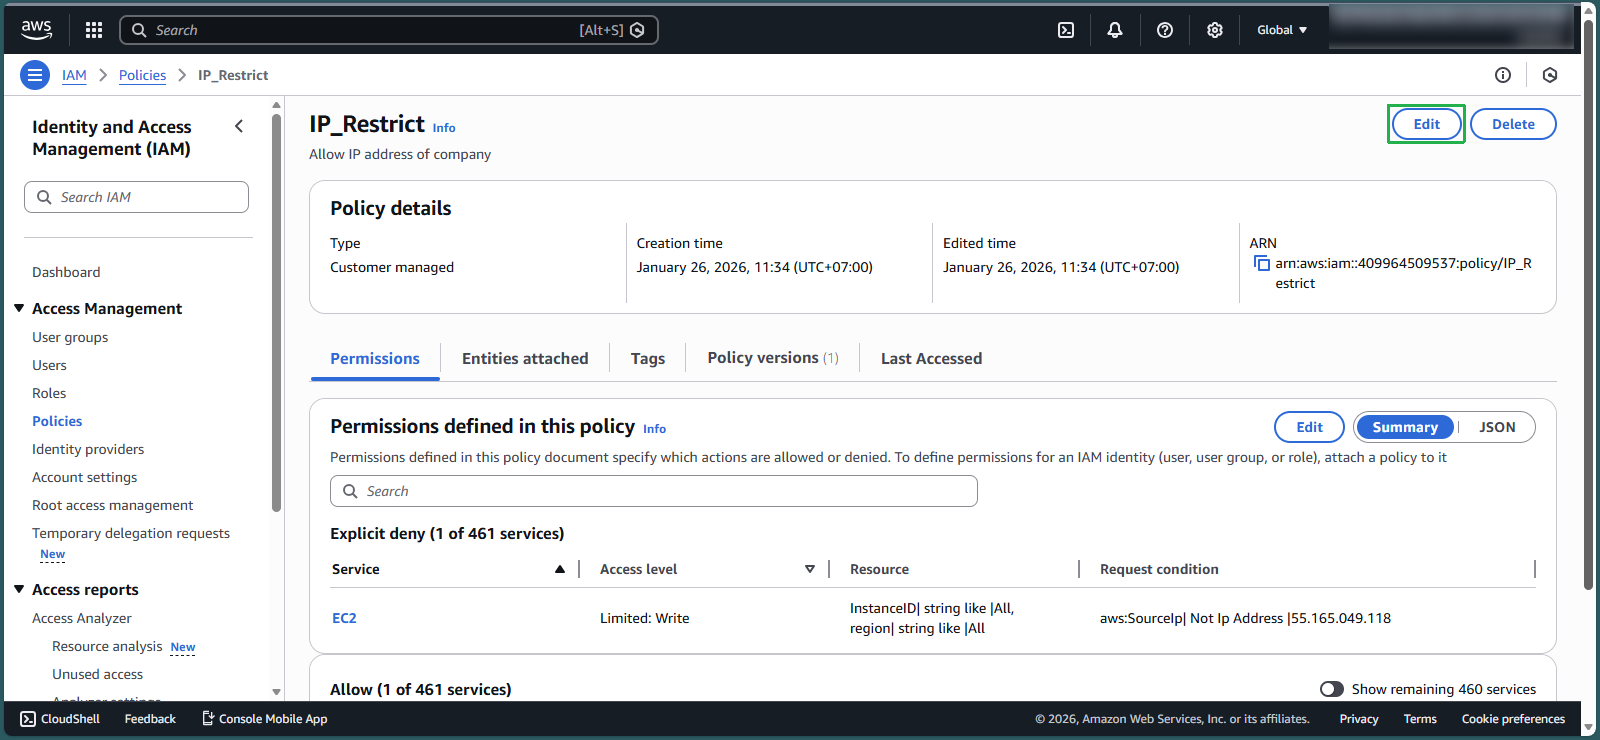
- Select IP_Restrict

- Select Edit
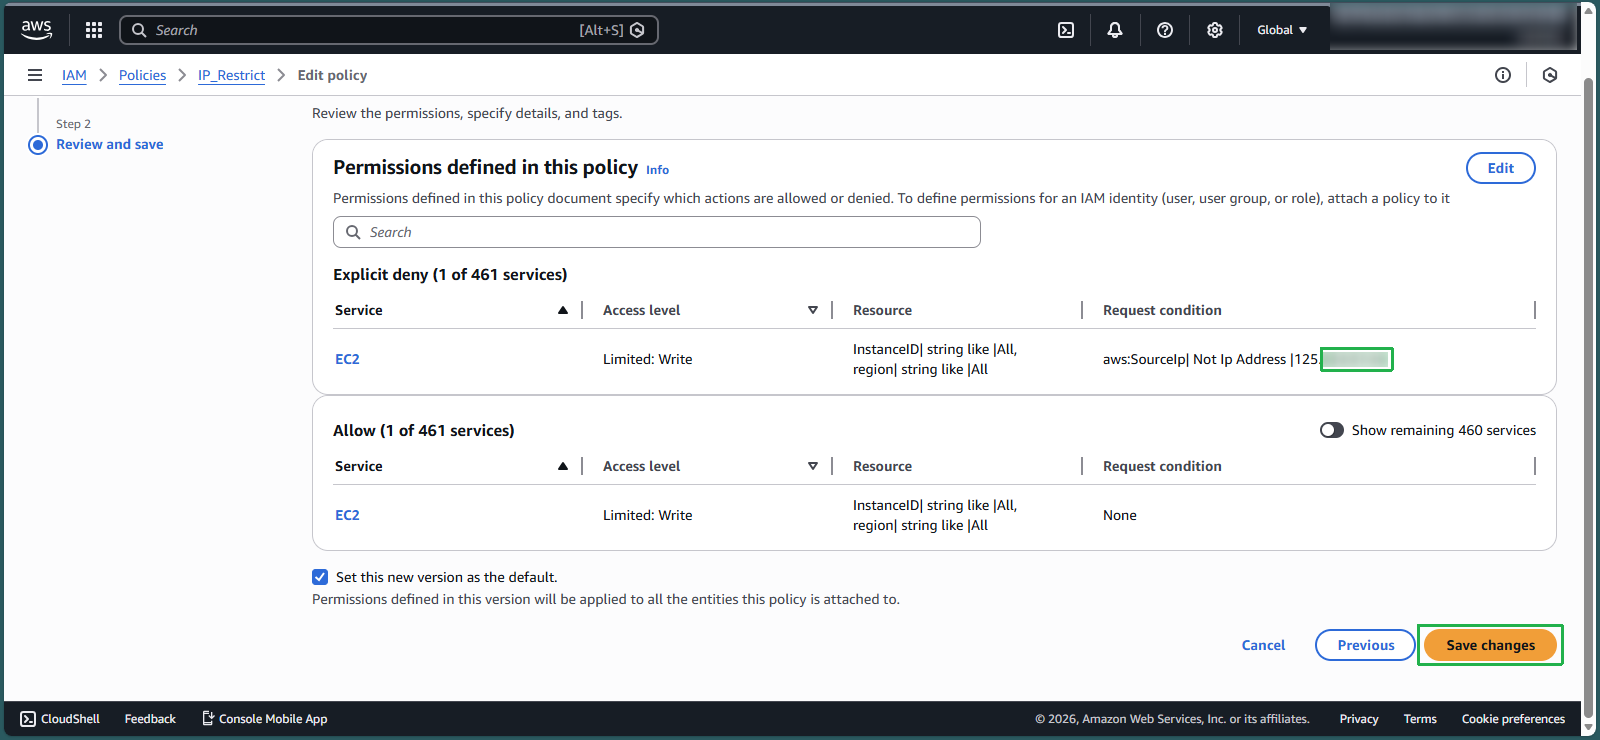
- In line aws:SourceIp, change the IP range: 55.165.049.118 with the IP address you took in step 1: 125.xxx.xxx.xxx
- Select Next
- Select Save changes
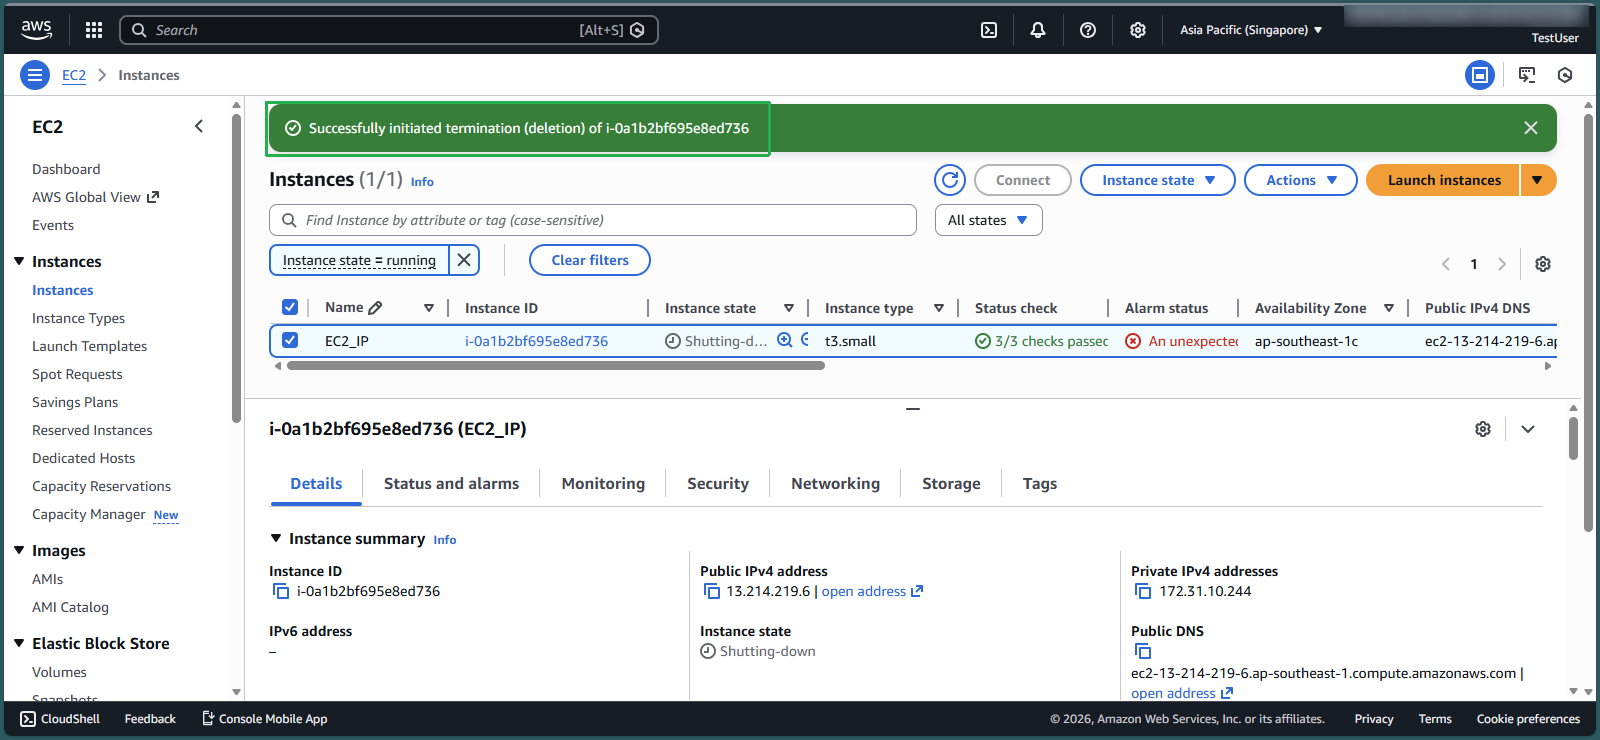
Return to the EC2 interface
Check the box symbol to select the EC2 instance you created in step 4
Select Instance state
Select Terminate instance
Congratulations, you have successfully deleted EC2 when accessing your AWS account from the company’s IP address.