Controlling EC2 Deployment by Instance Type
Implementing EC2 Instance Type Restrictions for Cost Governance
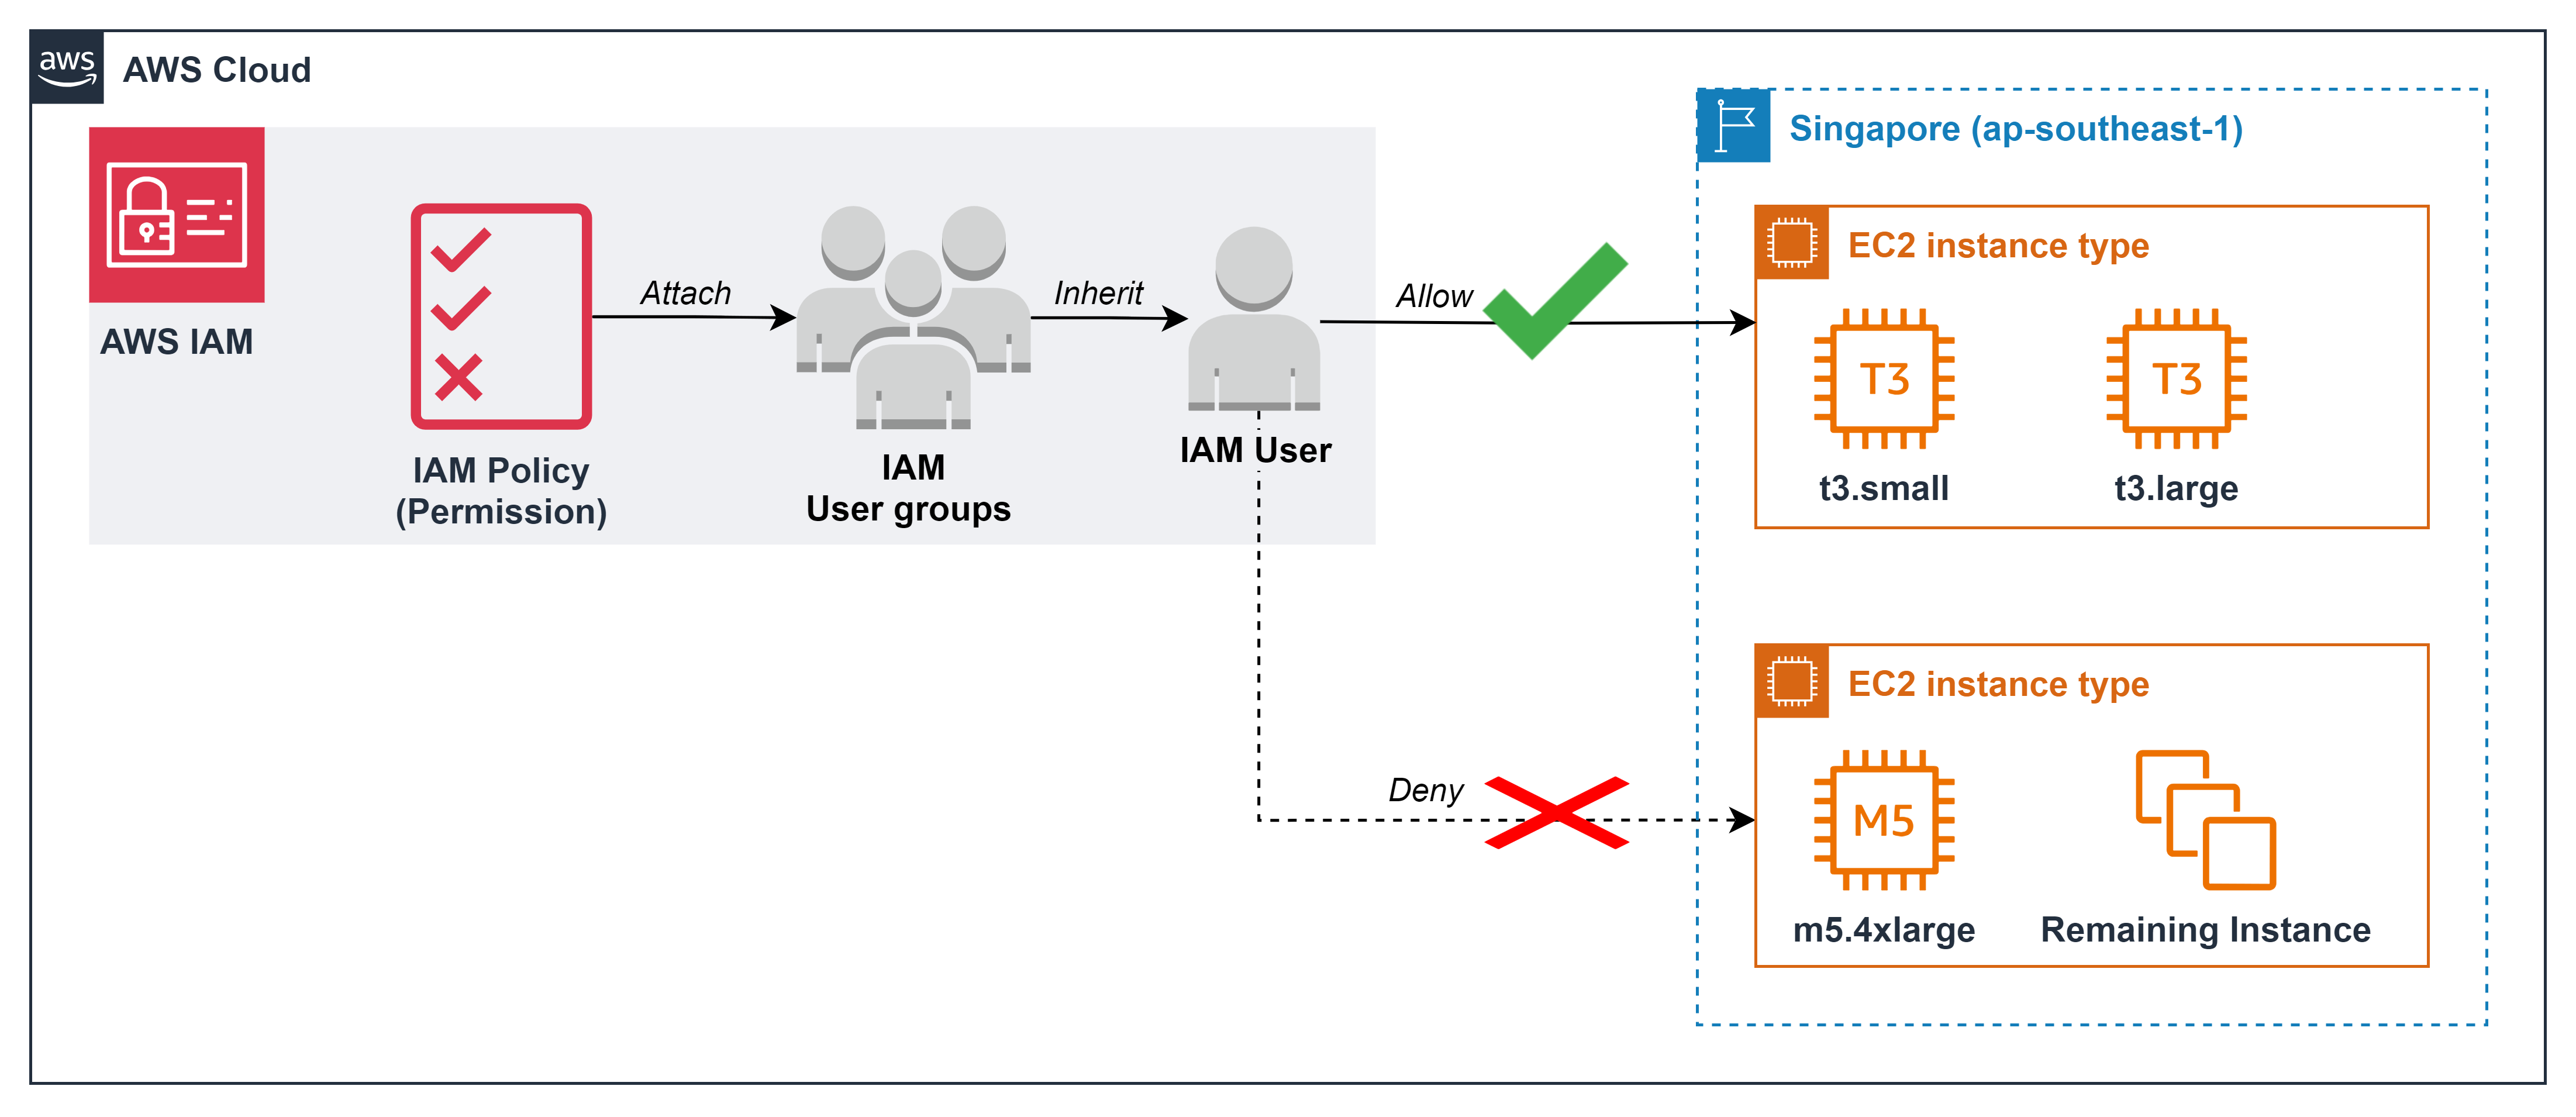
ℹ️ Information: After monitoring EC2 usage patterns in development environments, you can implement fine-grained controls that limit which specific instance types users can deploy, further enhancing your cost optimization strategy while maintaining appropriate performance levels.
Business Context
After analyzing EC2 usage in your development environment, you’ve determined that:
- Your development team primarily uses T3 instances (specifically t3.small and t3.large)
- The technical leadership wants to implement least-privilege permissions to prevent accidental over-provisioning
- Preventing the creation of unnecessarily powerful instances (like m5.4xlarge with 16 vCPU and 64 GiB RAM) will avoid resource waste and control costs
Implementation Steps
Create an IAM Policy for Instance Type Restrictions
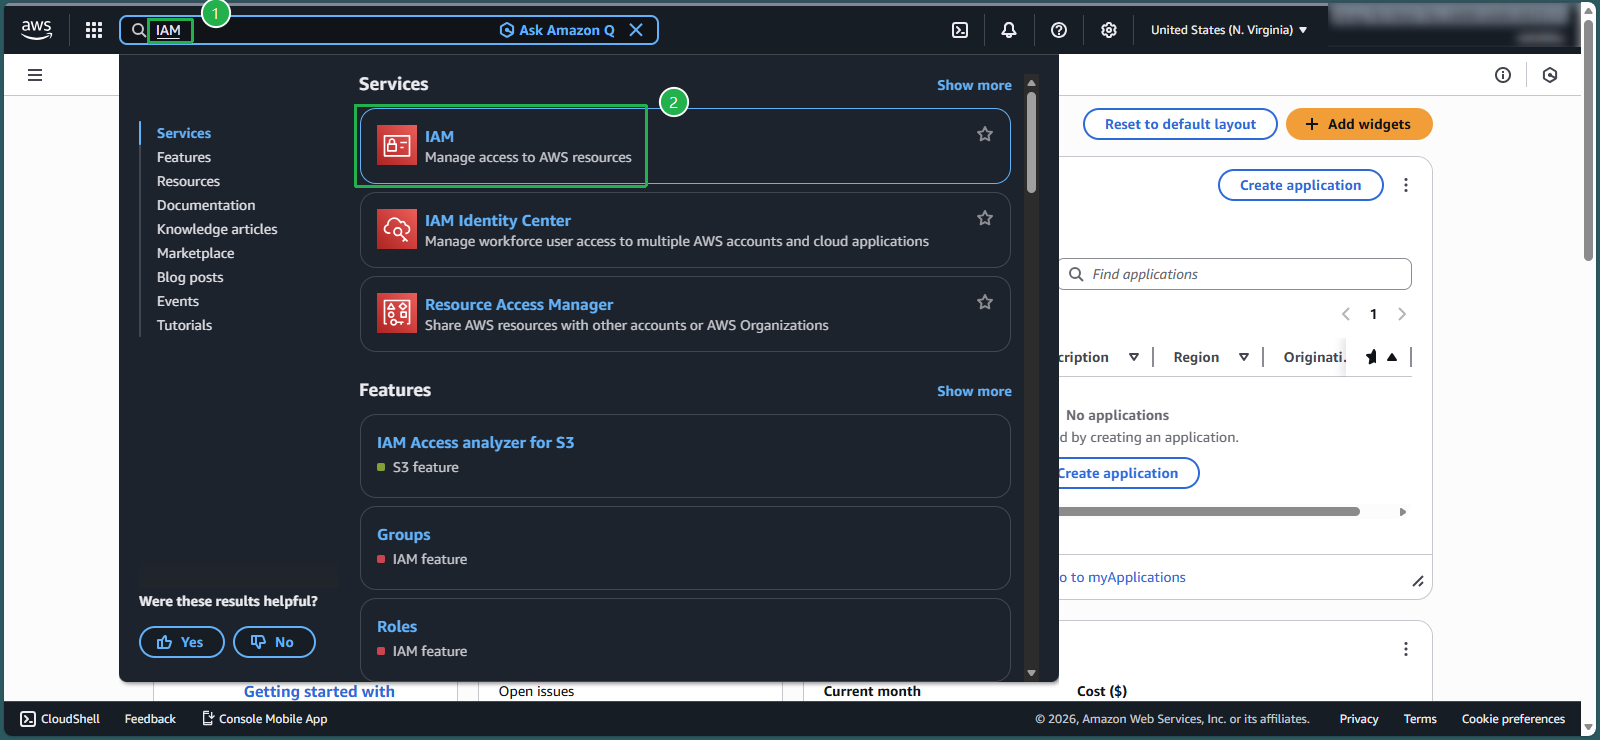
- Navigate to the IAM console by entering
IAMin the AWS Management Console search box - Select IAM service
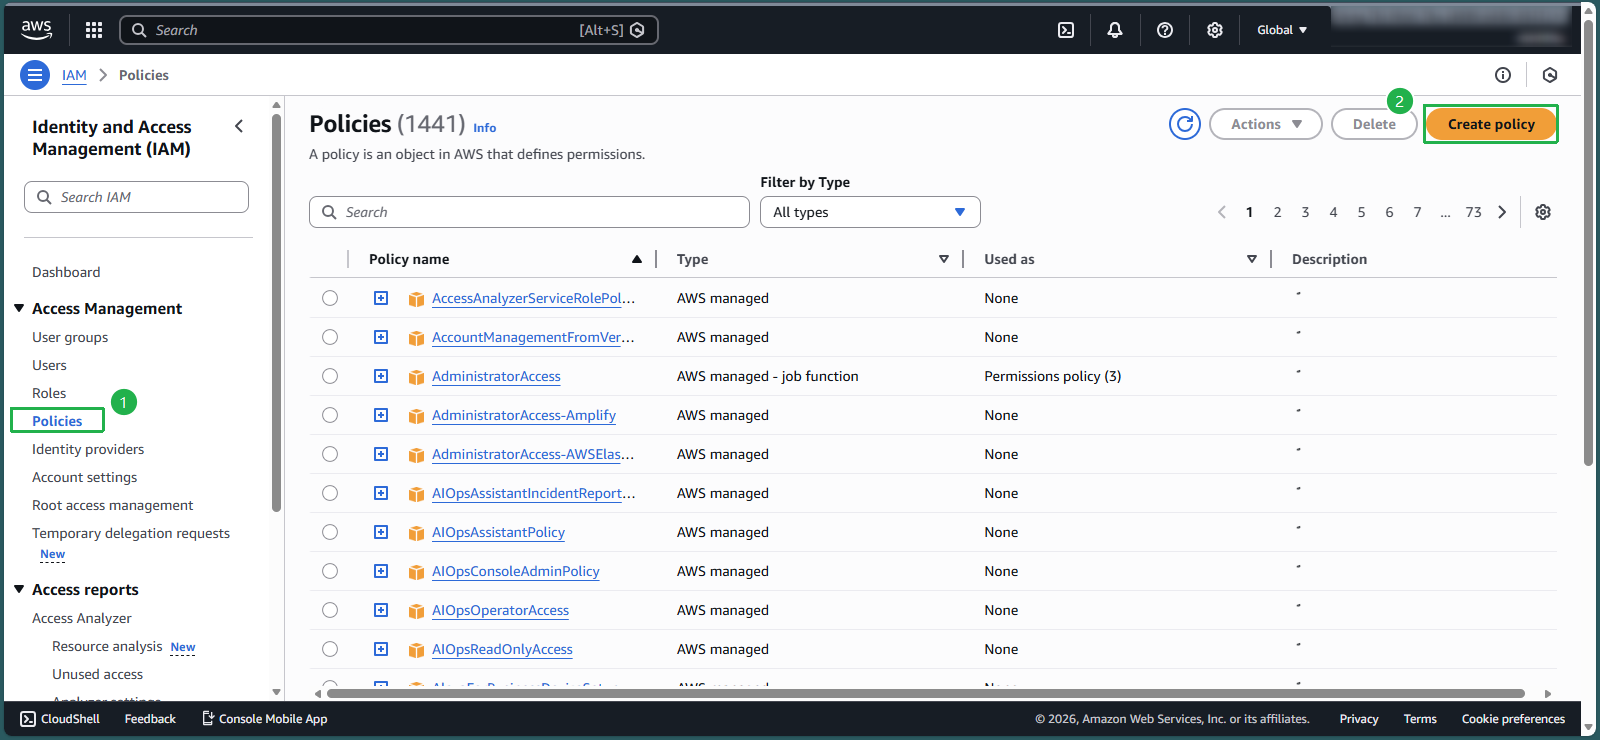
- In the navigation pane, select Policies
- Click Create policy
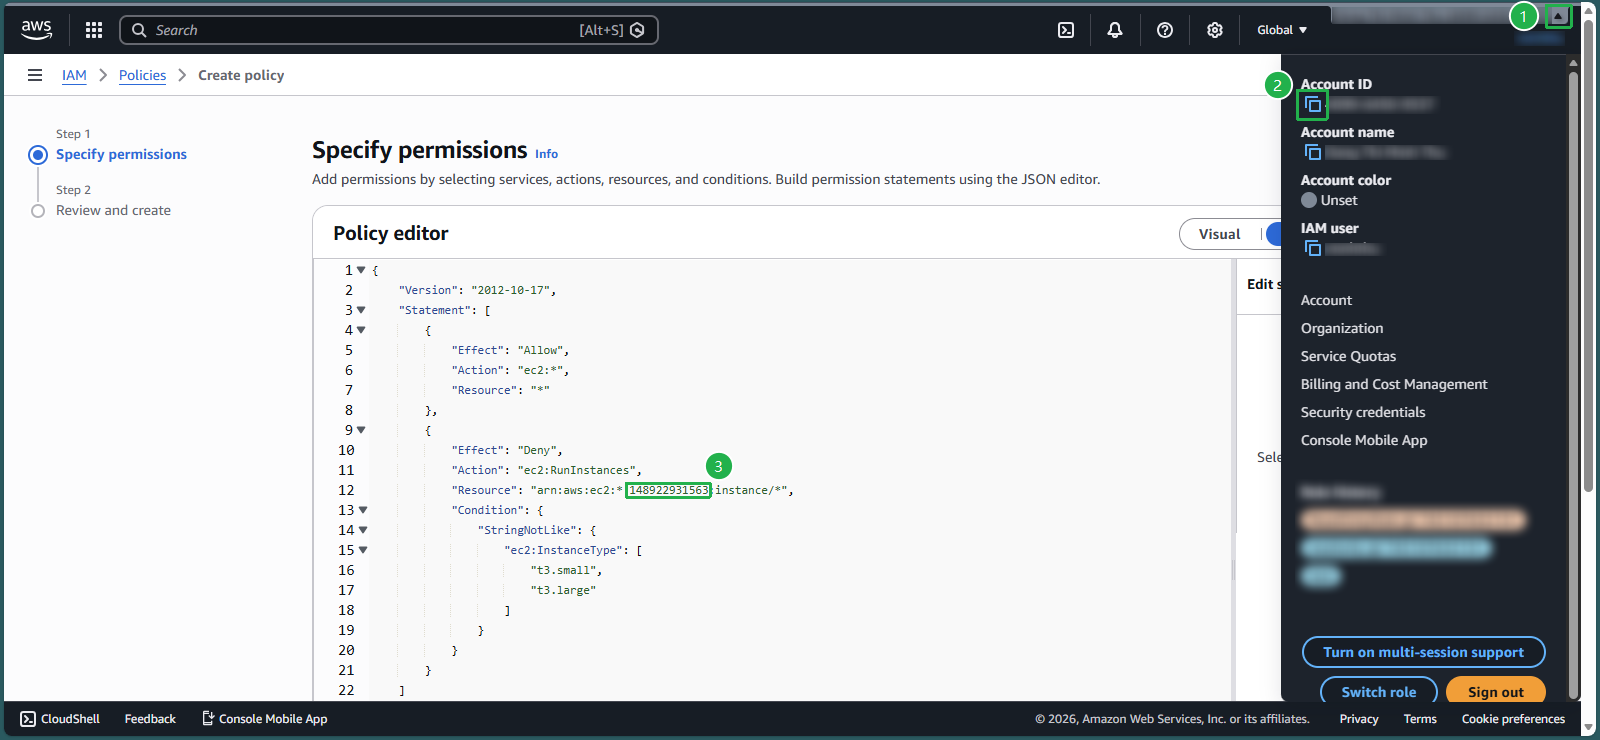
- Switch to the JSON editor tab instead of using the visual editor
- Delete any existing template code in the editor
- Copy and paste the following policy document:
{ "Version": "2012-10-17", "Statement": [ { "Effect": "Allow", "Action": "ec2:*", "Resource": "*" }, { "Effect": "Deny", "Action": "ec2:RunInstances", "Resource": "arn:aws:ec2:*:148922931563:instance/*", "Condition": { "StringNotLike": { "ec2:InstanceType": [ "t3.small", "t3.large" ] } } } ] }- Navigate to the IAM console by entering
🔒 Security Note: In the Resource line, replace the 12-digit sequence with your AWS account ID. Click the triangle symbol, then the square symbol to copy your AWS account ID.
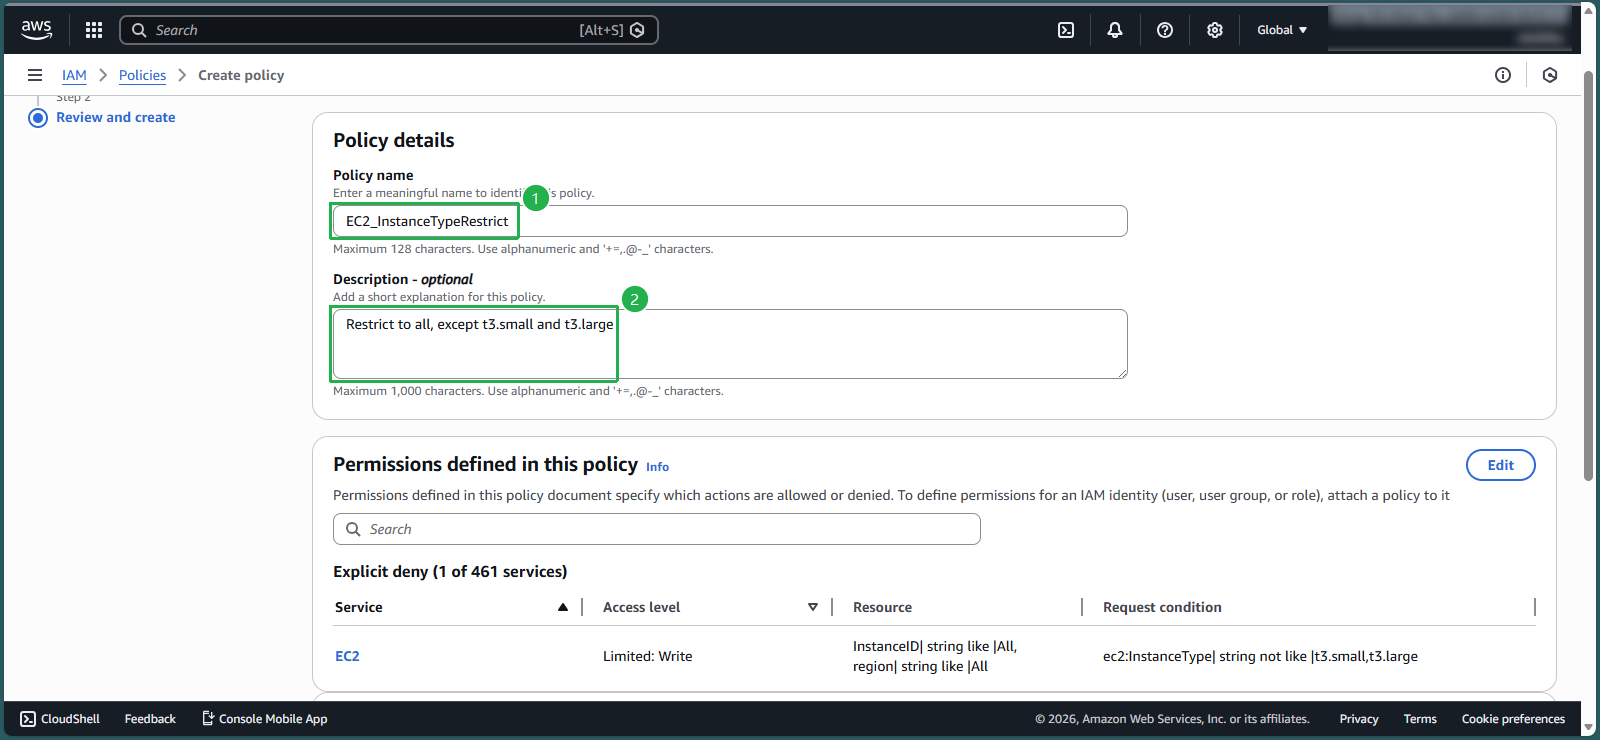
- Enter the following details and click Create policy:
- Policy name:
EC2_InstanceTypeRestrict - Description:
Restrict to all, except t3.small & t3.large
- Policy name:
- Apply the Policy to Your User Group
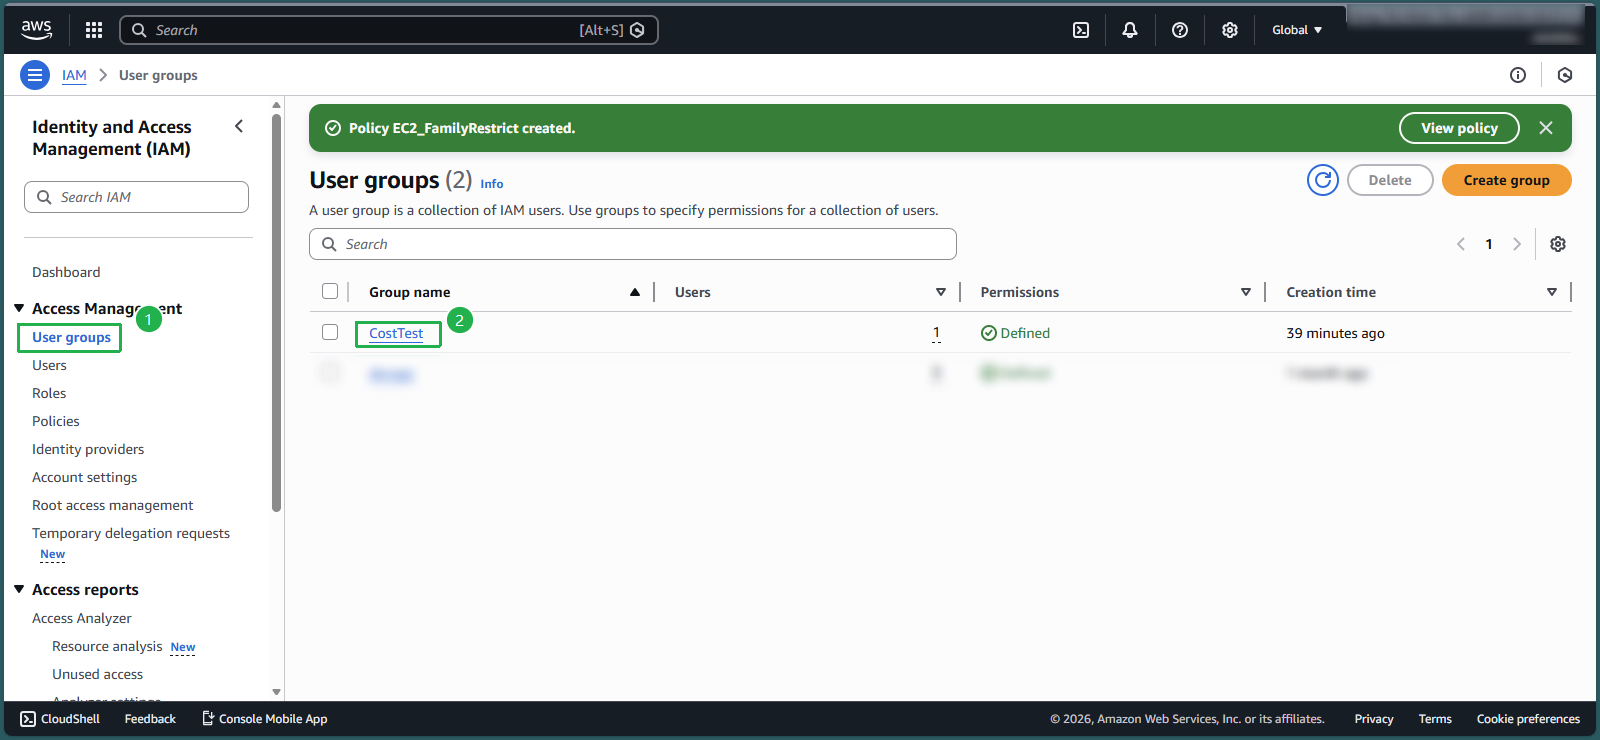
- In the IAM console, select User groups from the navigation pane
- Select the CostTest group
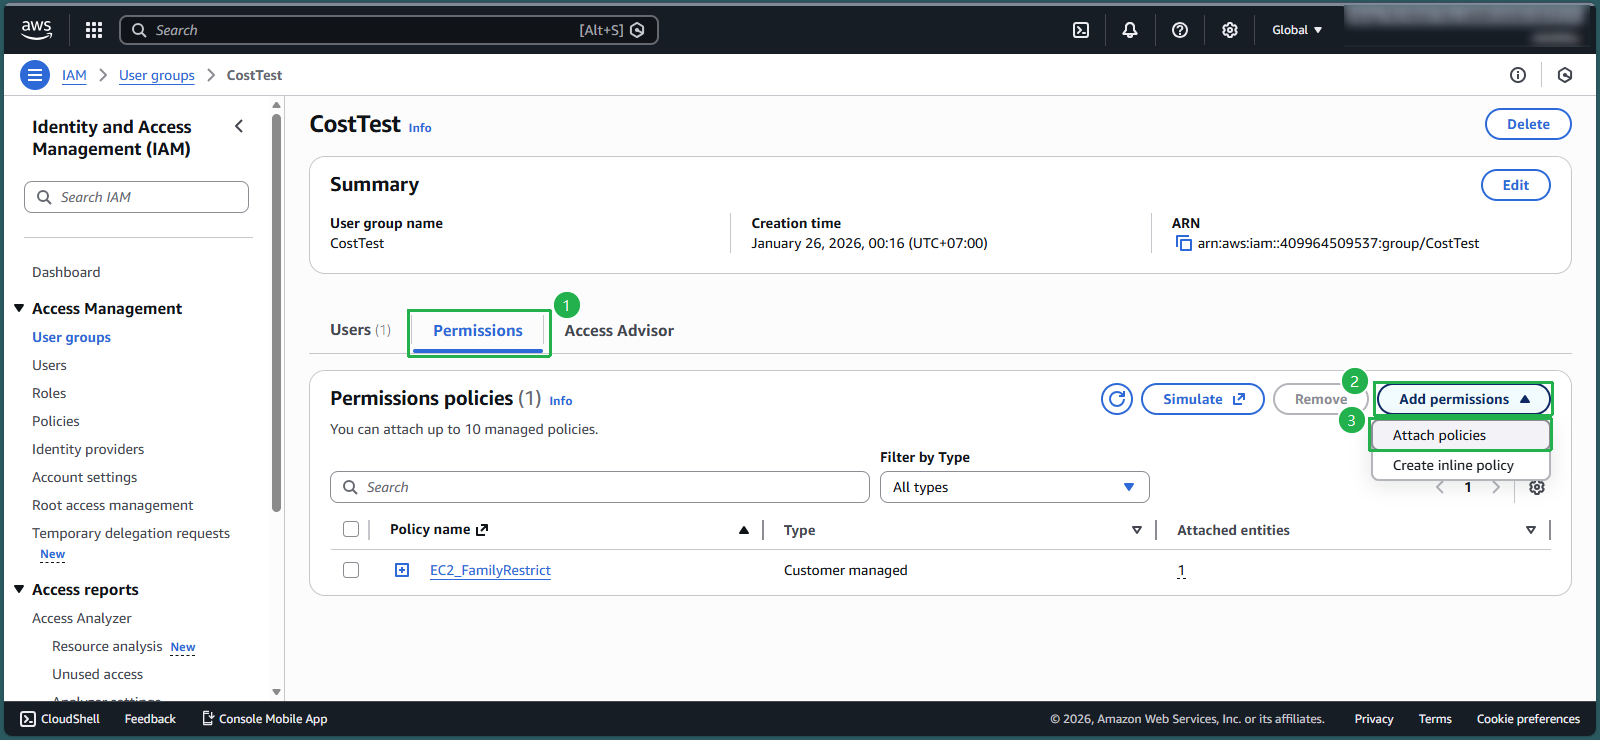
- Select the Permissions tab
- Click Add permissions, then select Attach policies
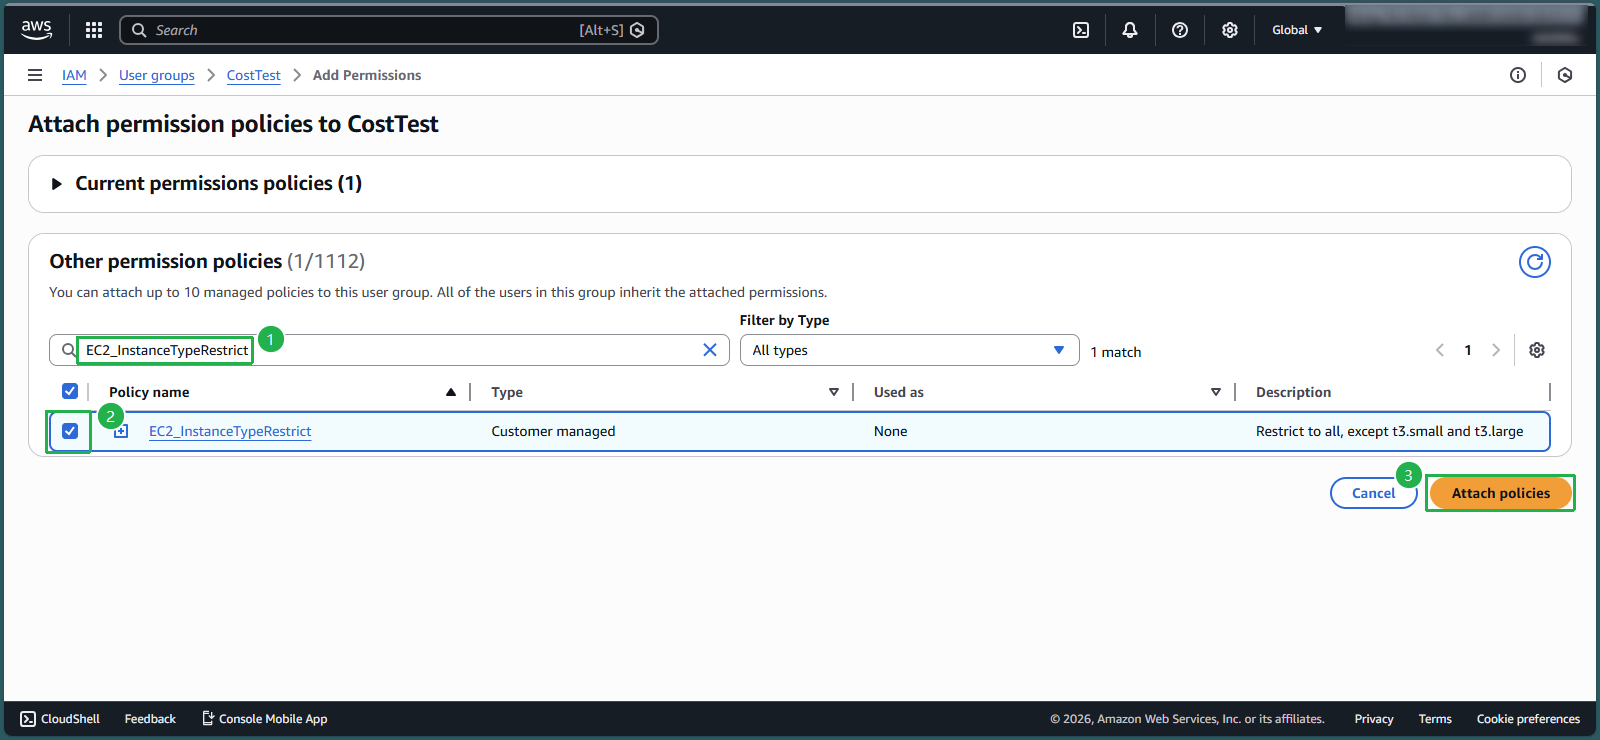
- Search for
EC2_InstanceTypeRestrictin the search box - Select the checkbox next to the policy and click Attach policies
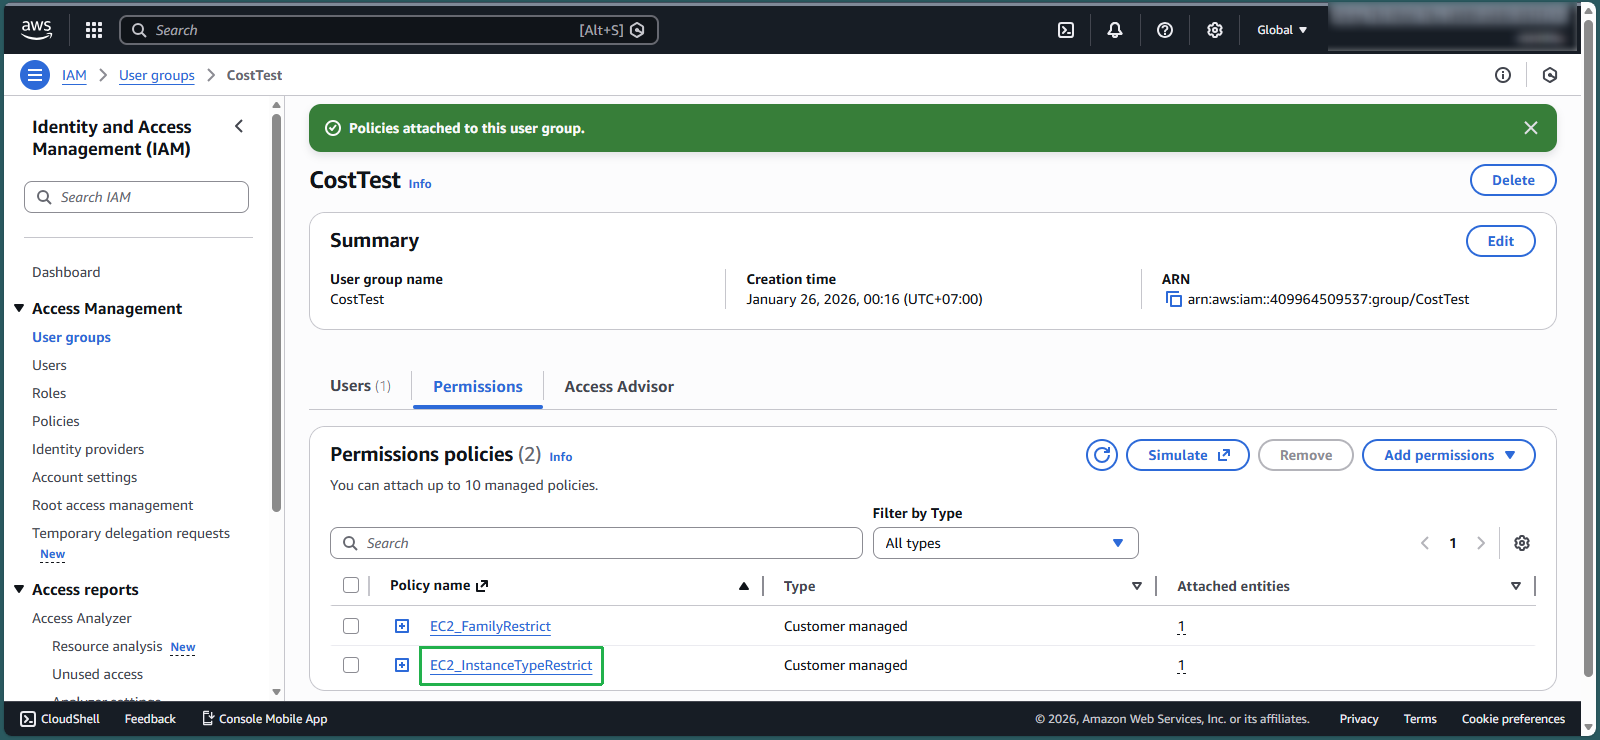
- Review the attached policies
- The group now has both EC2_InstanceTypeRestrict and EC2_FamilyRestrict policies
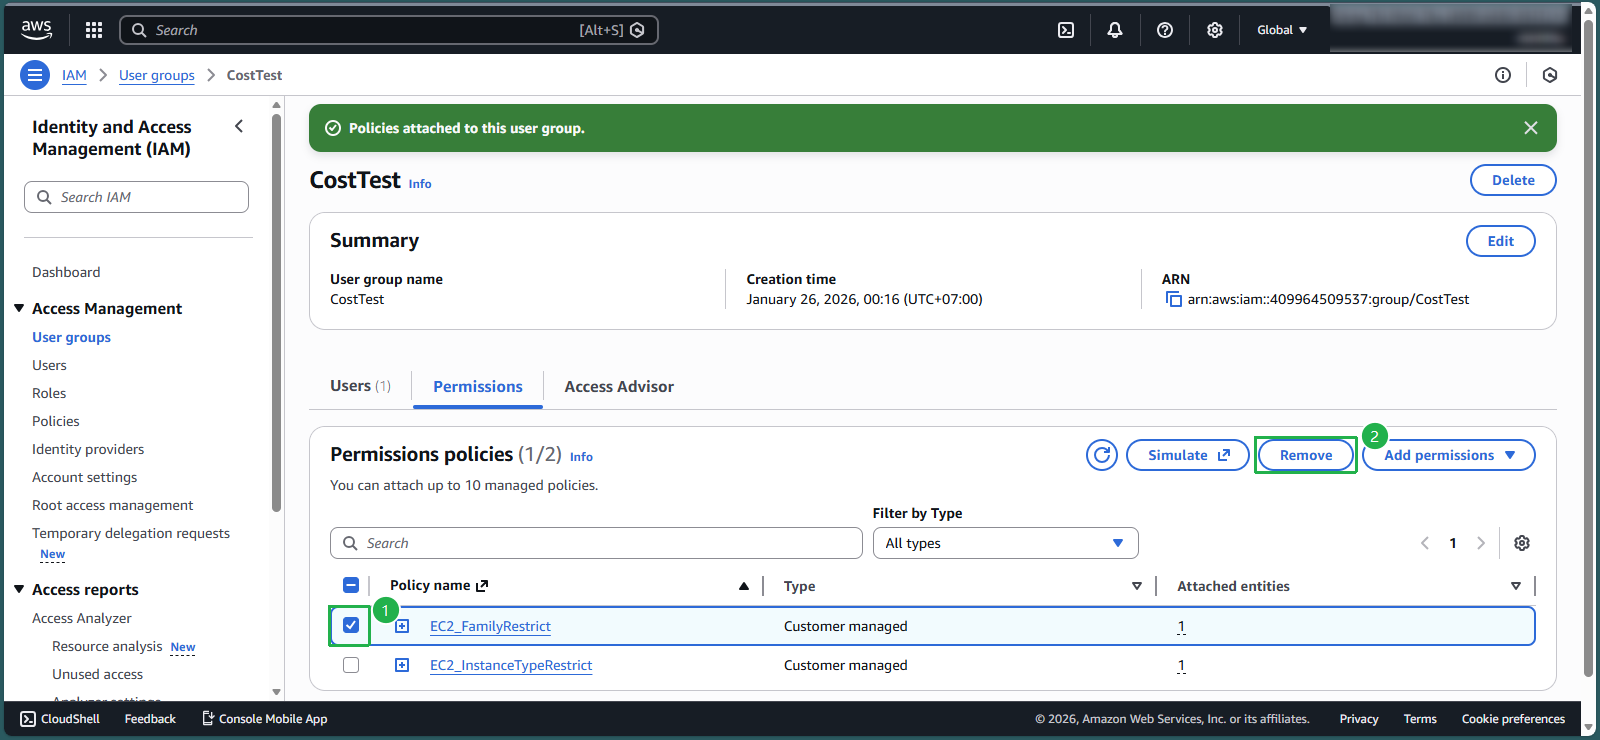
💡 Pro Tip: To follow least-privilege best practices, remove the broader EC2_FamilyRestrict policy since the new instance type policy provides more precise control.
- Select the checkbox next to EC2_FamilyRestrict and click Remove
- Verify user permissions:
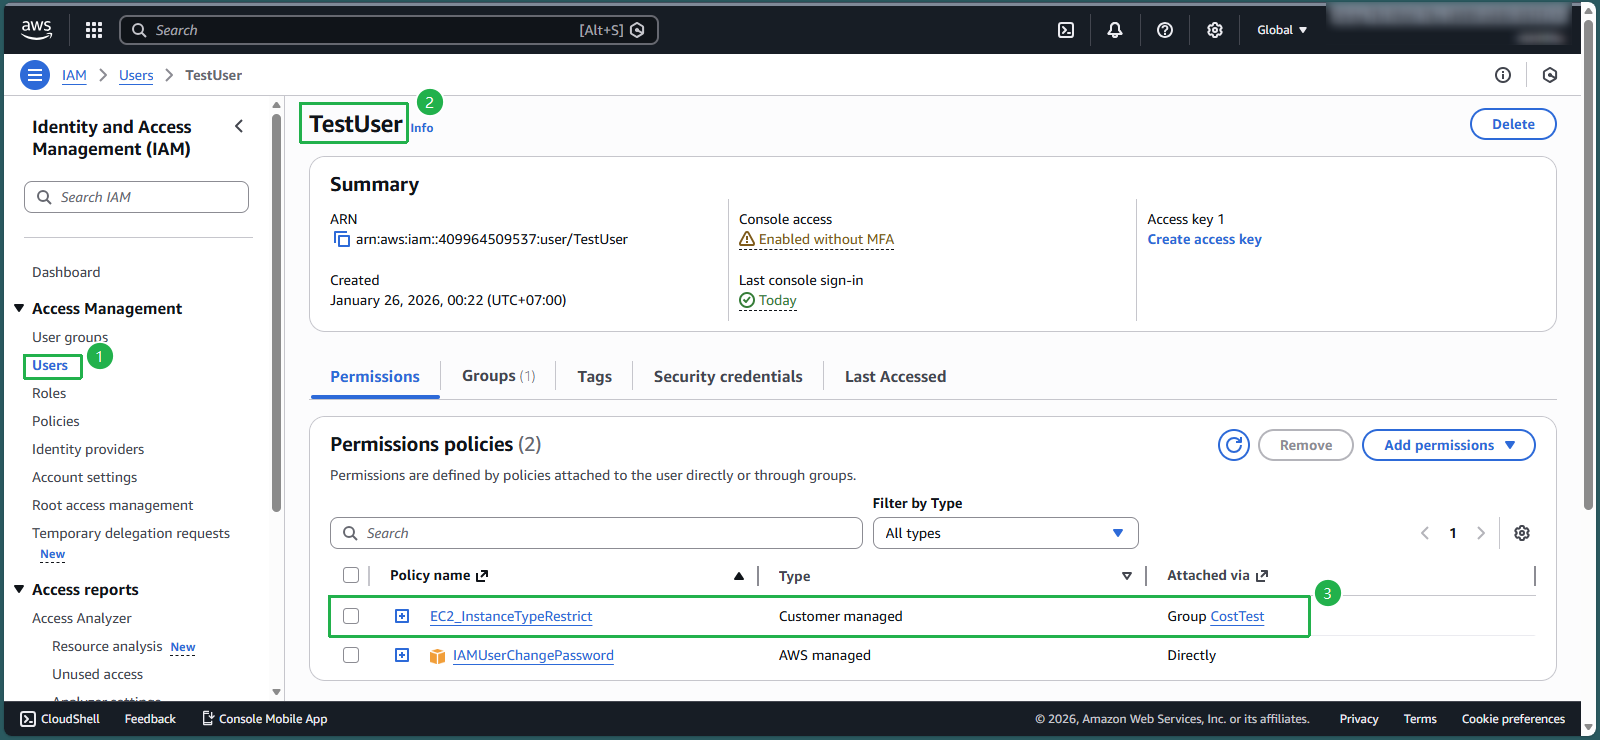
- Navigate to Users and select TestUser
- Confirm that EC2_InstanceTypeRestrict appears in the user’s policies
- Note that it shows as “Attached via Group CostTest” - following AWS best practice of centralized permission management through groups
Test the Allowed Instance Type: t3.small
- Log in as TestUser with the credentials created in lab 8.1
- Ensure you’re in the Singapore region
- Search for and select EC2 in the AWS Management Console
- Click Launch instance from the EC2 dashboard
- Configure the instance:
- Name:
EC2_InstanceTypeRestrict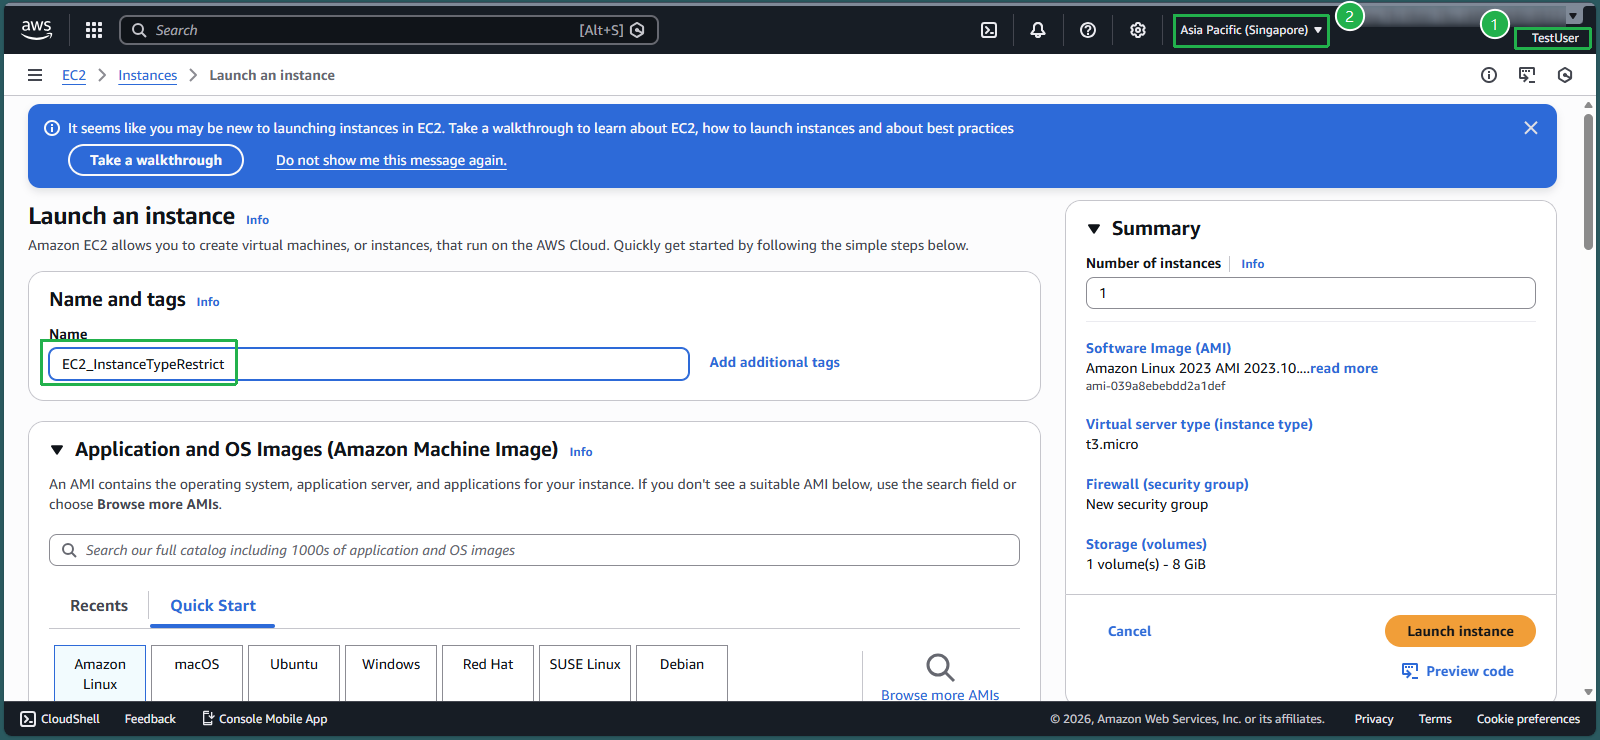
- Architecture: Keep the default 64-bit (x86)
- For Instance type, select t3.small
- For Key pair, select Proceed without a key pair
- Name:
- Click Launch instance

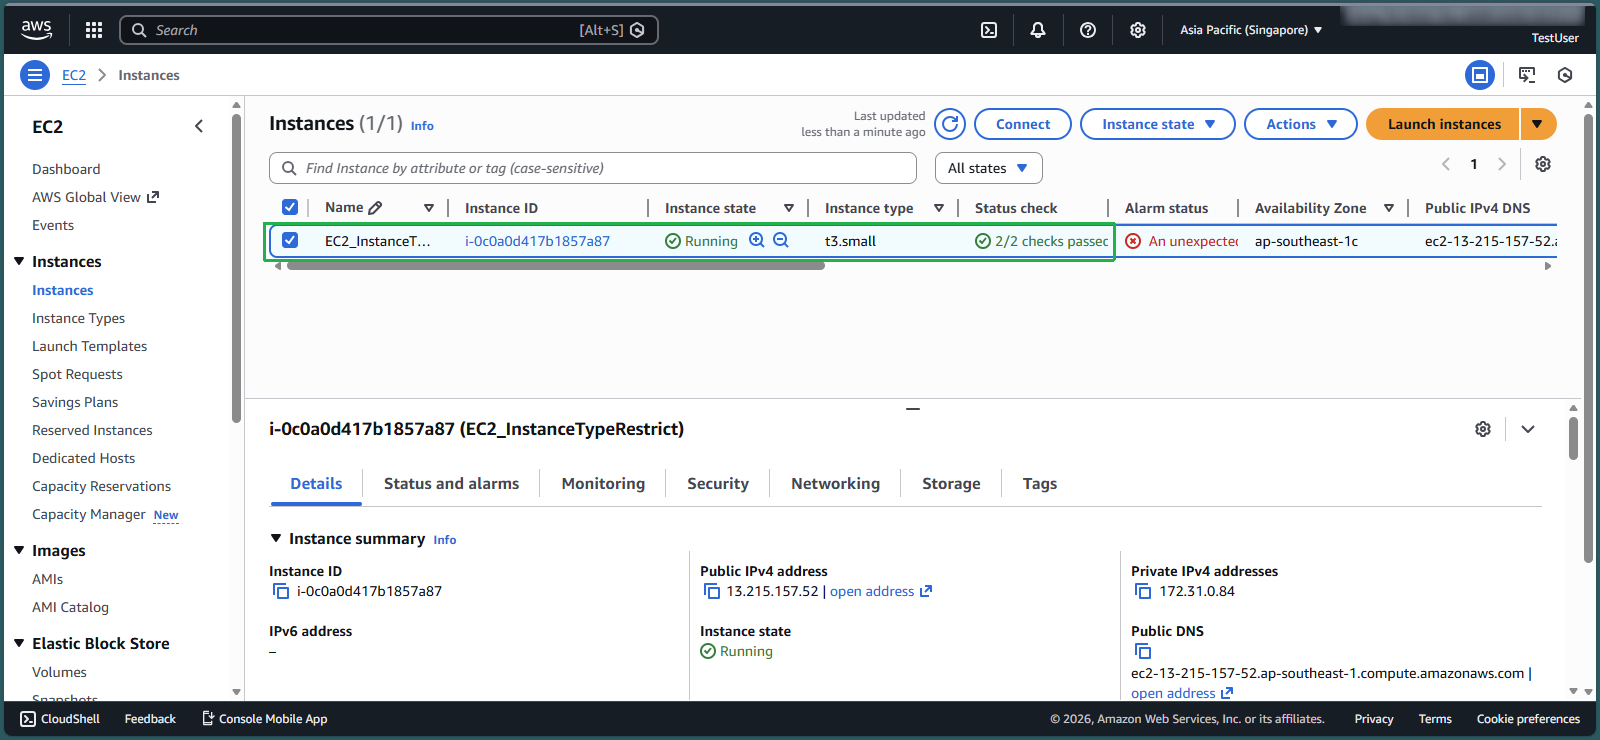
- Click the Instance ID of the newly created instance
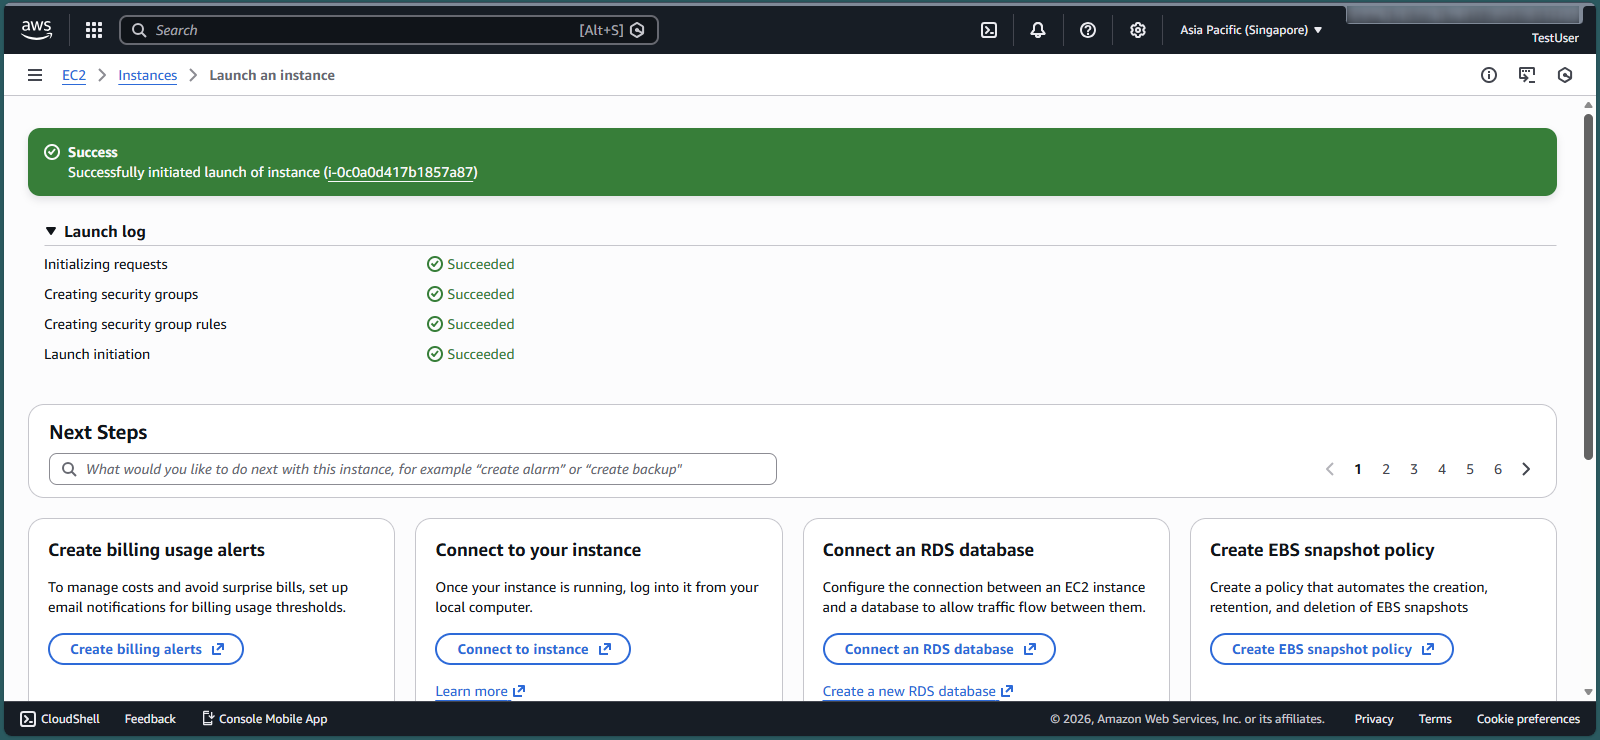
- Verify that the t3.small instance was successfully created
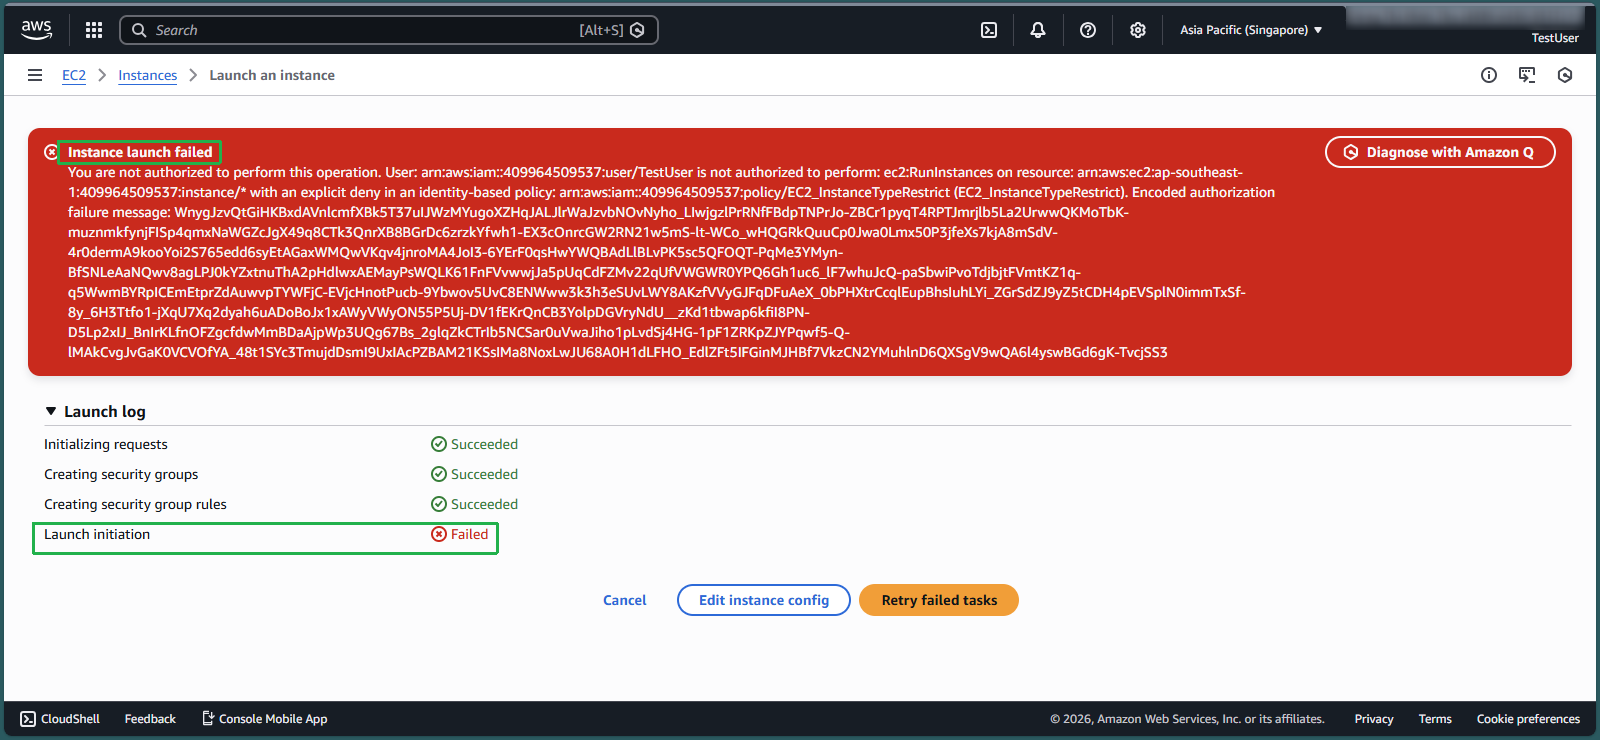
Test a Restricted Instance Type: m5.4xlarge
- Click Launch instance again
- Configure the instance:
- Name:
EC2_m5.4xlarge
- Name:
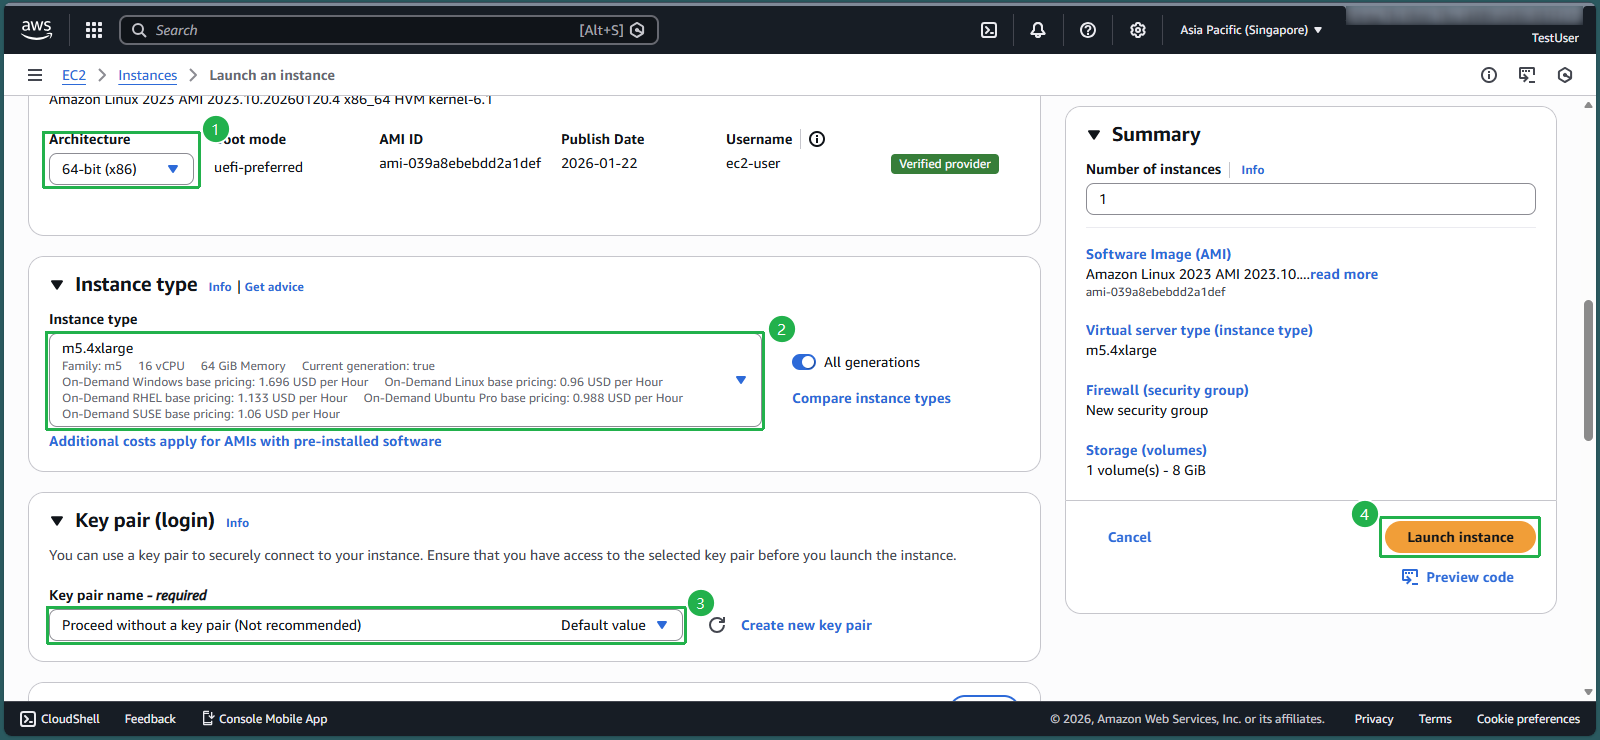
- Keep Architecture as 64-bit (x86)
- For Instance type, select m5.4xlarge
- For Key pair, select Proceed without a key pair
- Click Launch instance
- Observe the Instance launch failed error message, confirming that the IAM policy is correctly preventing the creation of unauthorized instance types
💡 Pro Tip: You can further validate your policy by attempting to launch a t3.large instance, which should succeed since it’s explicitly allowed in your IAM policy.
🔒 Security Note: This implementation demonstrates the principle of least privilege by allowing only the specific instance types required for development work, preventing accidental resource over-provisioning while maintaining developer productivity.