Launch Microsoft Windows Server 2025 Instance
Creating a Microsoft Windows Server 2025 Instance
ℹ️ Information: In this section, you’ll learn how to launch a Microsoft Windows Server 2025 instance in Amazon EC2. Amazon EC2 now supports Windows Server 2025 with License Included (LI) AMIs, making it easy to deploy the latest Windows Server version on EC2. By running Windows Server 2025 in the AWS Cloud, you can take advantage of enhanced security, performance, and reliability along with deep integration with AWS services such as AWS Systems Manager and EC2 Image Builder. These AMIs are designed for Nitro-based instance types with UEFI boot mode and use gp3 EBS volumes by default for improved throughput and cost efficiency.
Step 1: Access the EC2 Console
Sign in to the AWS Management Console
- In the search bar, type EC2
- Select EC2 from the services list
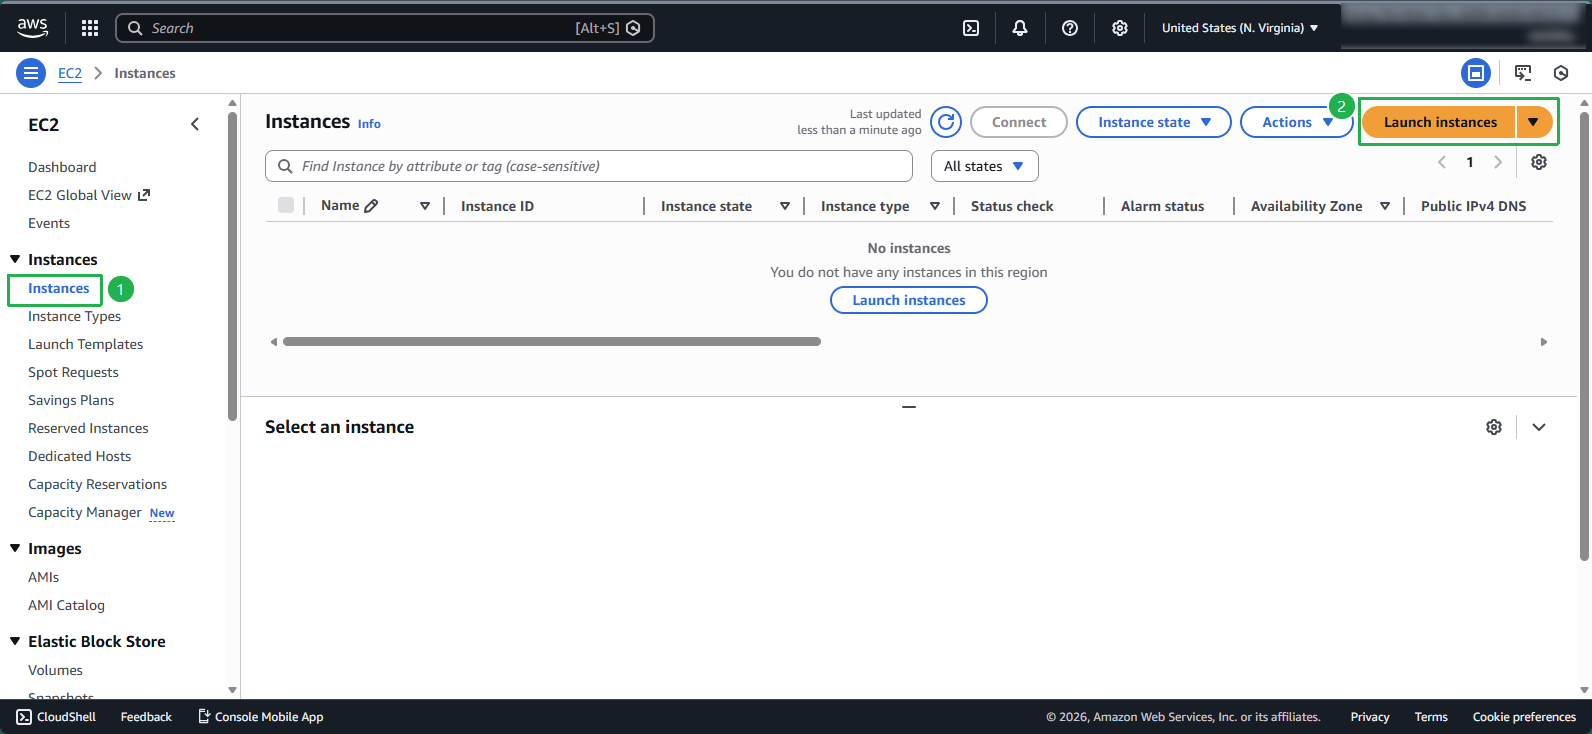
In the EC2 dashboard:
- Click on Instances in the navigation pane
- Click Launch instances
Step 2: Configure Instance Details
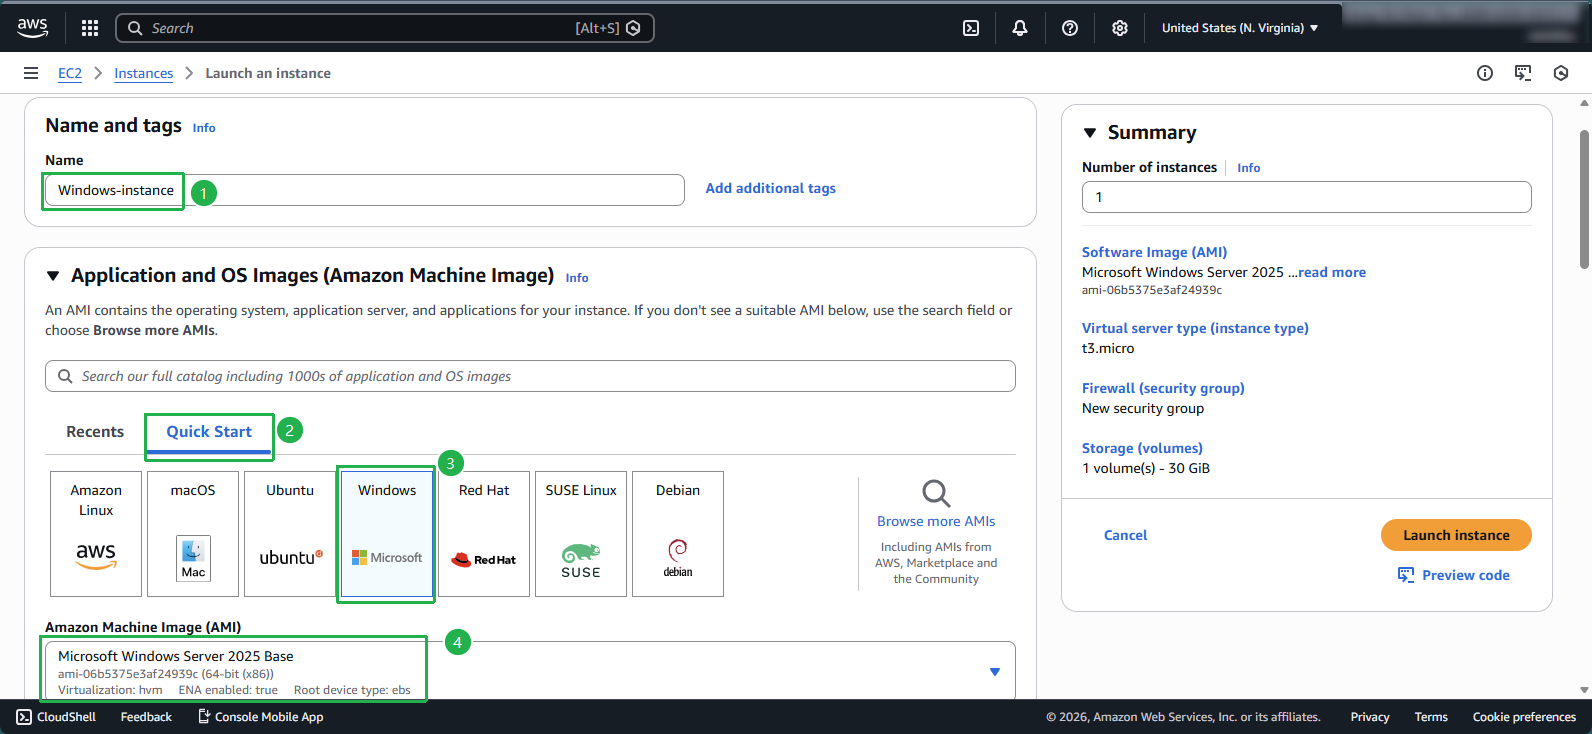
Enter basic details:
- Name: Enter
Windows-instance
- Name: Enter
Select the Amazon Machine Image (AMI):
- Under Quick Start, select Windows
- Choose Microsoft Windows Server 2025 Base from the available options
Choose instance specifications:
- Select an appropriate Instance type based on your workload requirements
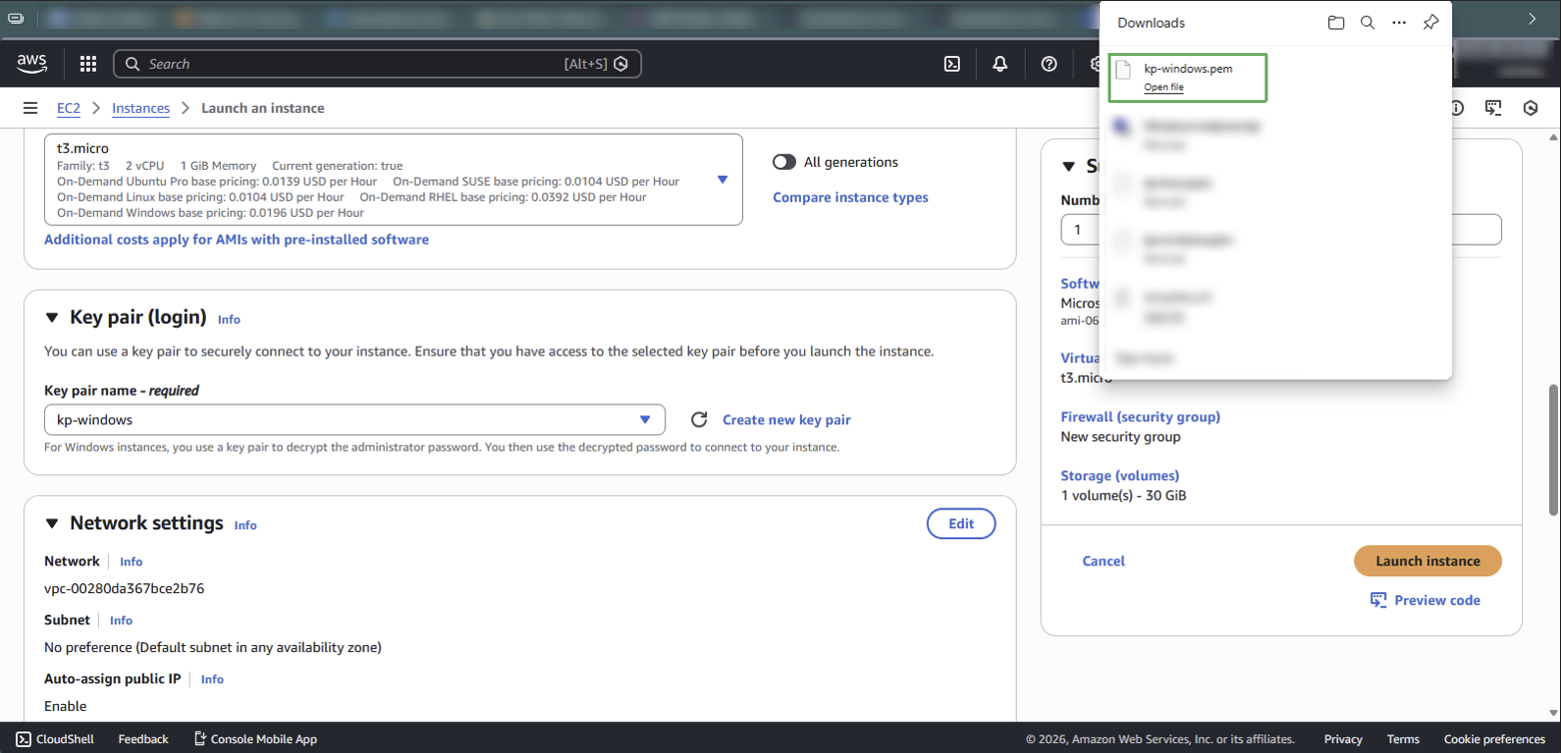
- Click Create new key pair
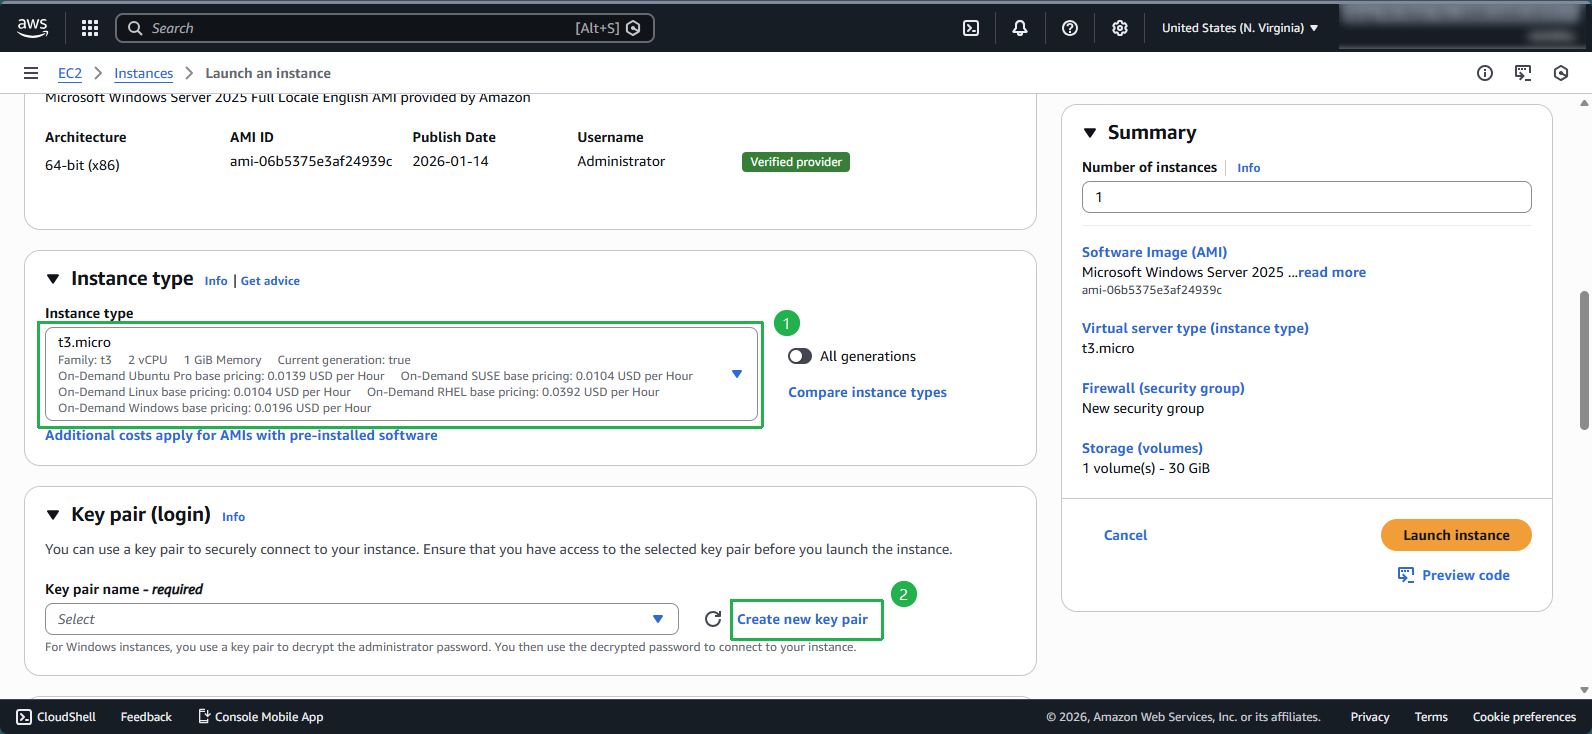
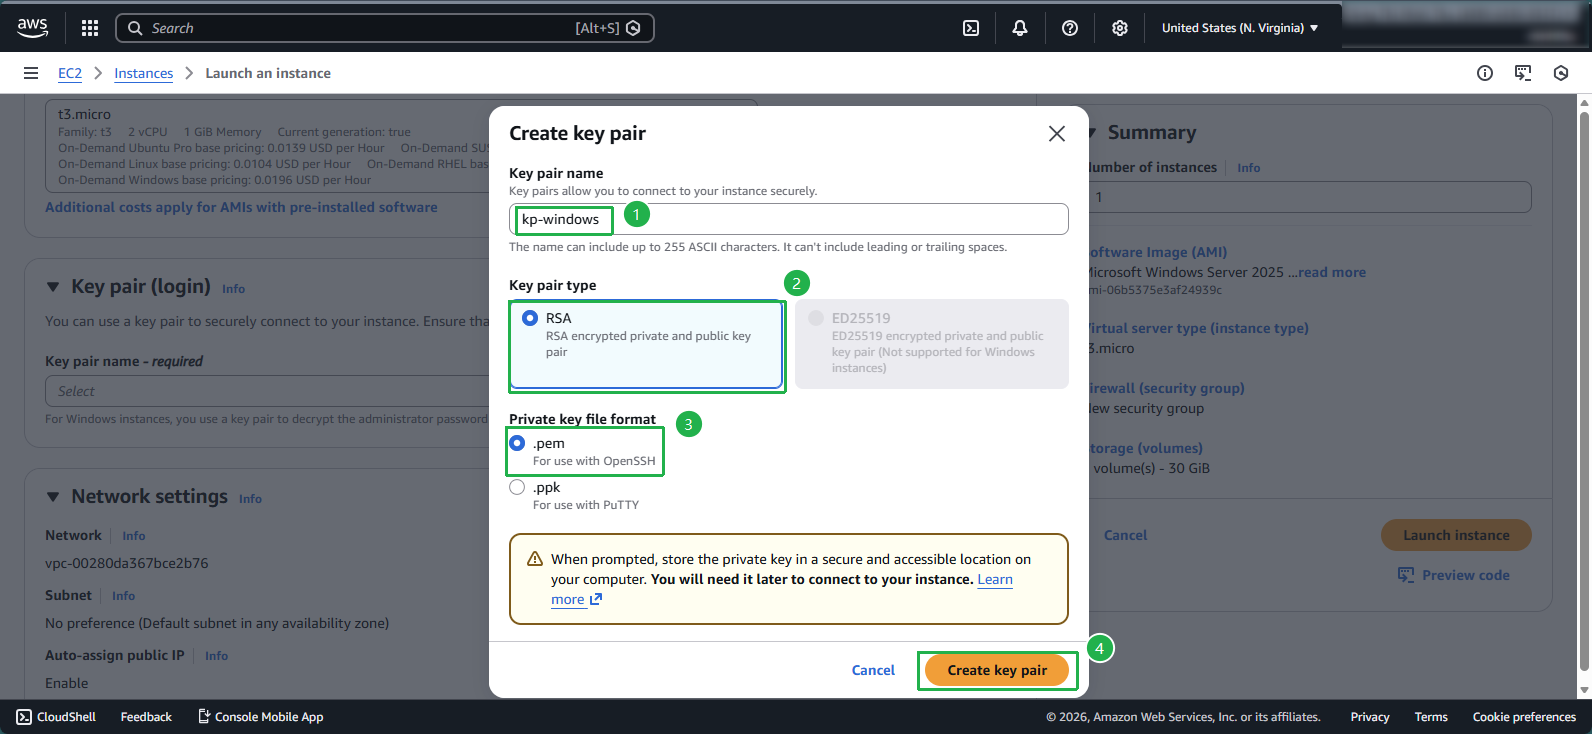
Step 3: Create a Key Pair
Configure your key pair:
- Key pair name: Enter
kp-windows - Private key file format: Select .pem
- Click Create key pair
- Key pair name: Enter
🔒 Security Note: The private key file will automatically download to your computer. Store this file securely as it’s required to decrypt the Windows administrator password for remote access.
Step 4: Configure Network Settings
Click Edit in the Network settings section
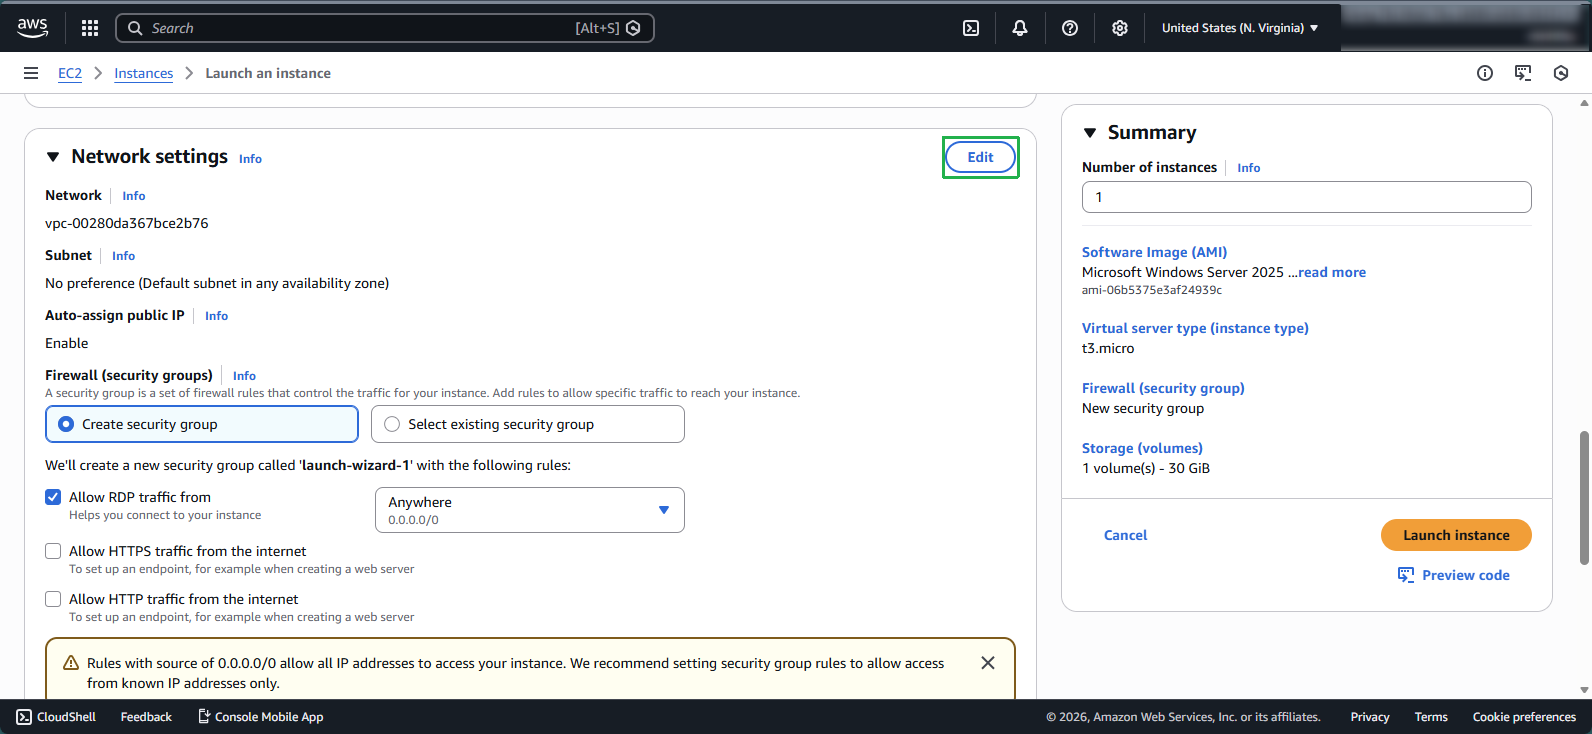
Configure the network parameters:
- VPC: Select Windows-vpc
- Subnet: Select public subnet
- Auto-assign public IP: Select Enable
- Firewall (security groups): Select Select existing security group
- Common security groups: Select Windows-SG
💡 Pro Tip: Placing a Windows instance in a public subnet with a public IP allows you to easily connect via RDP from a remote location. However, in production environments, you should consider using a bastion host or AWS Systems Manager Session Manager to enhance security.

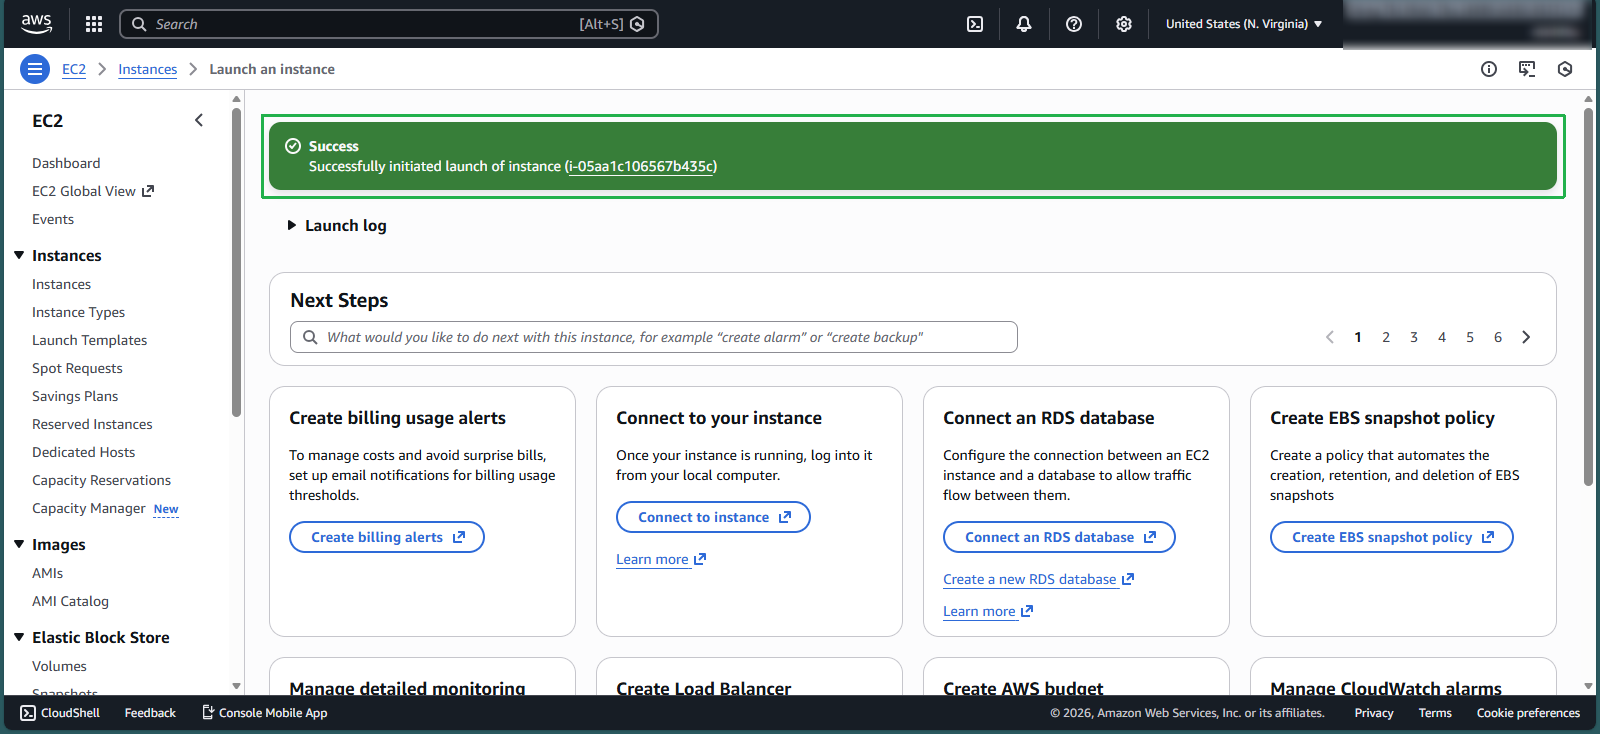
Step 5: Review and Launch
Review your configuration settings
Click Launch instance
Create instance successful
Step 6: Wait for Instance Initialization
- Wait approximately 5 minutes for the instance to complete initialization
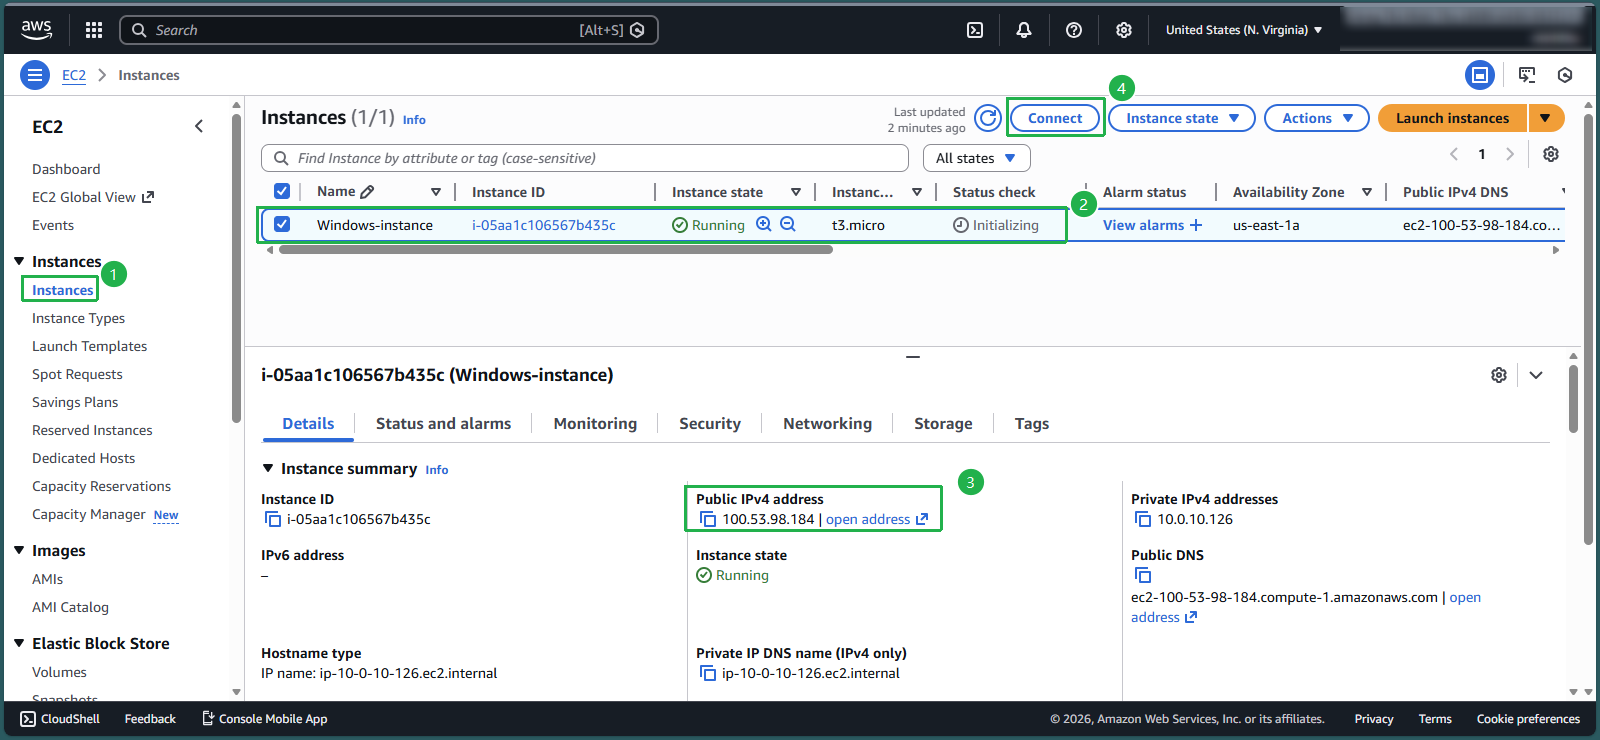
- The instance is ready when:
- Status check shows 3/3 checks passed
- Instance state displays Running
⚠️ Warning: Windows instances typically take longer to initialize than Linux instances. Do not attempt to connect until both status checks have passed.