Connect to Amazon Linux Instance
Connecting to Your Amazon Linux Instance
ℹ️ Information: In this section, you’ll learn how to connect to your Amazon Linux instance using SSH. We’ll cover two popular methods: using MobaXterm and using PuTTY on Windows.
Connect Using MobaXterm
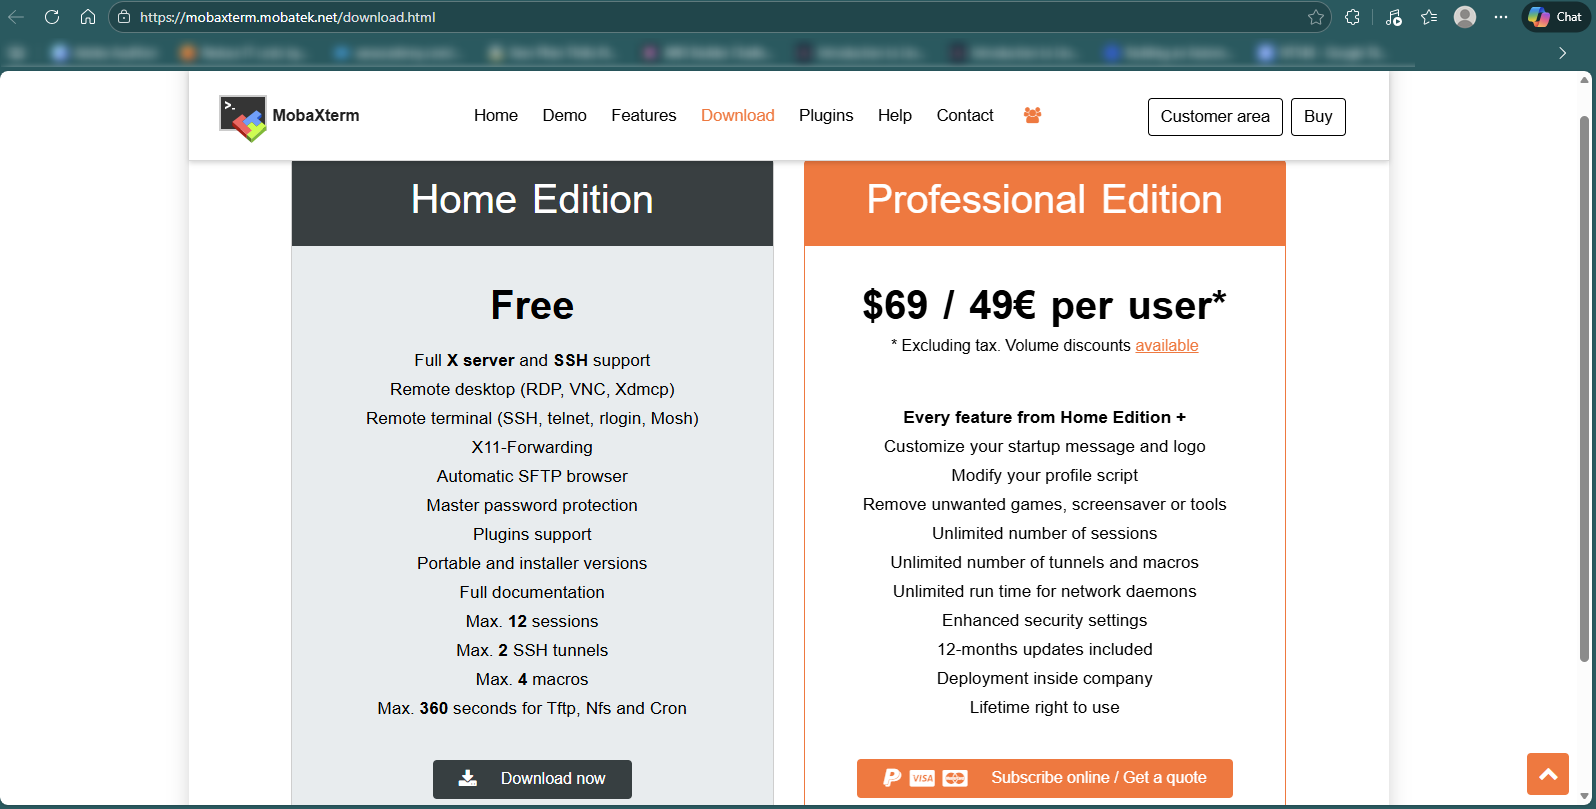
Download MobaXterm from the official website
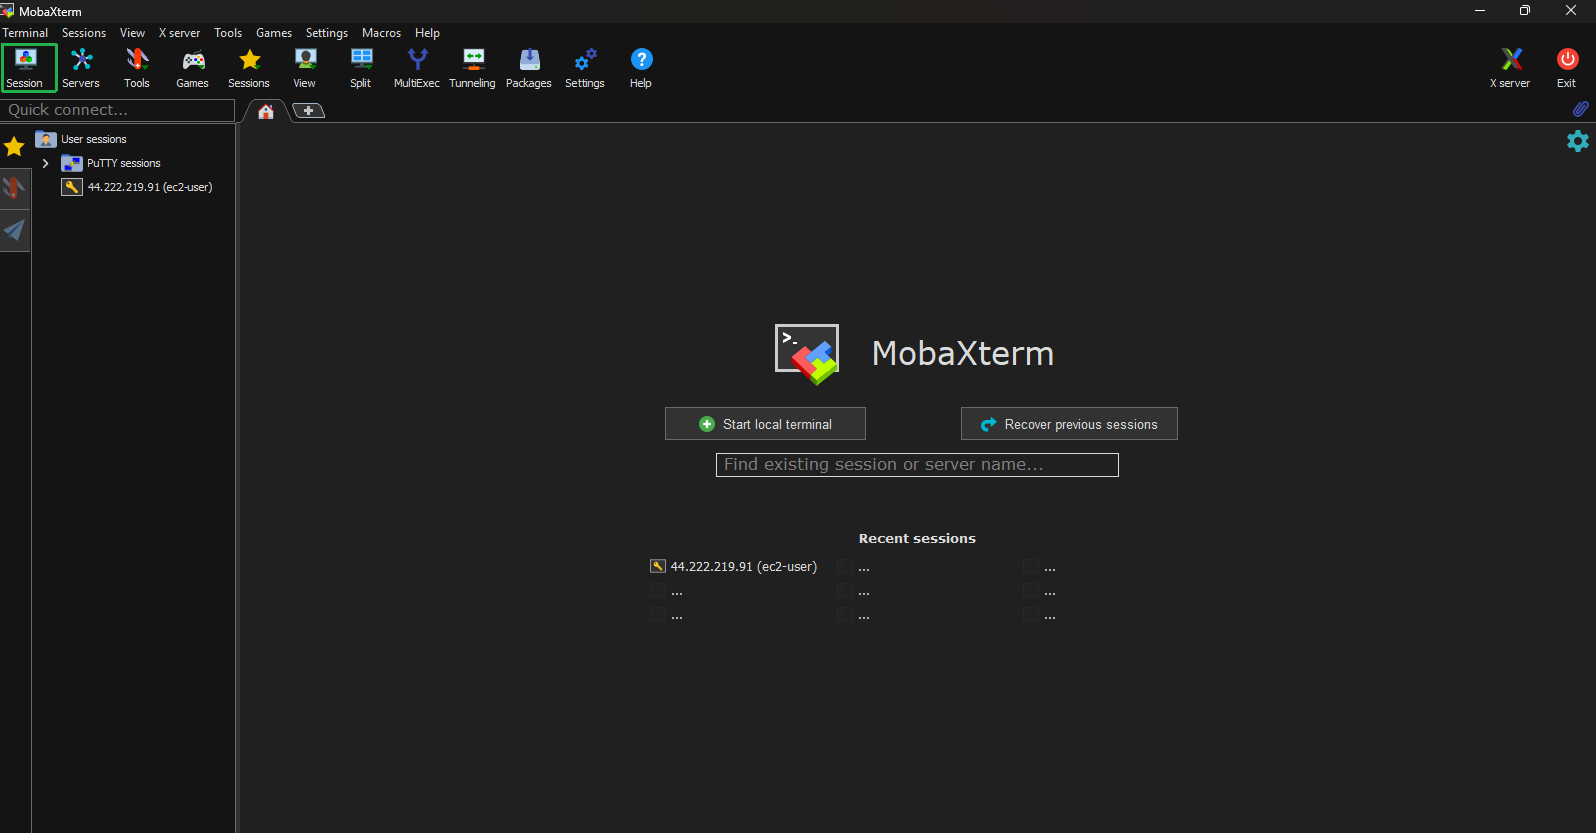
After downloading MobaXterm, open it. Then, select Session
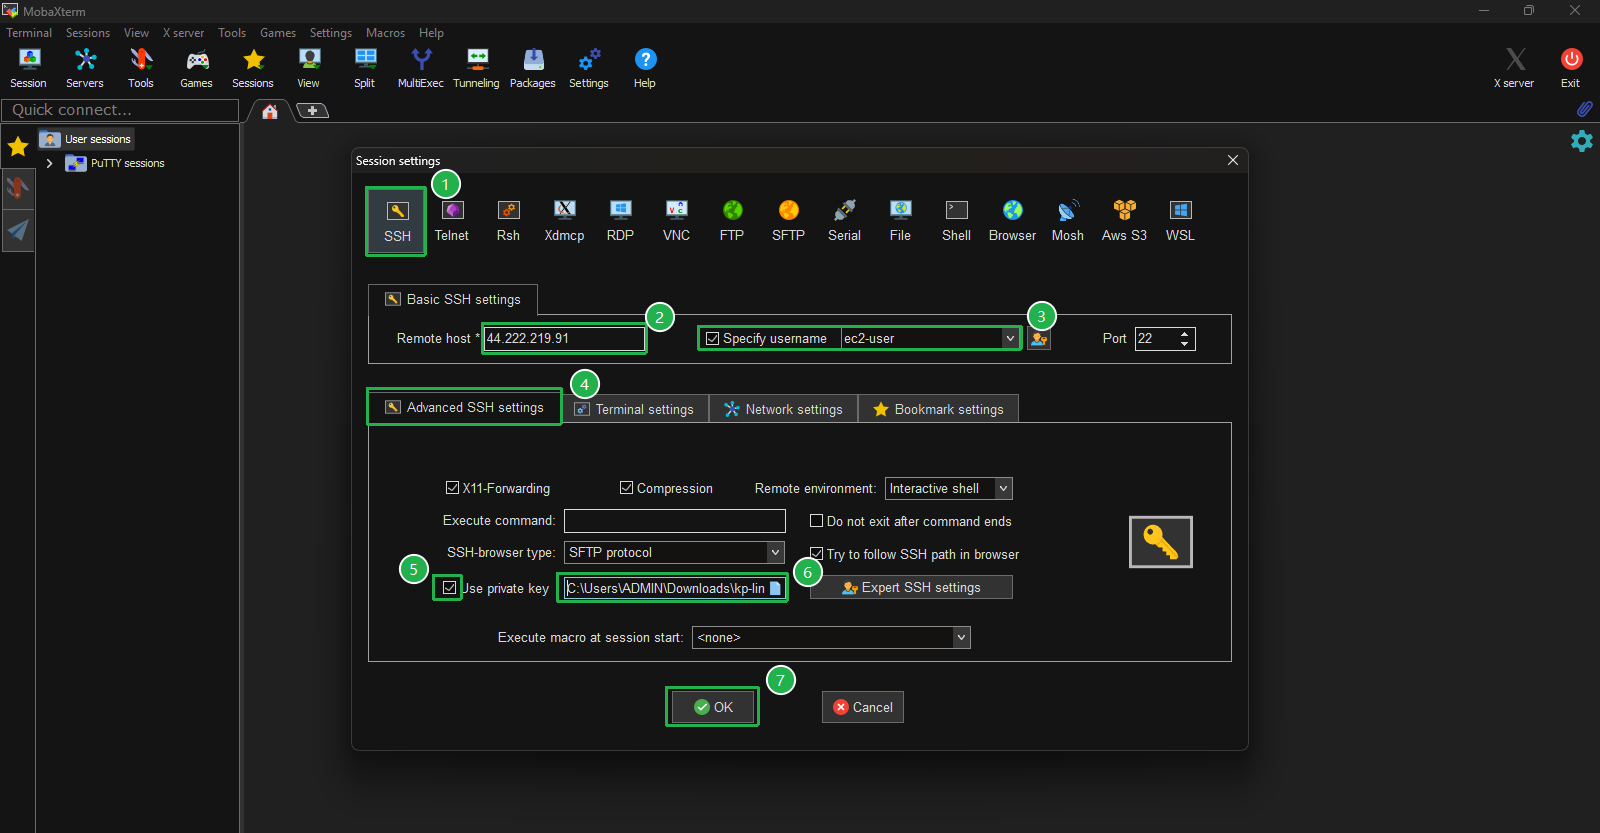
In the Session settings interface, choose SSH
Configure the SSH connection with the following details:
- Remote host: Enter the Public IPv4 address of your instance
- Specify username: Enter
ec2-user - Use private key: Browse and select the key pair file (kp-linux.pem) you downloaded when creating the EC2 instance
💡 Pro Tip:The default username varies depending on the AMI you use. For Amazon Linux 2023, the default username is ec2-user. Other AMIs may use ubuntu, centos, admin, or a different default username.
Click OK to establish the connection.
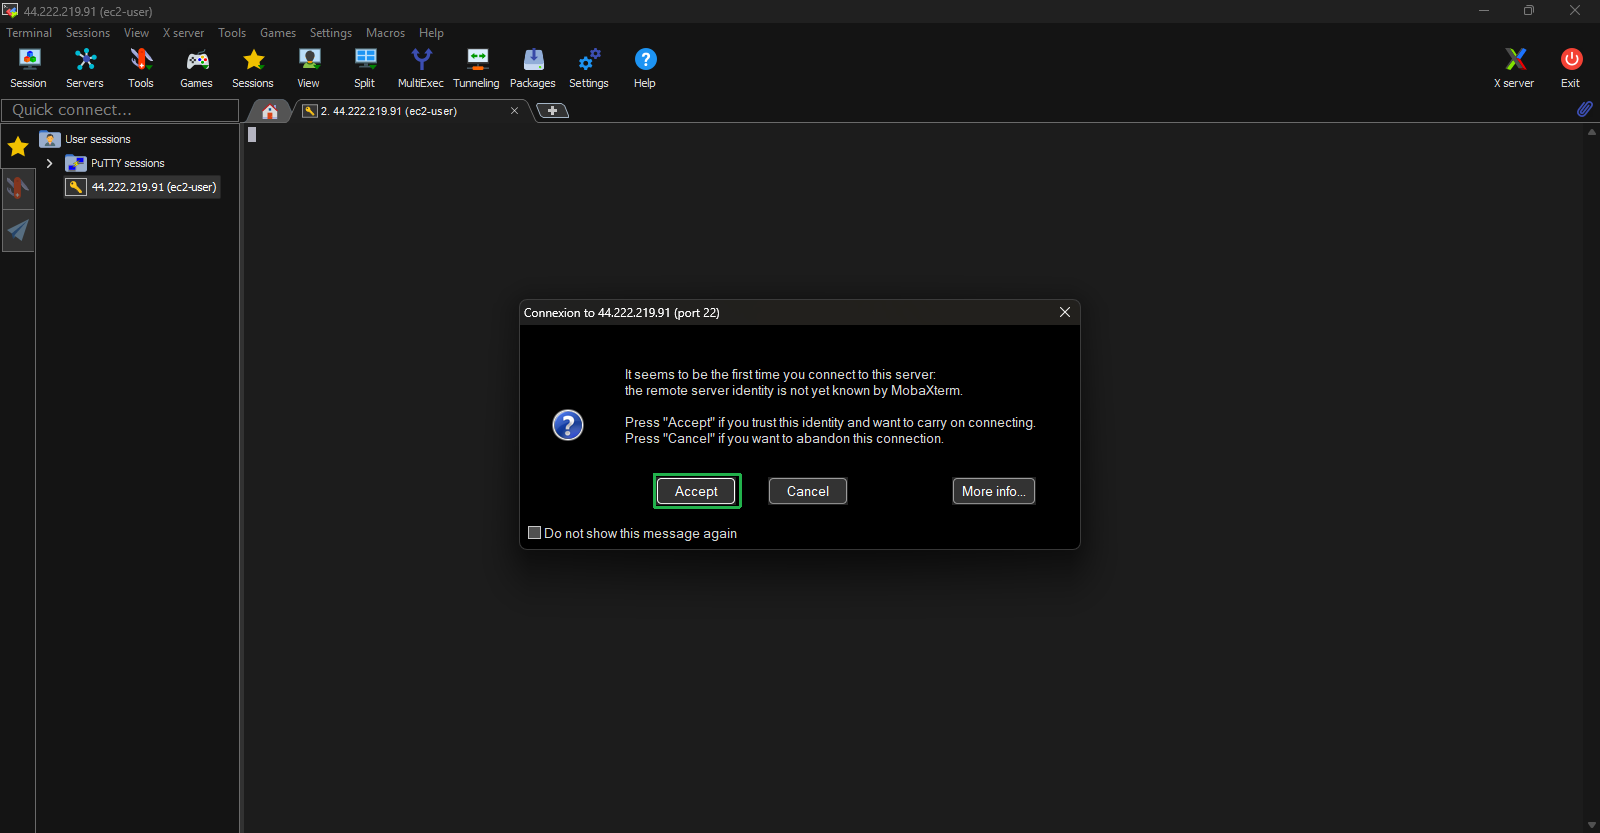
- When connecting for the first time, MobaXterm will display a message indicating that the server identity is not yet known. Click Accept to trust the server and continue the connection.
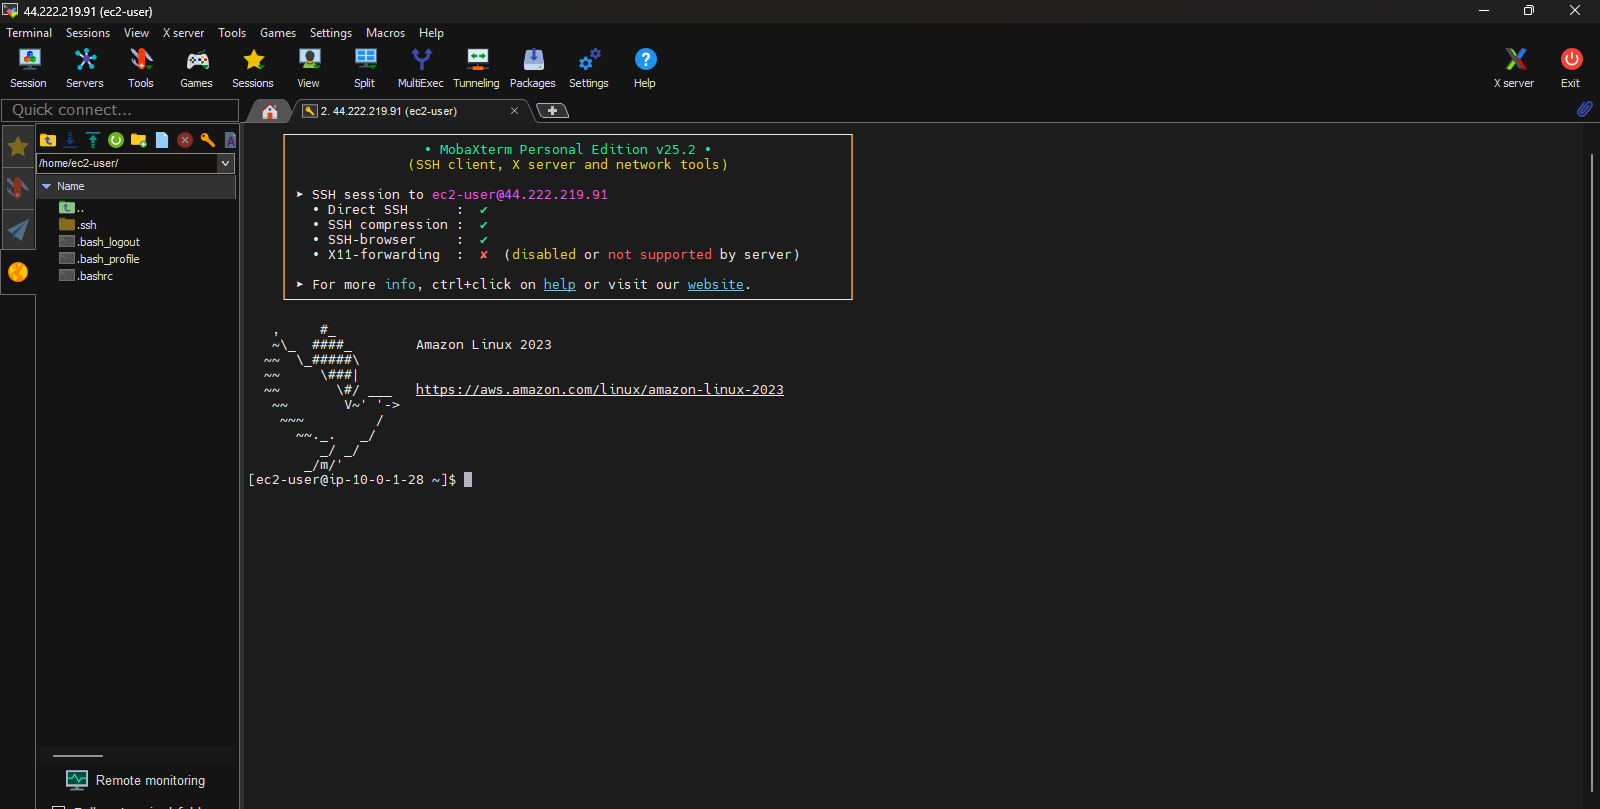
When successful, you’ll see the Linux terminal:
💡 Pro Tip: MobaXterm provides an integrated SFTP browser on the left side of the window, allowing you to easily transfer files between your local machine and the EC2 instance.
Connect Using PuTTY
ℹ️ Information: PuTTY is a popular SSH client for Windows. Since PuTTY doesn’t natively support the .pem key format used by AWS, you’ll need to convert your key using PuTTYgen.
Download the following PuTTY tools:
- PuTTY Executable - Tool for SSH client used to connect to remote servers.
- RSA and DSA Key Generation Utility (PuTTYgen) - Tool for generating and converting SSH keys
🔒 Security Note: PuTTY does not directly support AWS .pem key files. You must use PuTTYgen to convert the .pem key into a .ppk format that PuTTY can use.
Convert your .pem key to PuTTY format:
- Open PuTTYgen
- Click Load to import your private key file
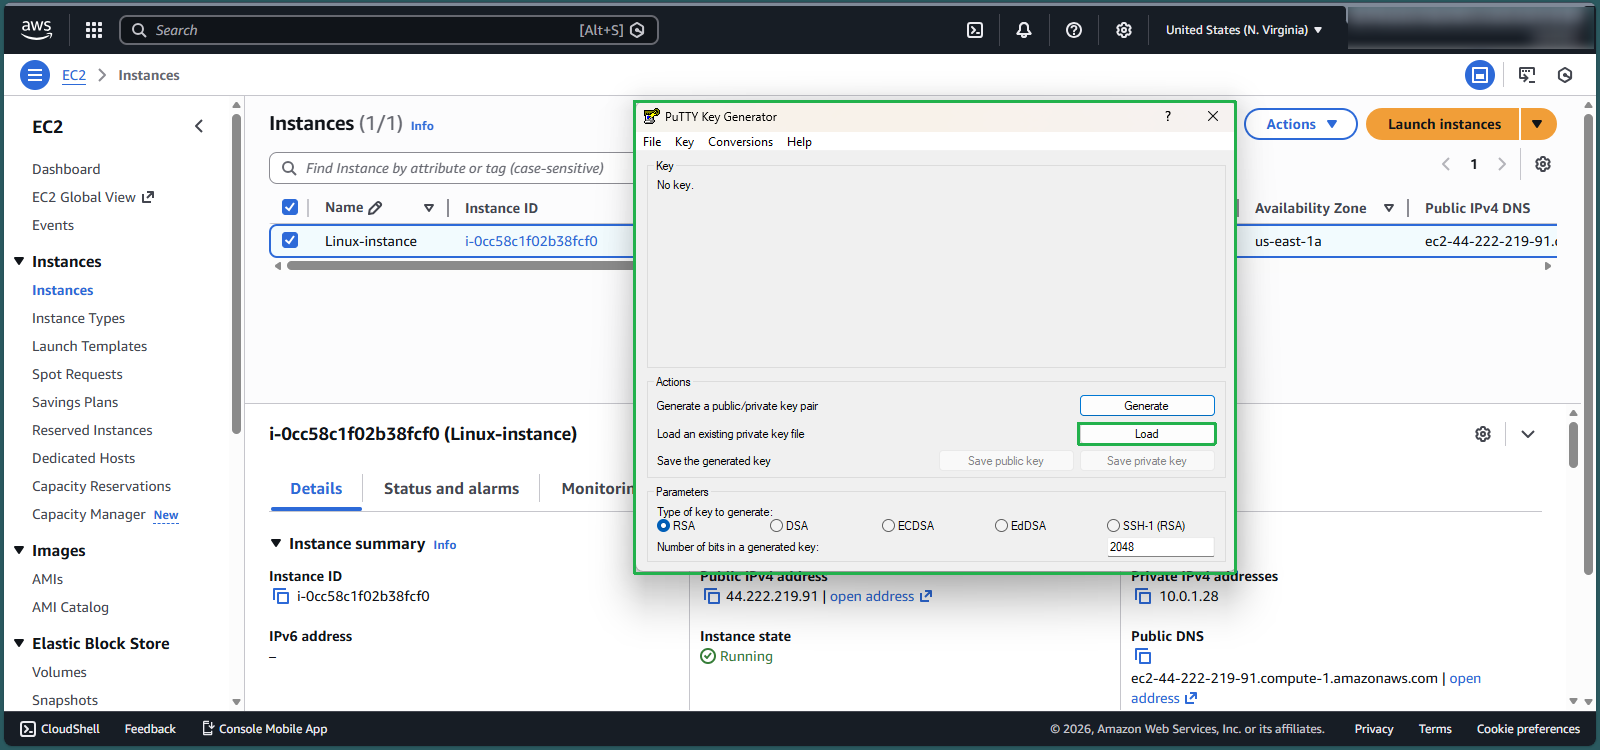
Select the kp-linux.pem file you downloaded when creating your Amazon Linux instance
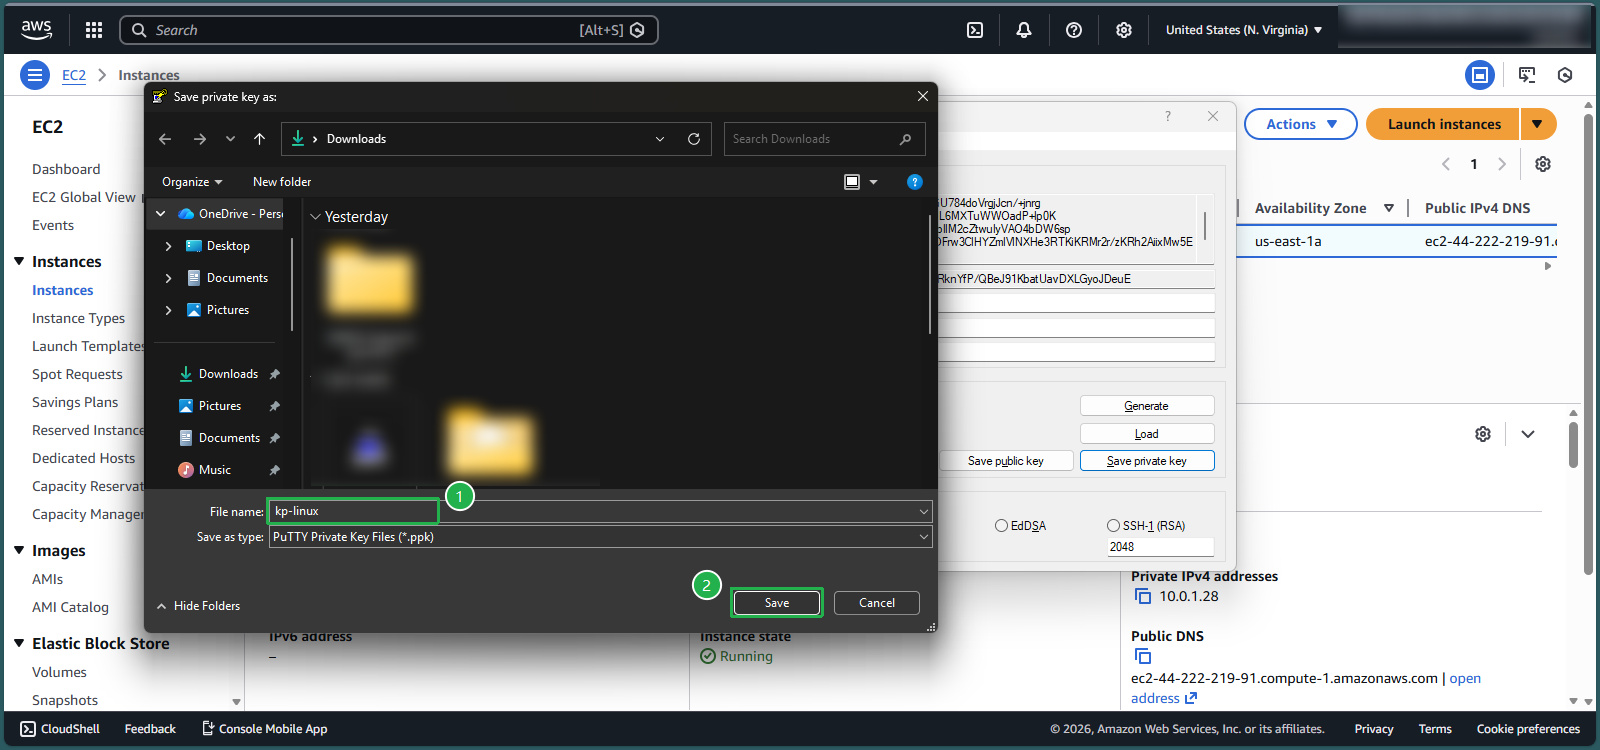
After successfully importing the key, click Save private key

Name the key file kp-linux.ppk and click Save
Retrieve your instance’s public IP address:
- Return to the EC2 console
- Select your Linux-instance
- Copy the Public IPv4 address
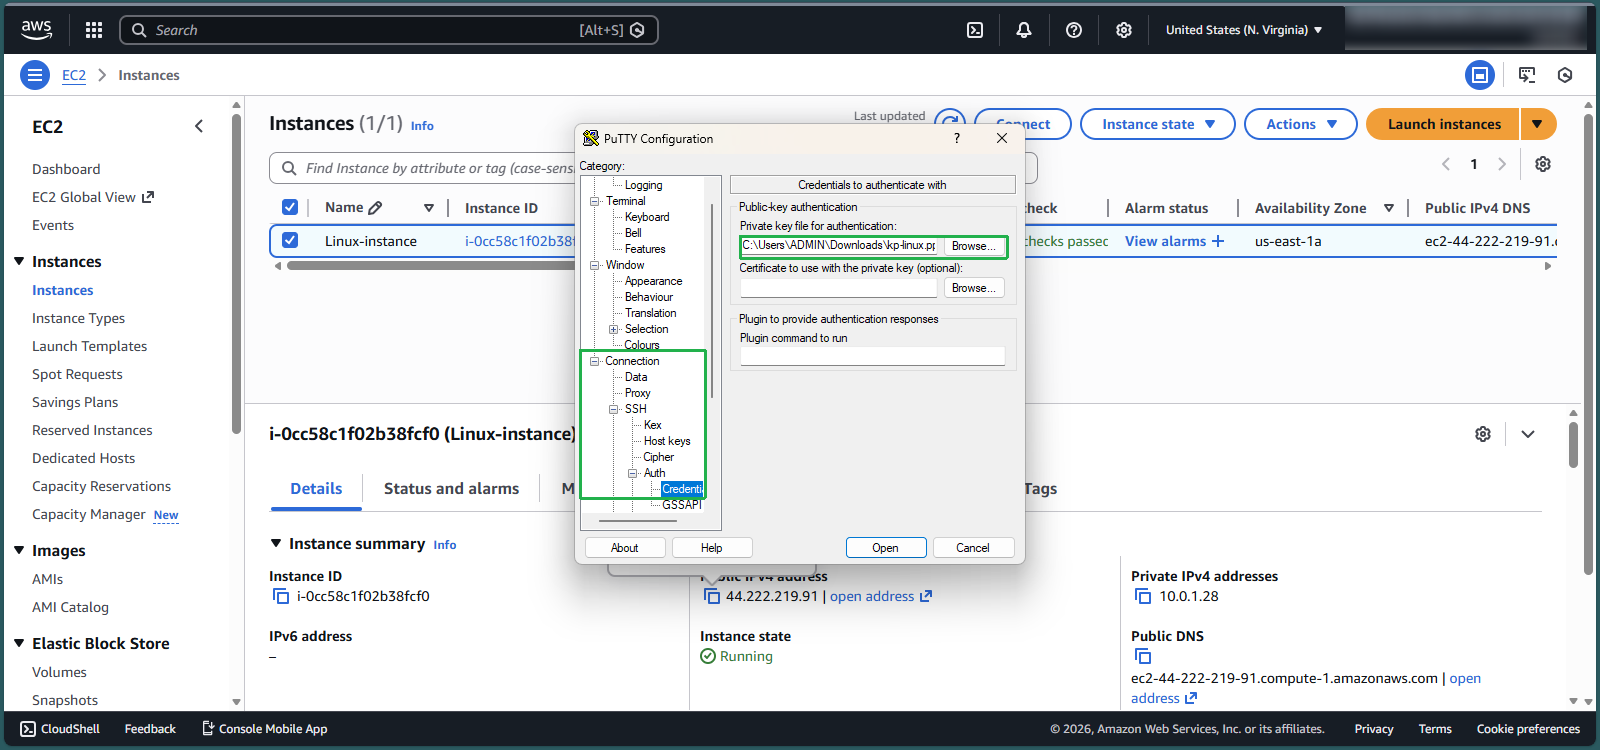
Configure SSH authentication:
- Launch Putty
- In the category tree on the left, navigate to Connection > SSH > Auth > Credentials
- Under Private key file for authentication, click Browse and select your kp-linux.ppk file
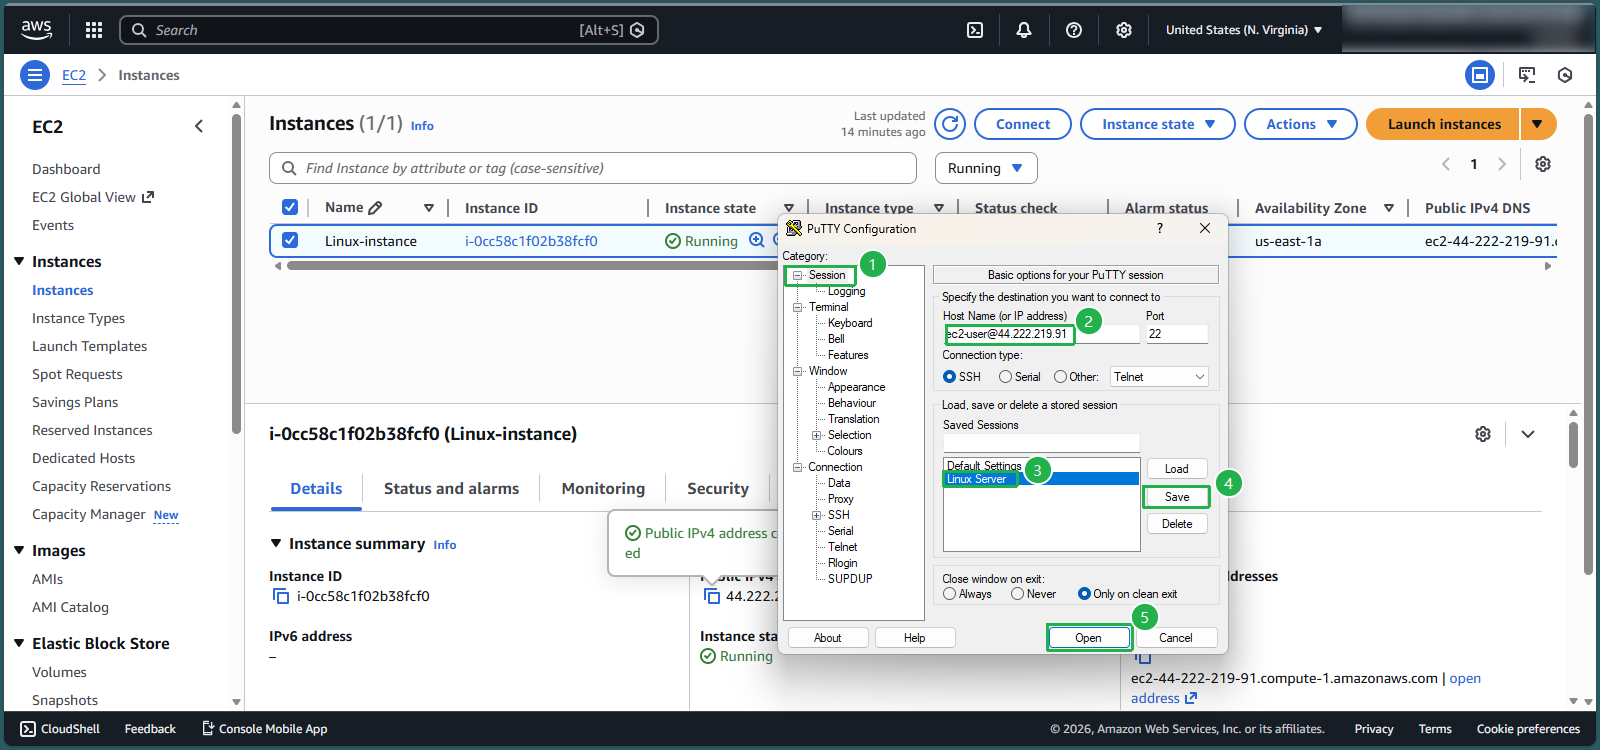
Configure PuTTY for the connection:
- Return to the Session category
- In the Host Name field, paste the Public IPv4 address or ec-user@Public-IPv4
- Enter a name (e.g., Linux-Server) in the Saved Sessions field and click Save
- Click Open to start the connection
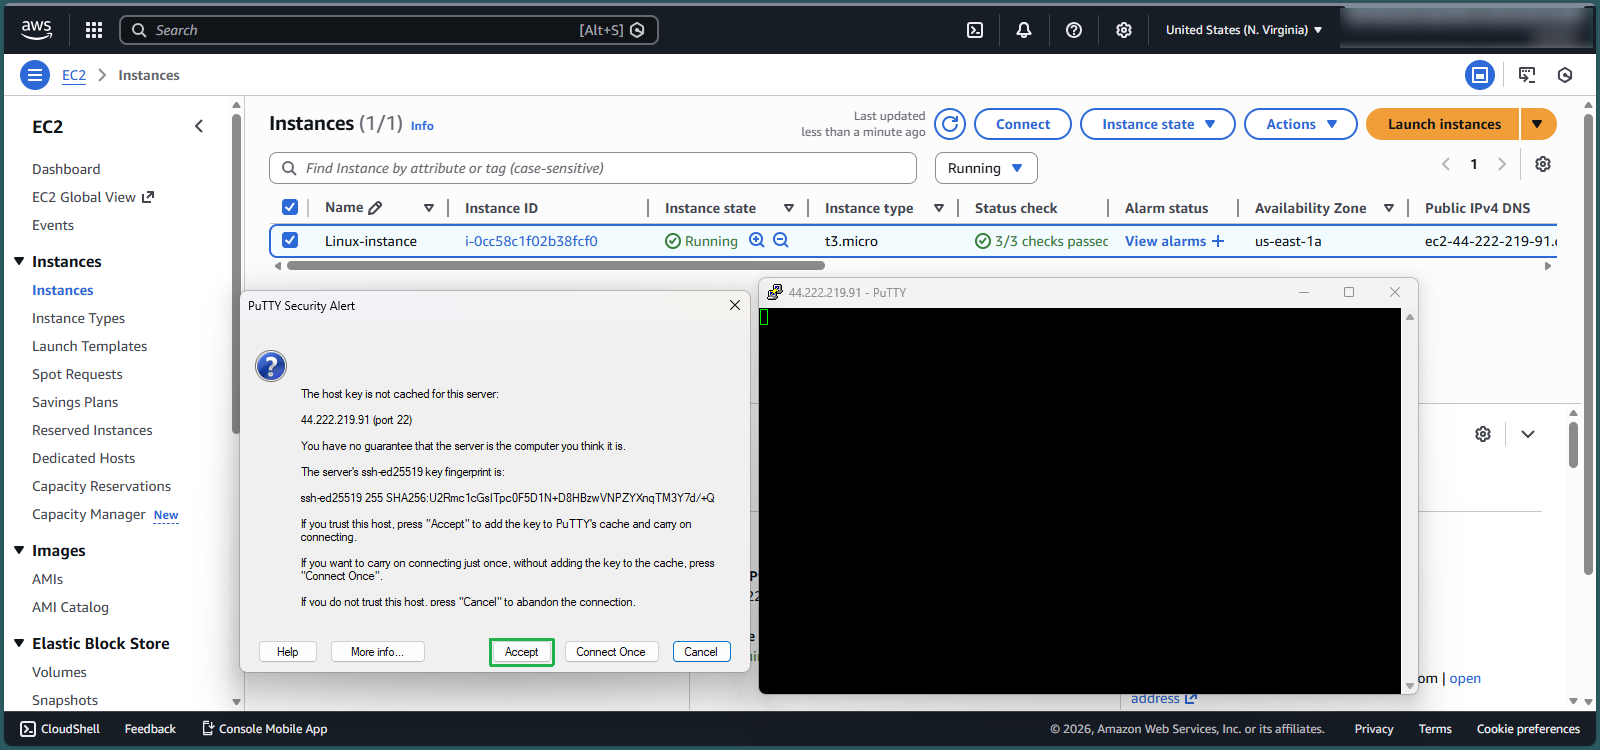
- When prompted with a security alert about the server’s host key, click Accept to continue
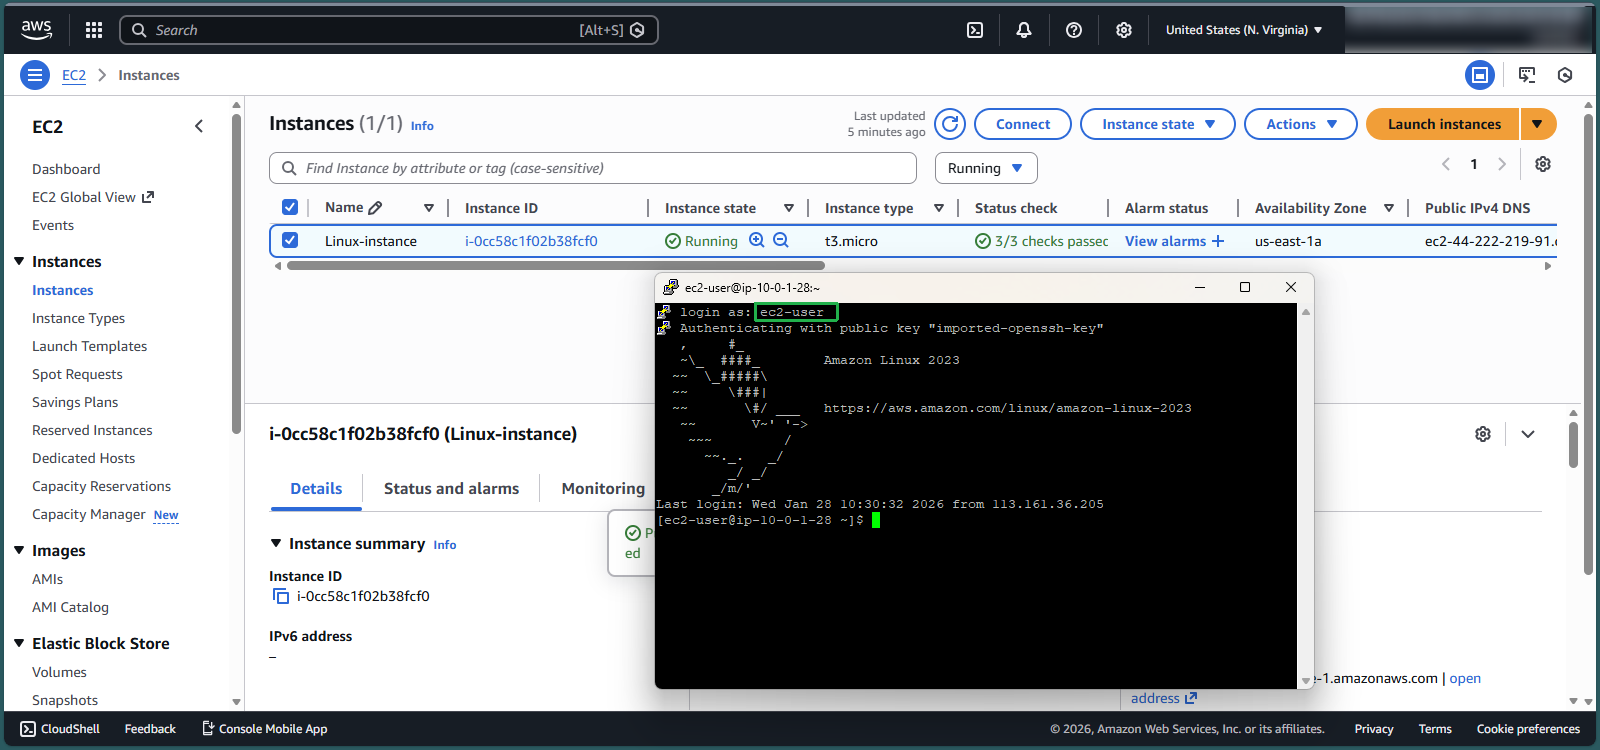
- Fill login as:
ec2-user - You are now successfully connected to your Amazon Linux instance
Verify your connection by testing network connectivity:
ping 8.8.8.8

🔒 Security Note: Always keep your private key files (.pem and .ppk) secure. Never share these files or store them in public repositories, as they provide direct access to your EC2 instances.