Recovering Access to Linux Instances
Recovering Access to Linux Instances When Key Pair is Lost
ℹ️ Information: The key pair is essential for authenticating SSH connections to your Amazon EC2 Linux instances. If you lose your private key file, you can use EC2 user data to inject a new SSH key, allowing you to regain access without rebuilding your instance.
Prerequisites for Key Pair Recovery
⚠️ Warning: This recovery process requires stopping your EC2 instance. If your instance uses instance store volumes, stopping it will result in data loss. Ensure you have backed up any critical data before proceeding.
Step 1: Create a New Key Pair
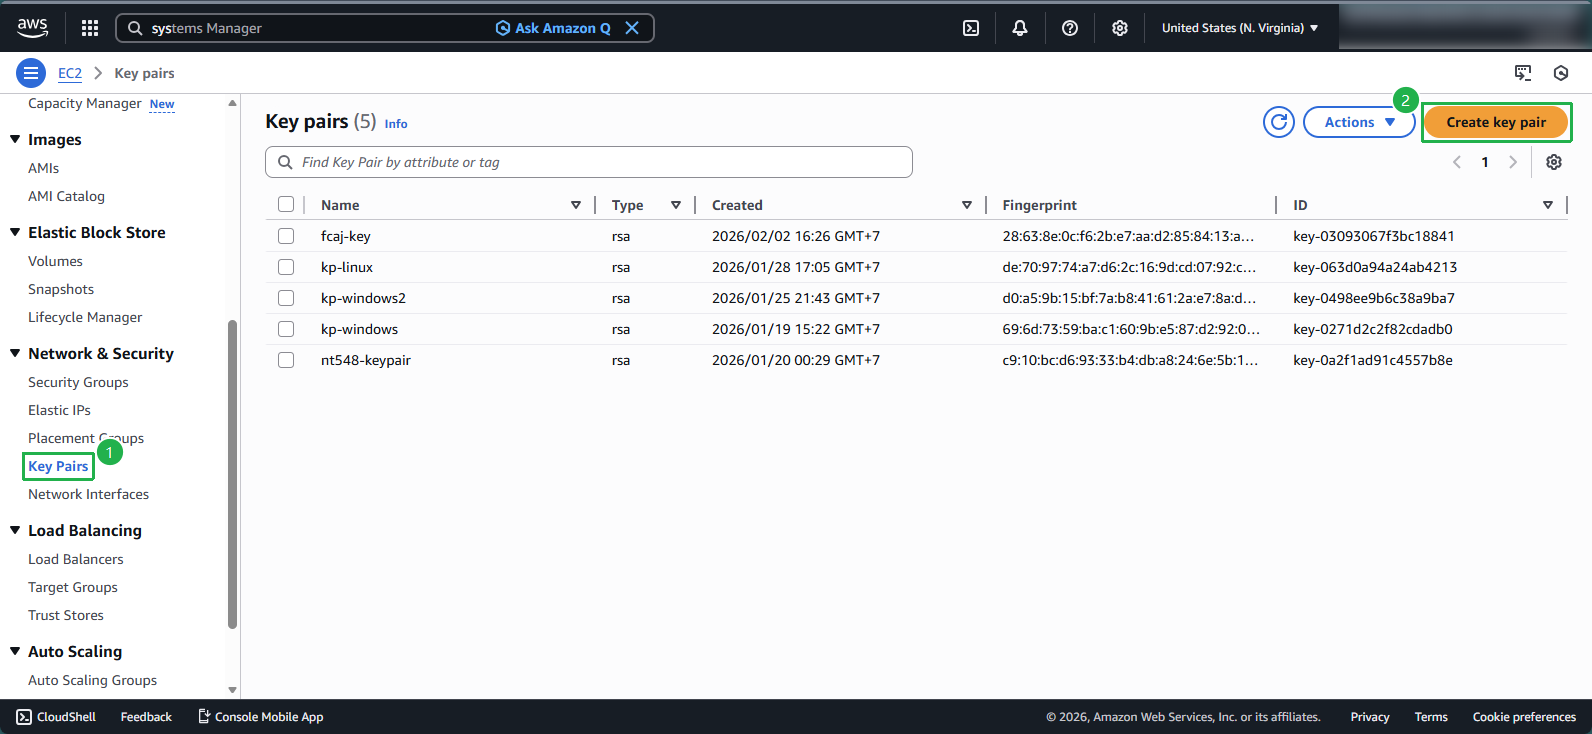
Navigate to the EC2 console:
- In the navigation pane, select Key Pairs

Generate a new key pair:
- Click Create key pair
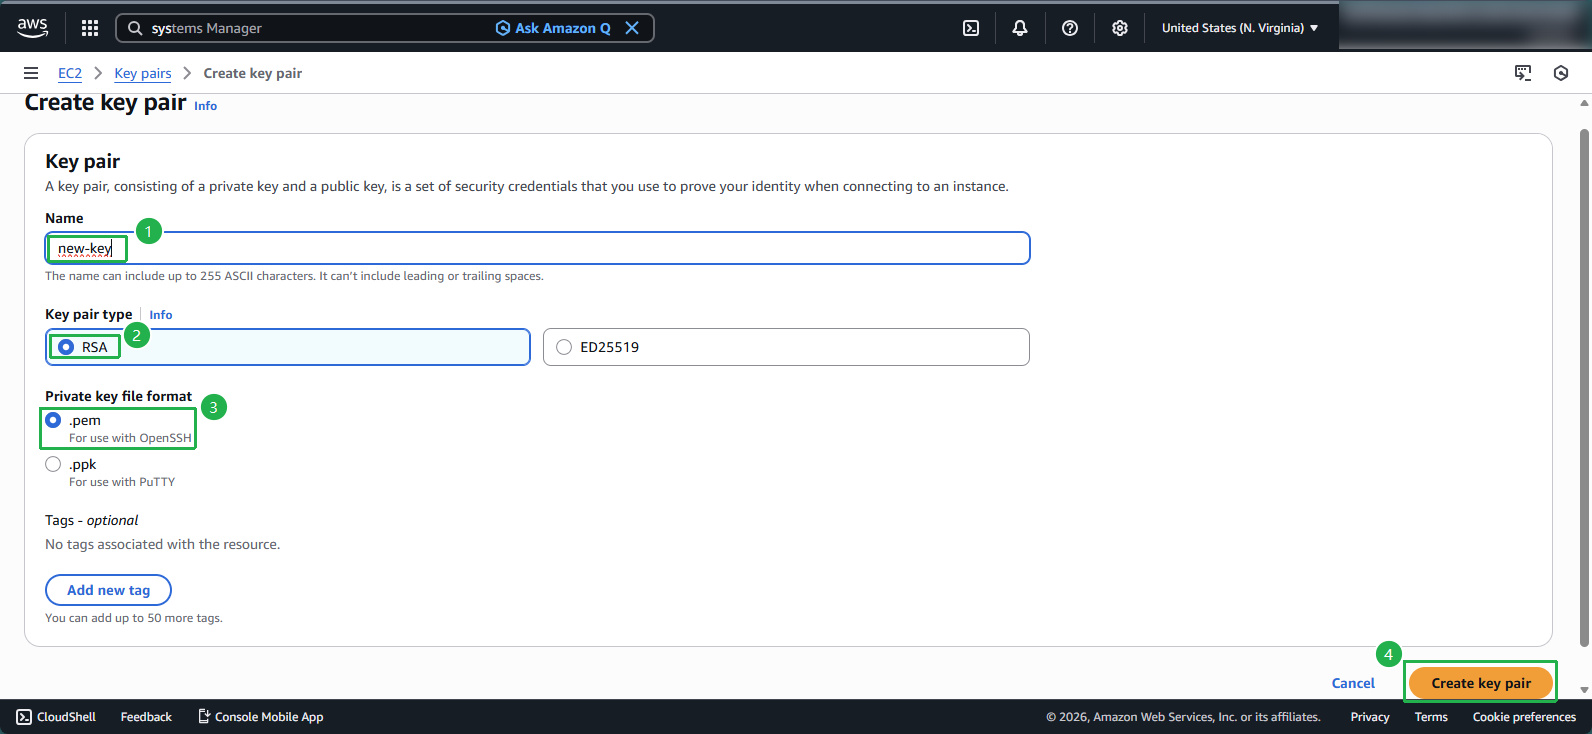
Configure the key pair settings:
- Name: Enter
new-key - Key pair type: Select RSA
- Private key file format: Choose .pem
- Click Create key pair
- Name: Enter
💡 Pro Tip: The private key file (new-key.pem) will be automatically downloaded to your local machine. Store this file securely as it cannot be recovered if lost.
Step 2: Extract the Public Key
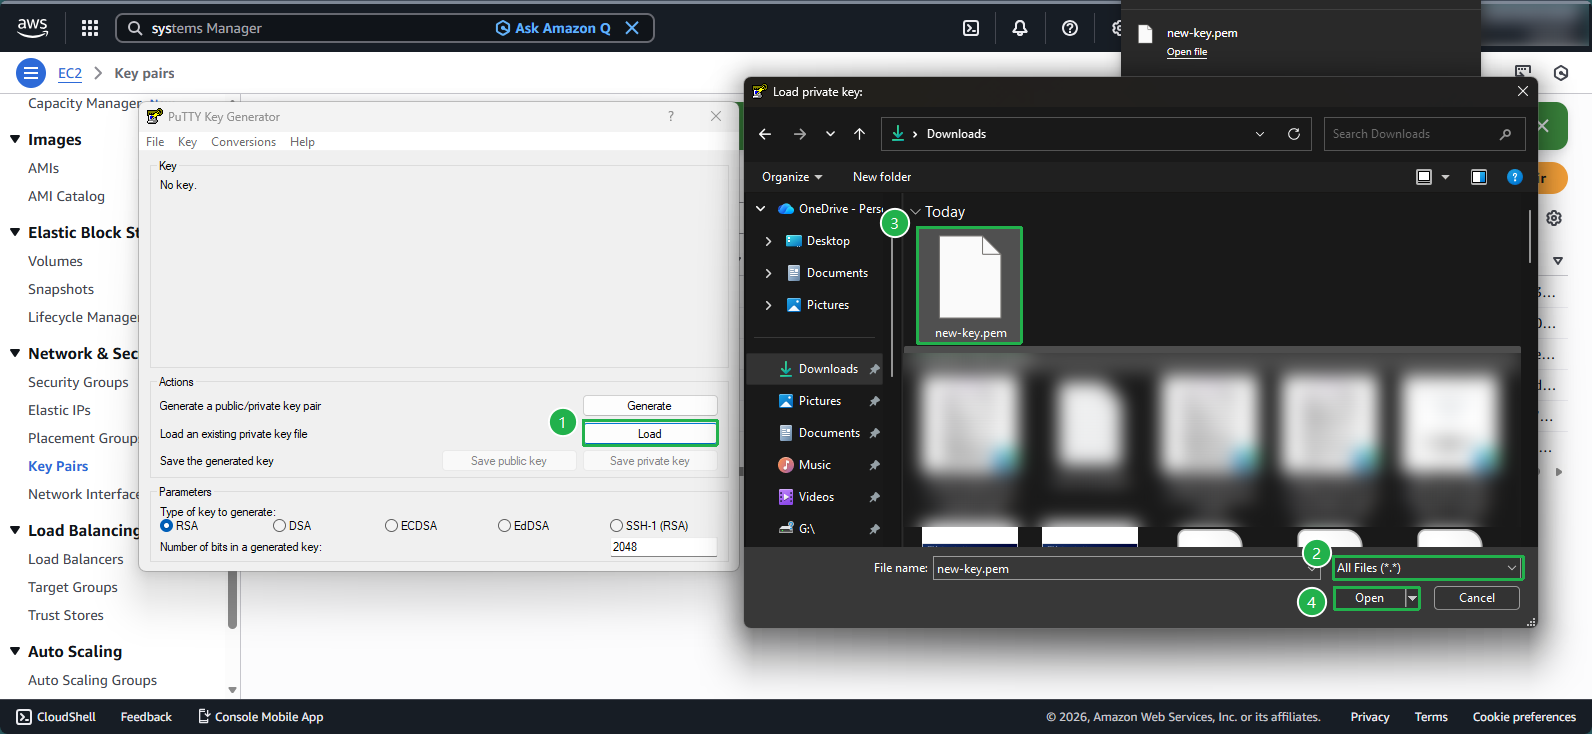
Open PuTTYgen:
- Click Load and select All Files (*.*) from the file type dropdown
- Navigate to and select your new-key.pem file
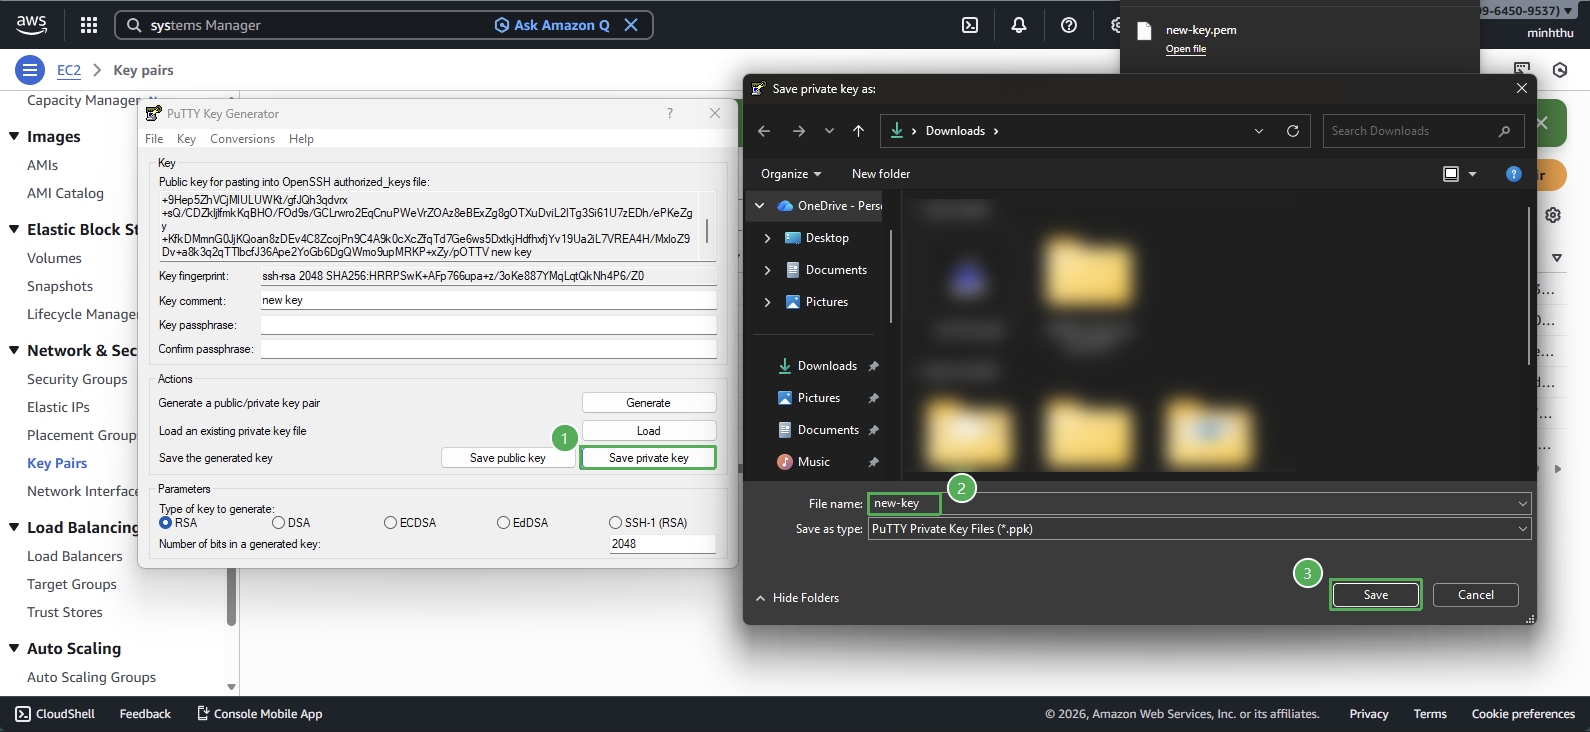
Retrieve the public key:
- In the Key comment field, enter
new key - Copy the entire public key string from the text box at the top
- The format should be:
ssh-rsa AAAAB3NzaC1yc2EAAAADAQA......+xZy/pOTTV new key

- In the Key comment field, enter
🔒 Security Note: The public key is safe to share, but never share your private key (.pem file). The private key should be stored securely and with appropriate permissions (chmod 400 on Linux/macOS). 3. Save the private key in .ppk format:
In PuTTYgen, click Save private key
When prompted, choose Yes to save without a passphrase (if applicable)
Enter the file name as
new-keyand Save the fileThis .ppk file will be required when connecting to the instance using PuTTY.
Step 3: Update Instance User Data
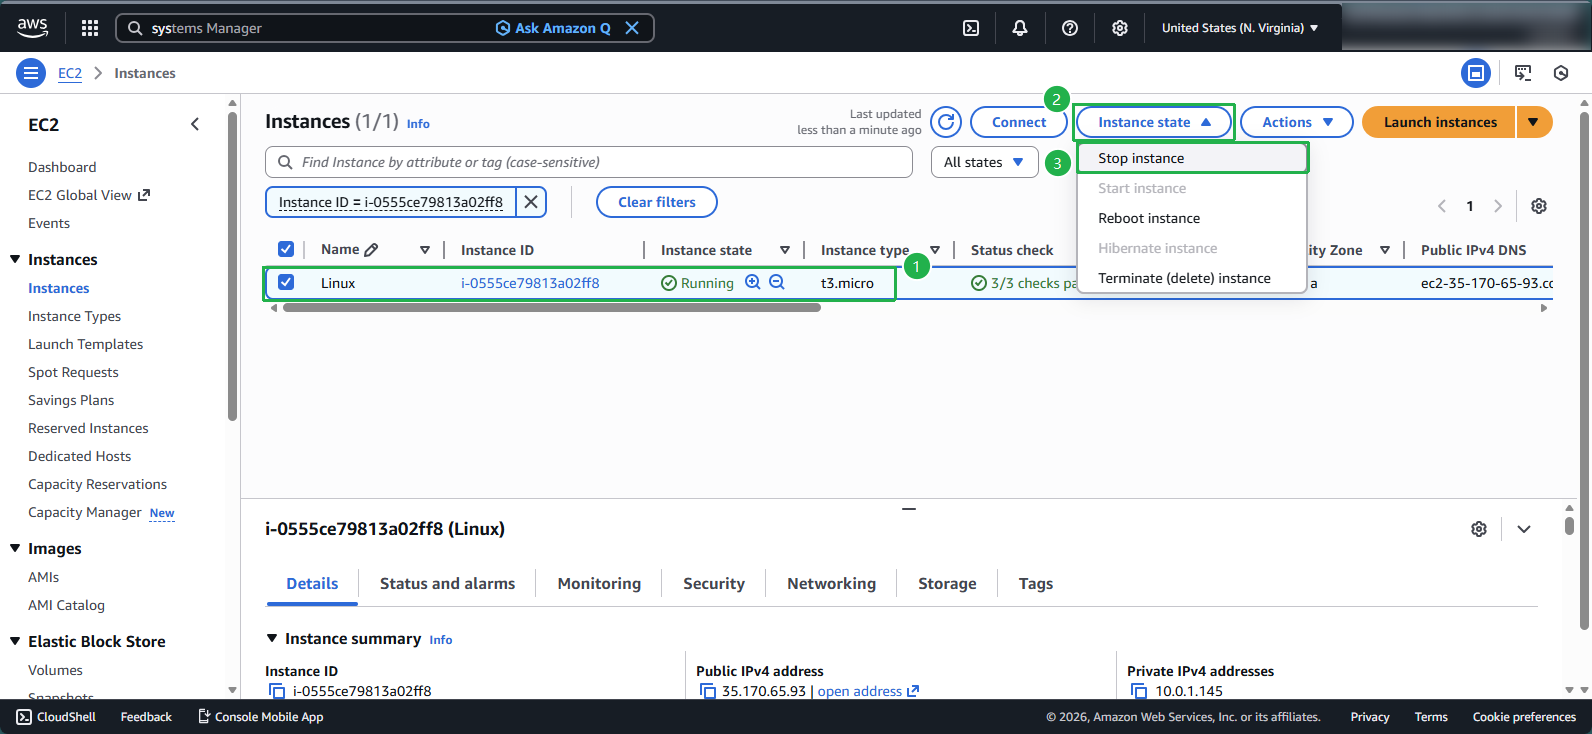
Stop the EC2 instance:
- Select your instance
- Click Instance state > Stop instance
- Wait until the instance status shows Stopped
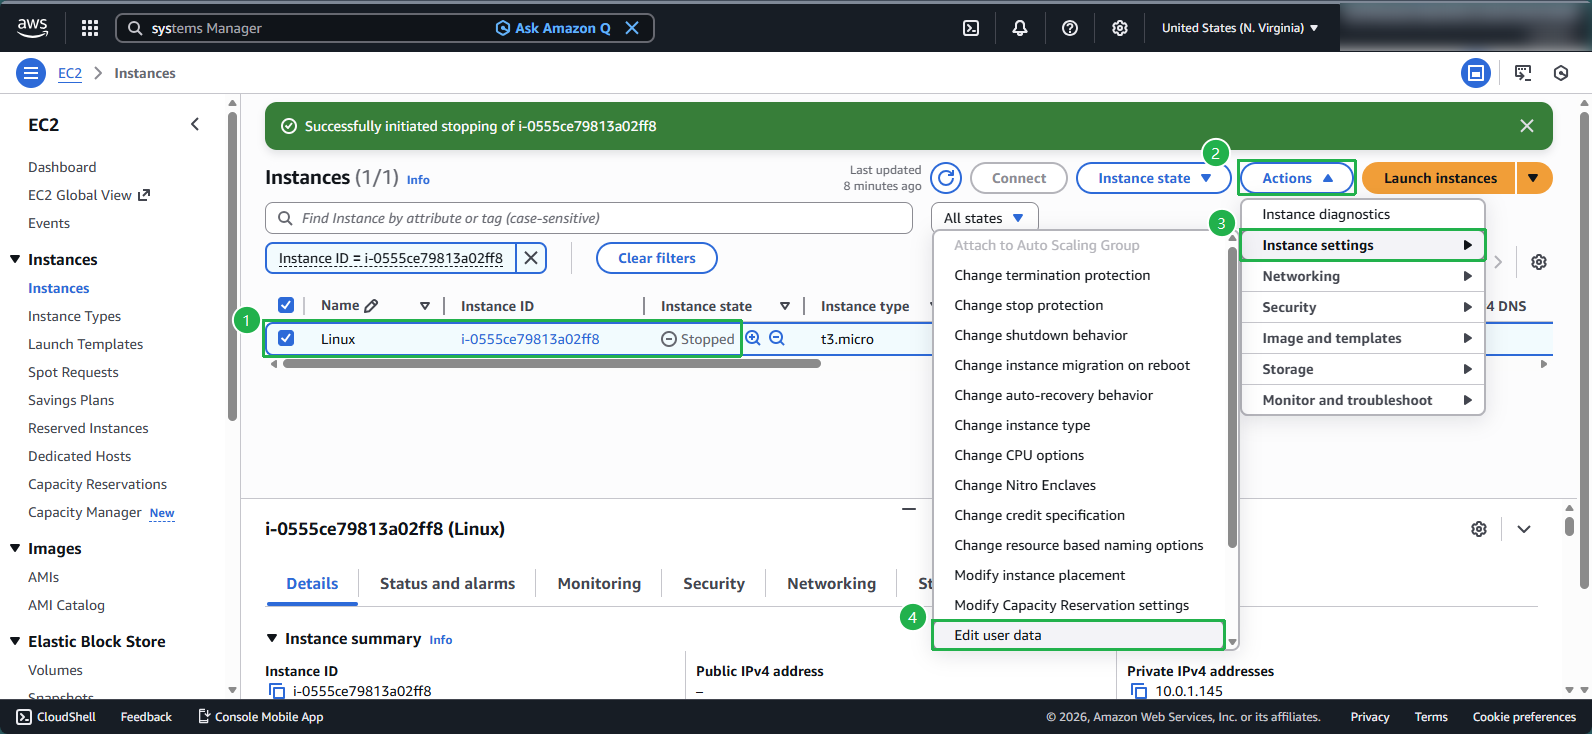
Access the user data settings:
- With the instance selected, click Actions
- Navigate to Instance settings > Edit user data
Configure the cloud-init script:
- Select Modify user data as text
- Enter the following cloud-init configuration, replacing the placeholder with your actual public key:
Content-Type: multipart/mixed; boundary="//" MIME-Version: 1.0 --// Content-Type: text/cloud-config; charset="us-ascii" MIME-Version: 1.0 Content-Transfer-Encoding: 7bit Content-Disposition: attachment; filename="cloud-config.txt" #cloud-config cloud_final_modules: - [users-groups, once] users: - name: ec2-user ssh-authorized-keys: - ssh-rsa AAAAB3NzaC1yc2EAAAADAQA......+xZy/pOTTV new key- Replace
ec2-userwith the appropriate username for your Linux distribution if different - Click Save

⚠️ Warning: The username varies by Linux distribution. Common examples include, refer to: Connect to your Linux instance using SSH, General connection prerequisites
- Amazon Linux:
ec2-user - Ubuntu:
ubuntu - RHEL:
ec2-userorroot - Debian:
admin - SUSE:
ec2-userorroot
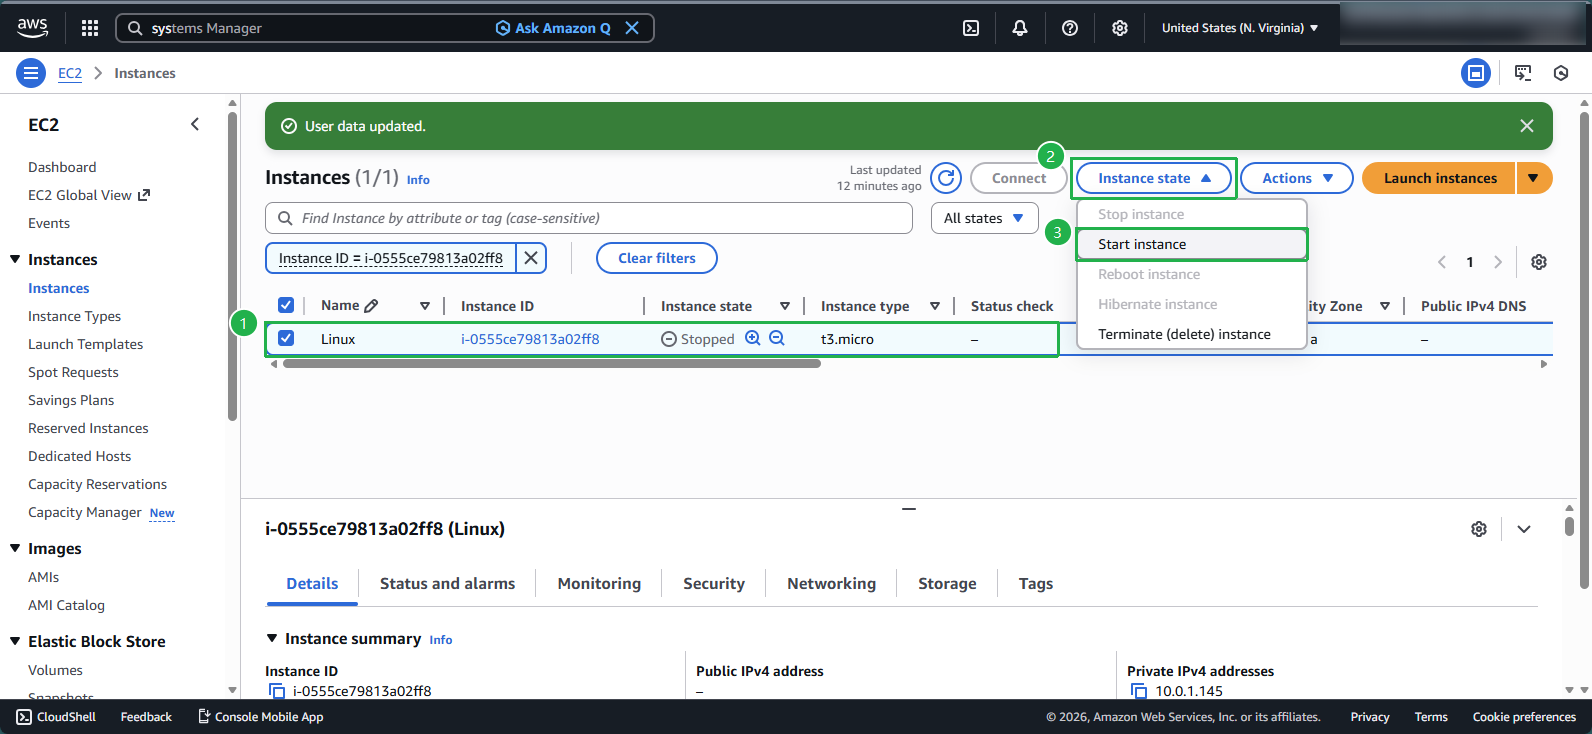
Step 4: Restart the Instance
Start the EC2 instance:
- With the instance selected, click Instance state > Start instance
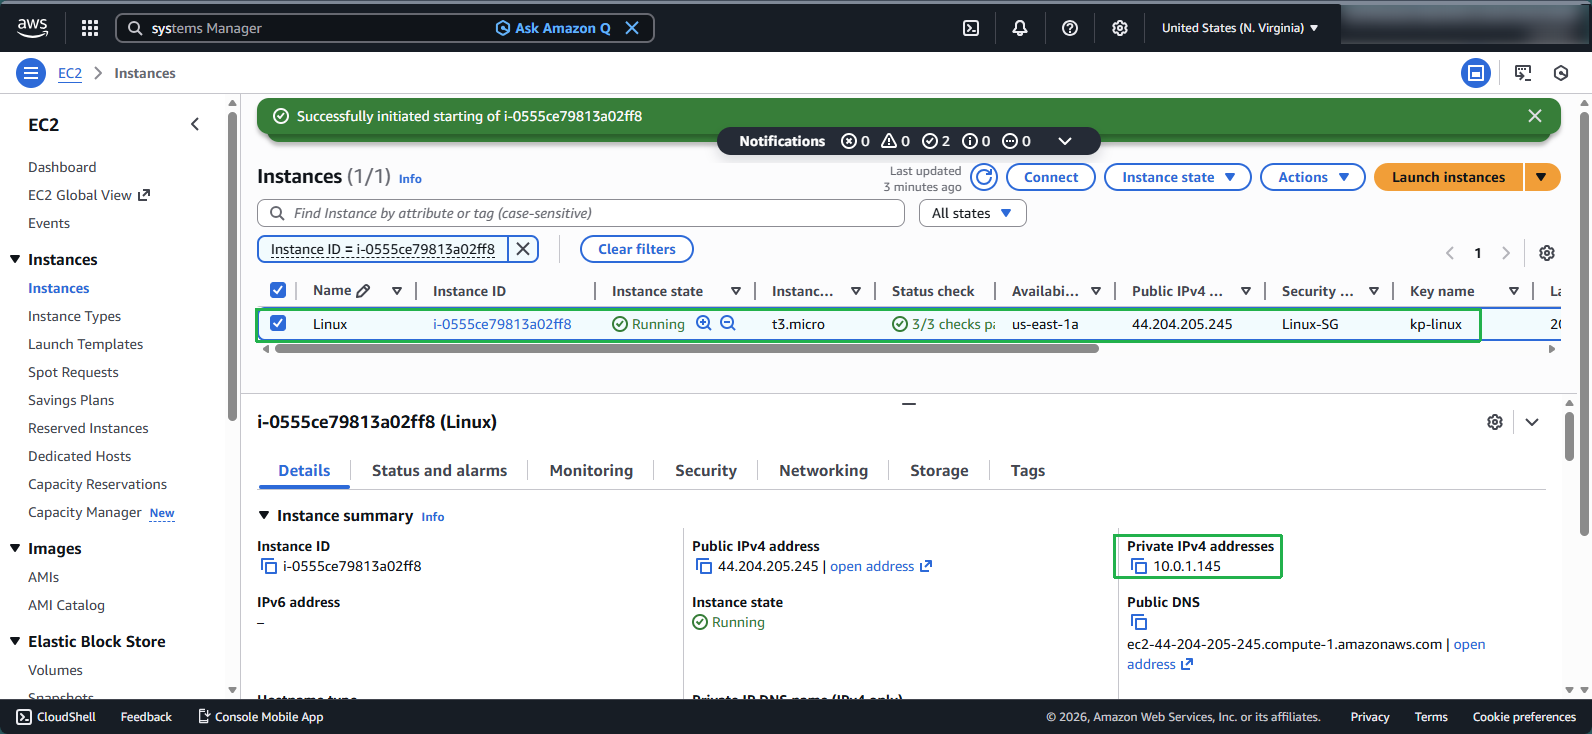
Wait for initialization:
- Allow approximately 5 minutes for the instance to start
- Verify that Status checks shows 3/3 checks passed
Step 5: Connect to the Instance
Prepare for connection:
- Note the instance’s Private IP address
Configure PuTTY:
- Enter the instance’s IP address
- Configure SSH authentication with your new private key
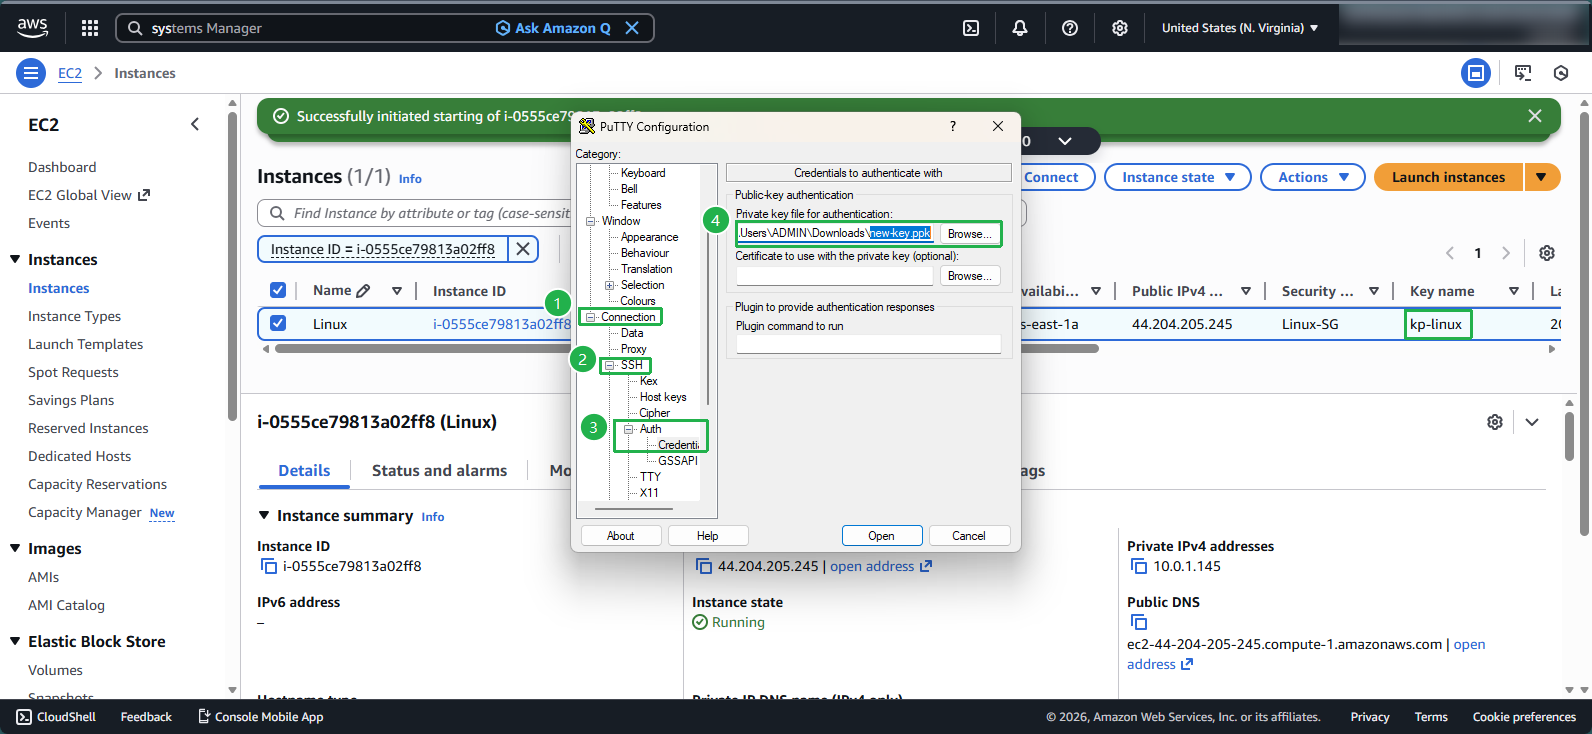
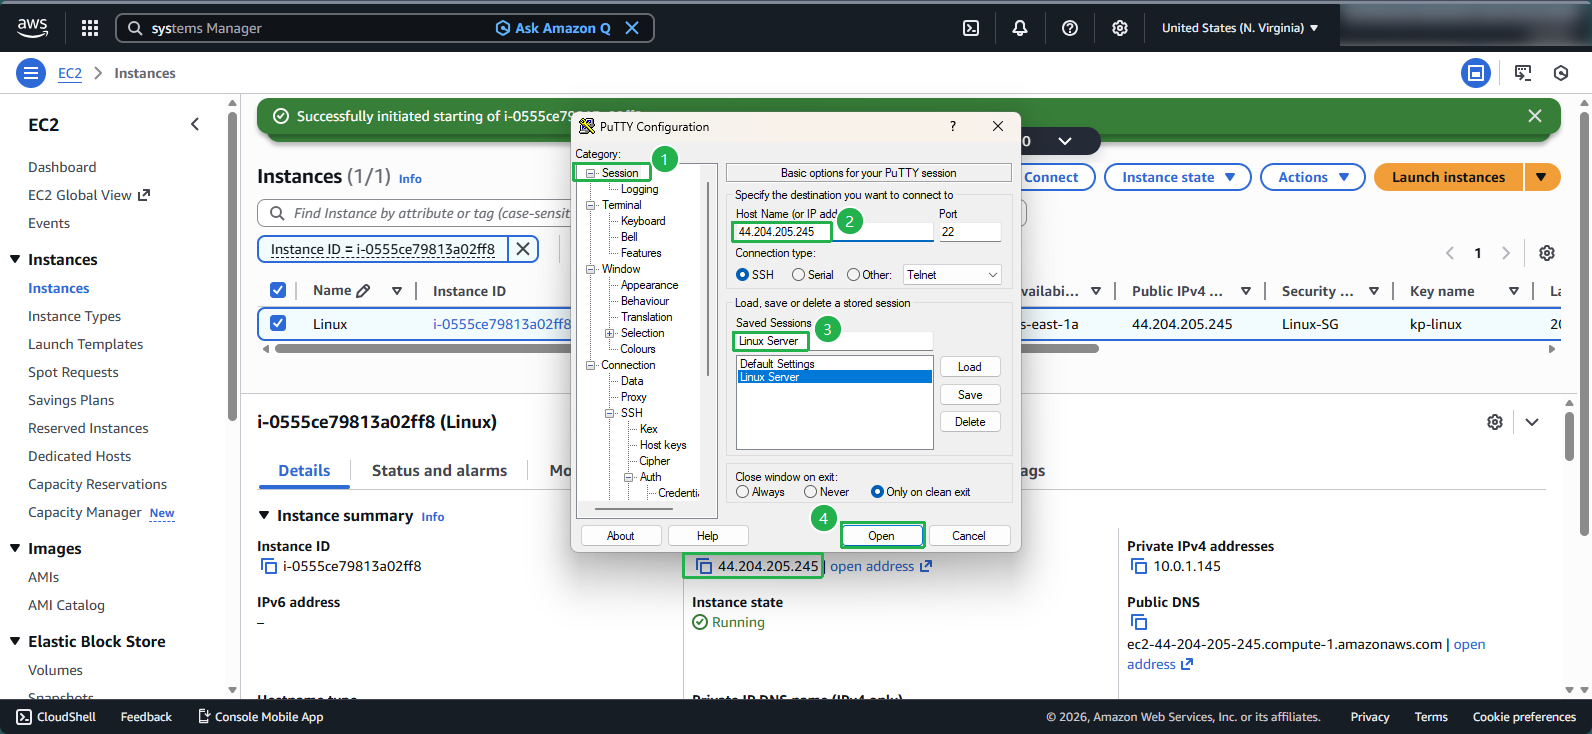
Establish the connection:
- Click Open to connect to your instance
- When prompted, enter the appropriate username
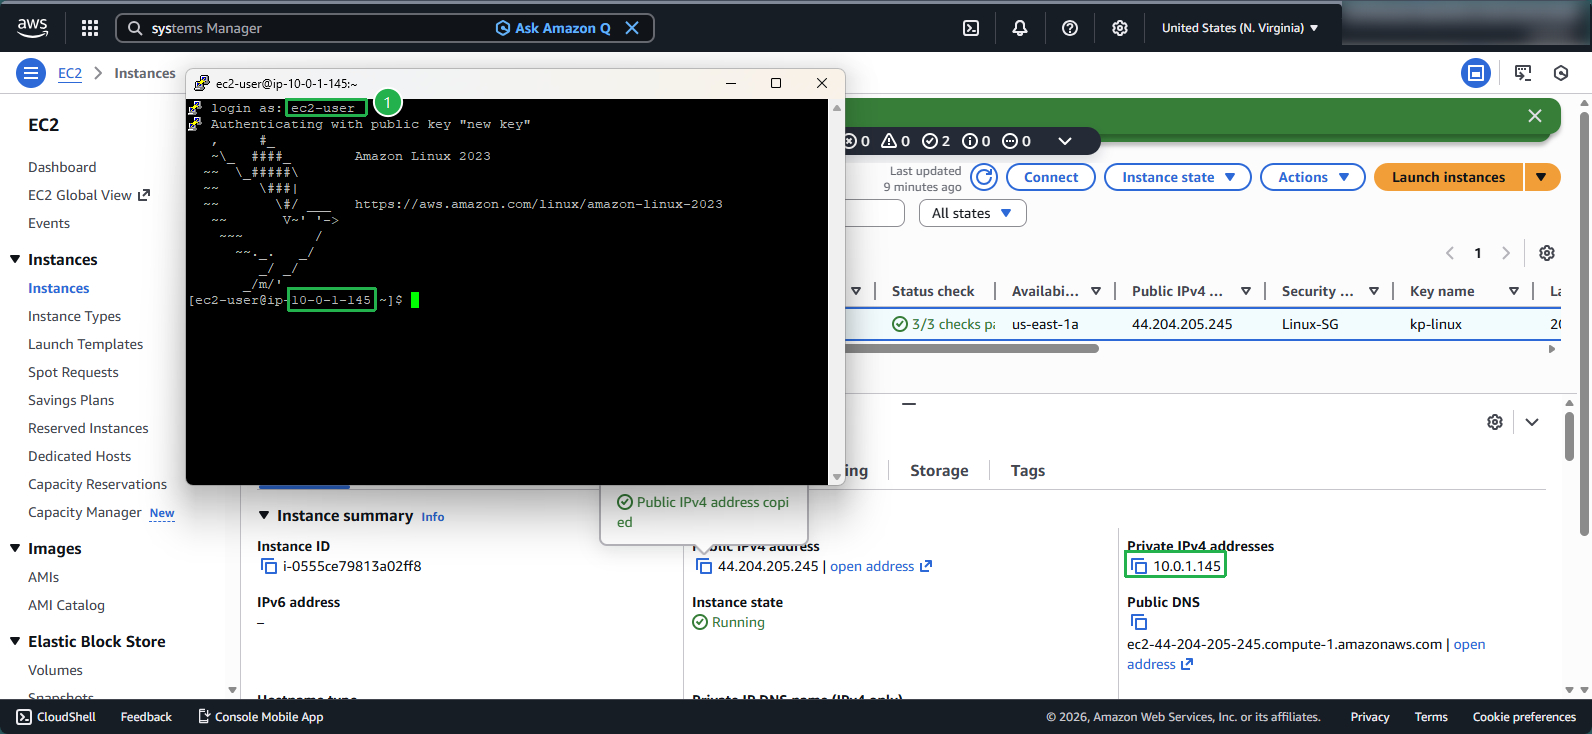
💡 Pro Tip: You can verify the key was properly added by checking the ~/.ssh/authorized_keys file on your instance. Each line in this file represents an authorized public key.
Important Considerations
🔒 Security Note: The cloud-init process only runs once when the instance starts. If you make a mistake in your user data configuration, you’ll need to stop and start the instance again to trigger another run.
ℹ️ Information: This method works because cloud-init processes user data during instance initialization, allowing you to inject configuration changes like SSH keys without needing to access the instance first.