Installing phpMyAdmin
Install phpMyAdmin
phpMyAdmin is a web-based database management tool that you can use to view and edit MySQL databases on your EC2 instances. Follow the steps below to install and configure phpMyAdmin on your Amazon Linux instance.
Install the required dependency
sudo dnf install php-mbstring php-xml -y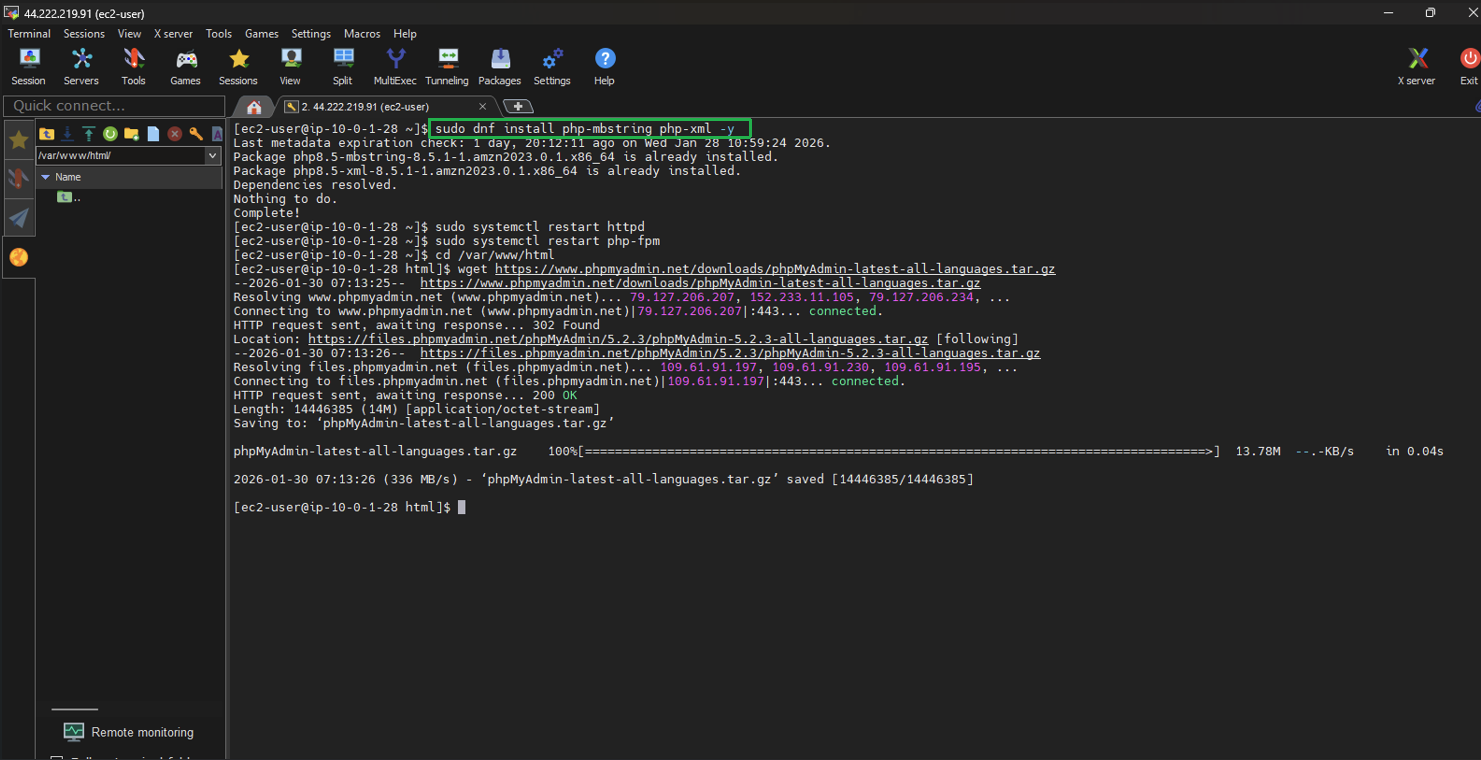
Restart Apache
sudo systemctl restart httpdRestart php-fpm.
sudo systemctl restart php-fpm
Navigate to the Apache document root at /var/www/html.
cd /var/www/htmlDownload phpMyAdmin
wget https://www.phpmyadmin.net/downloads/phpMyAdmin-latest-all-languages.tar.gz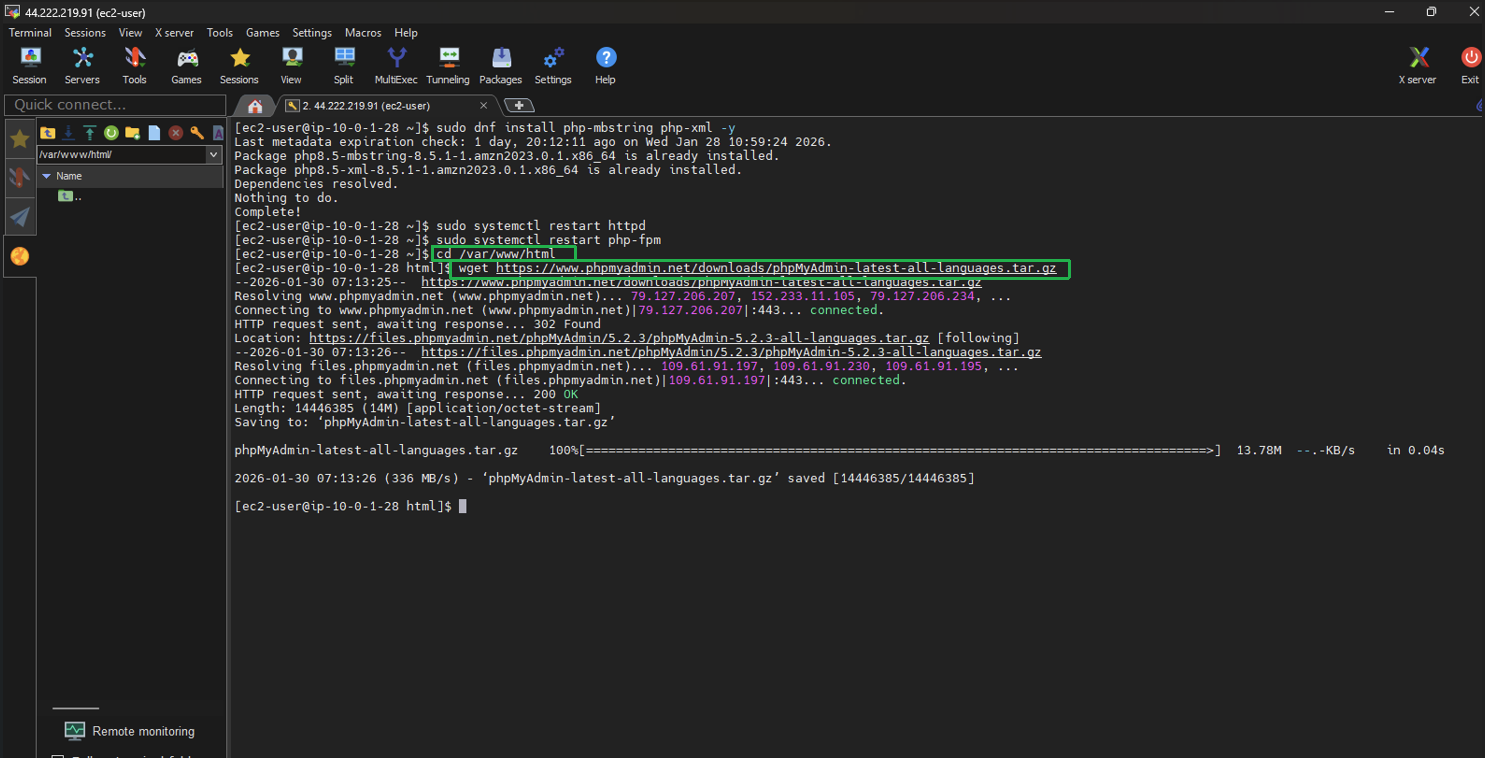
Create a folder phpMyAdmin and extract it with the following command.
mkdir phpMyAdmin && tar -xvzf phpMyAdmin-latest-all-languages.tar.gz -C phpMyAdmin --strip-components 1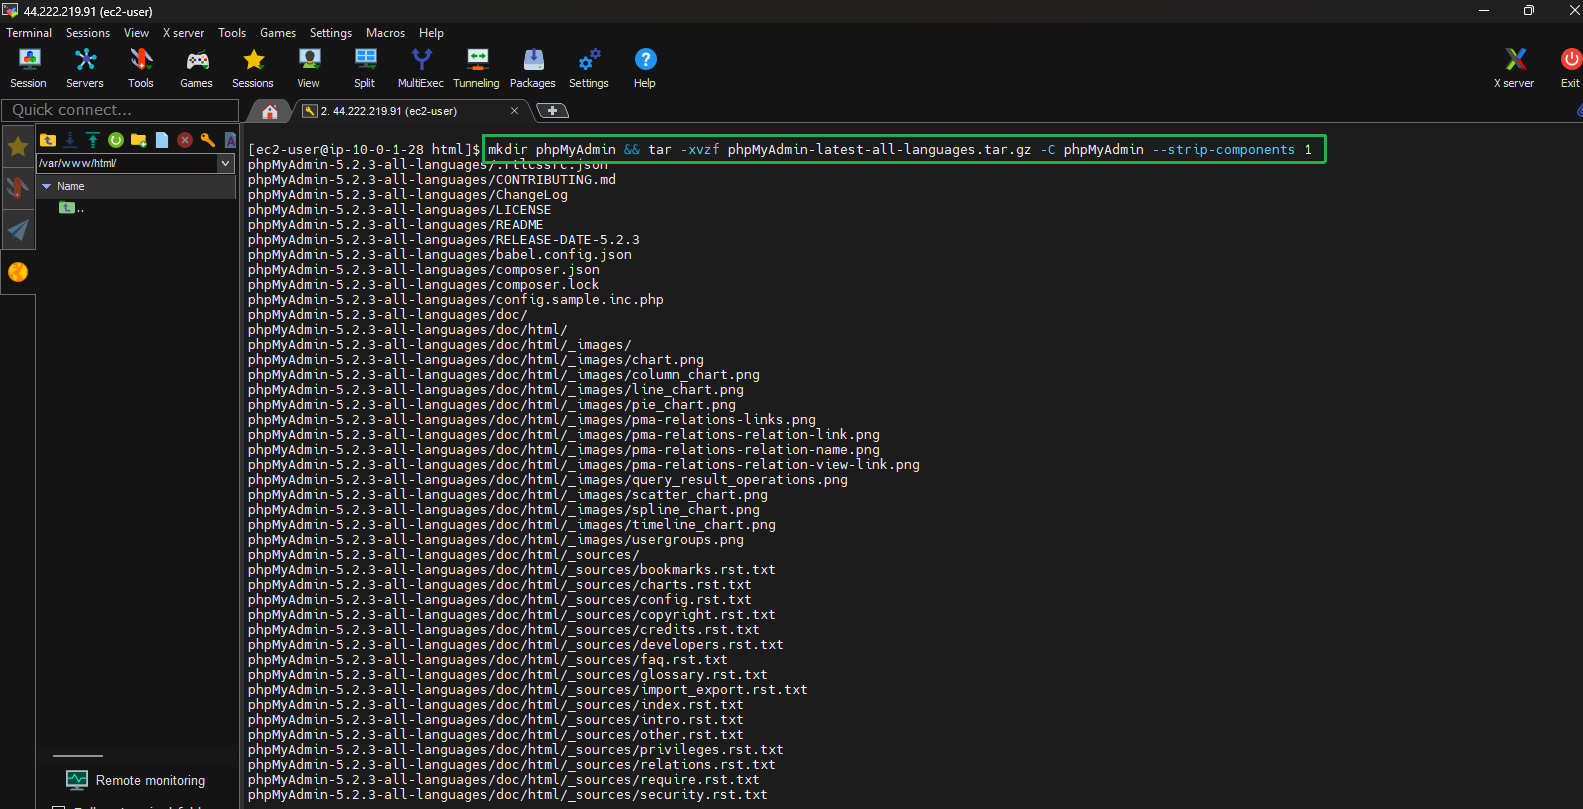
Remove phpMyAdmin-latest-all-languages.tar.gz tarball.
rm phpMyAdmin-latest-all-languages.tar.gz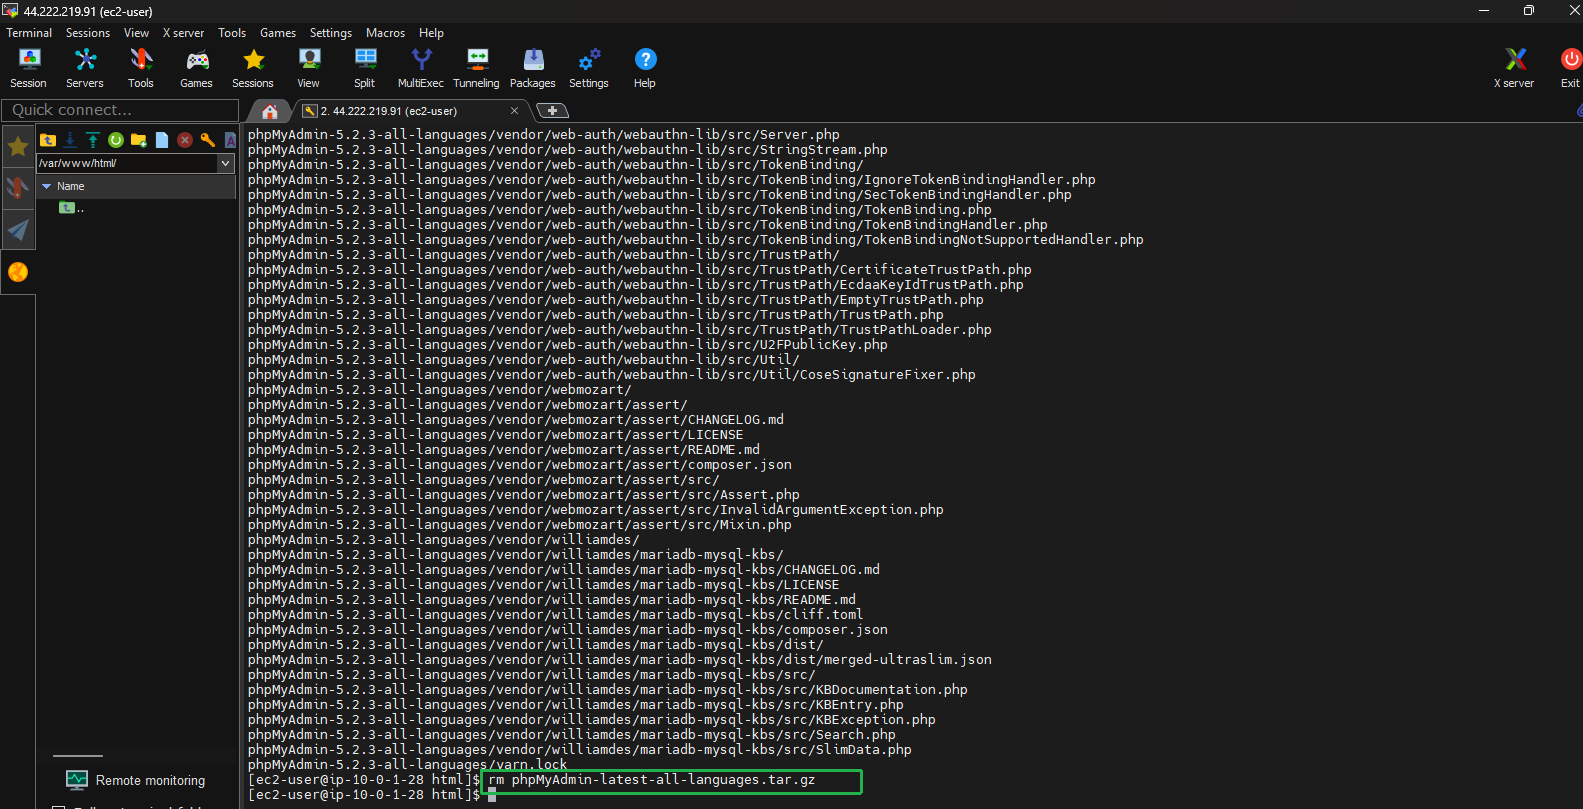
If the MySQL server is not running, start it
sudo systemctl start mariadb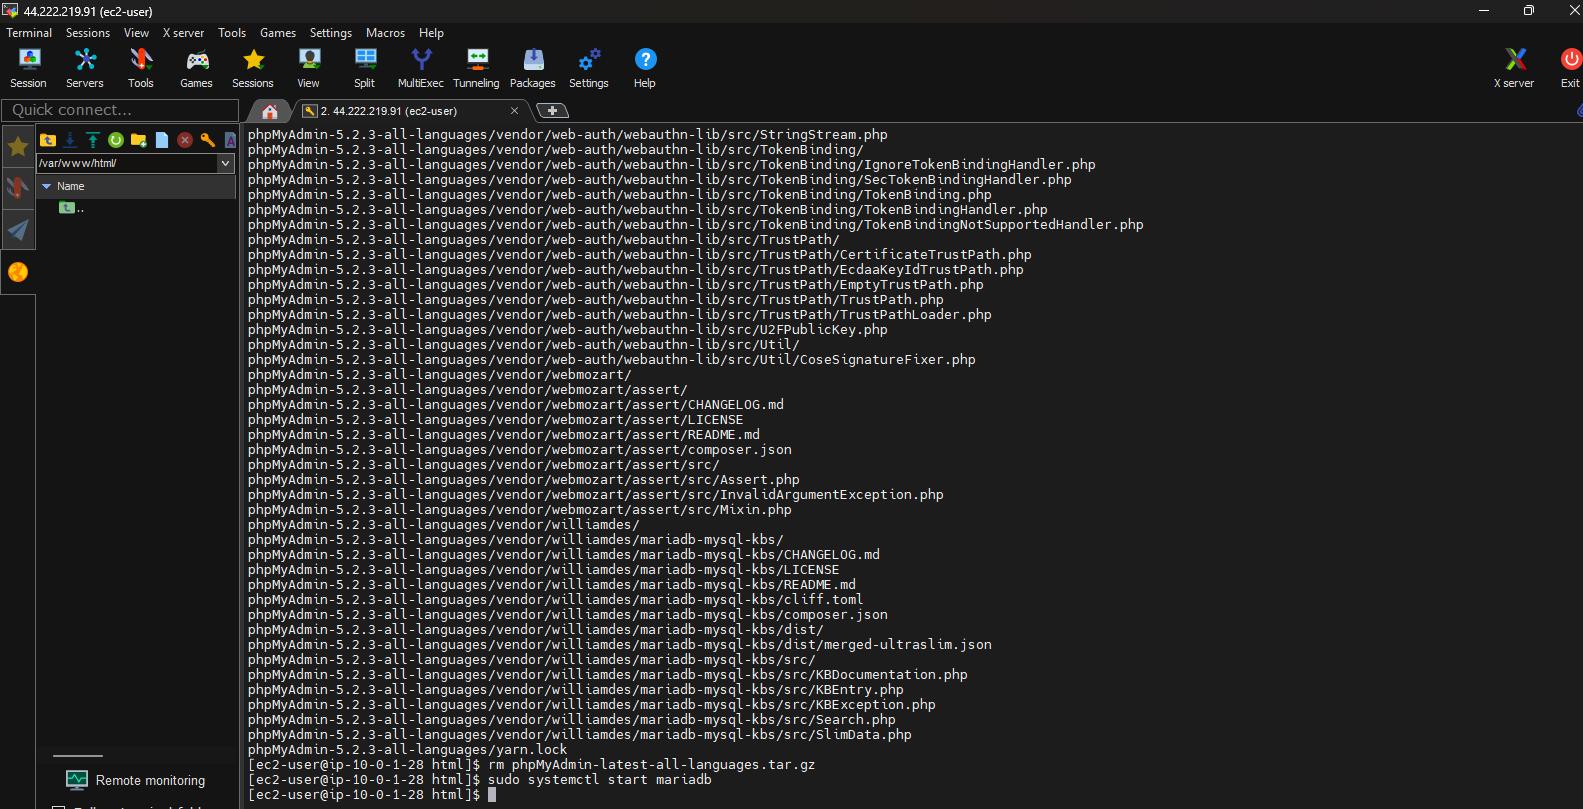
In the EC2 interface
- Select Instances
- Select Linux-instance
- Copy Public IPv4 DNS
Paste Public IPv4 DNS into the browser with the following URL:
http://my.public.dns.amazonaws.com/phpMyAdmin
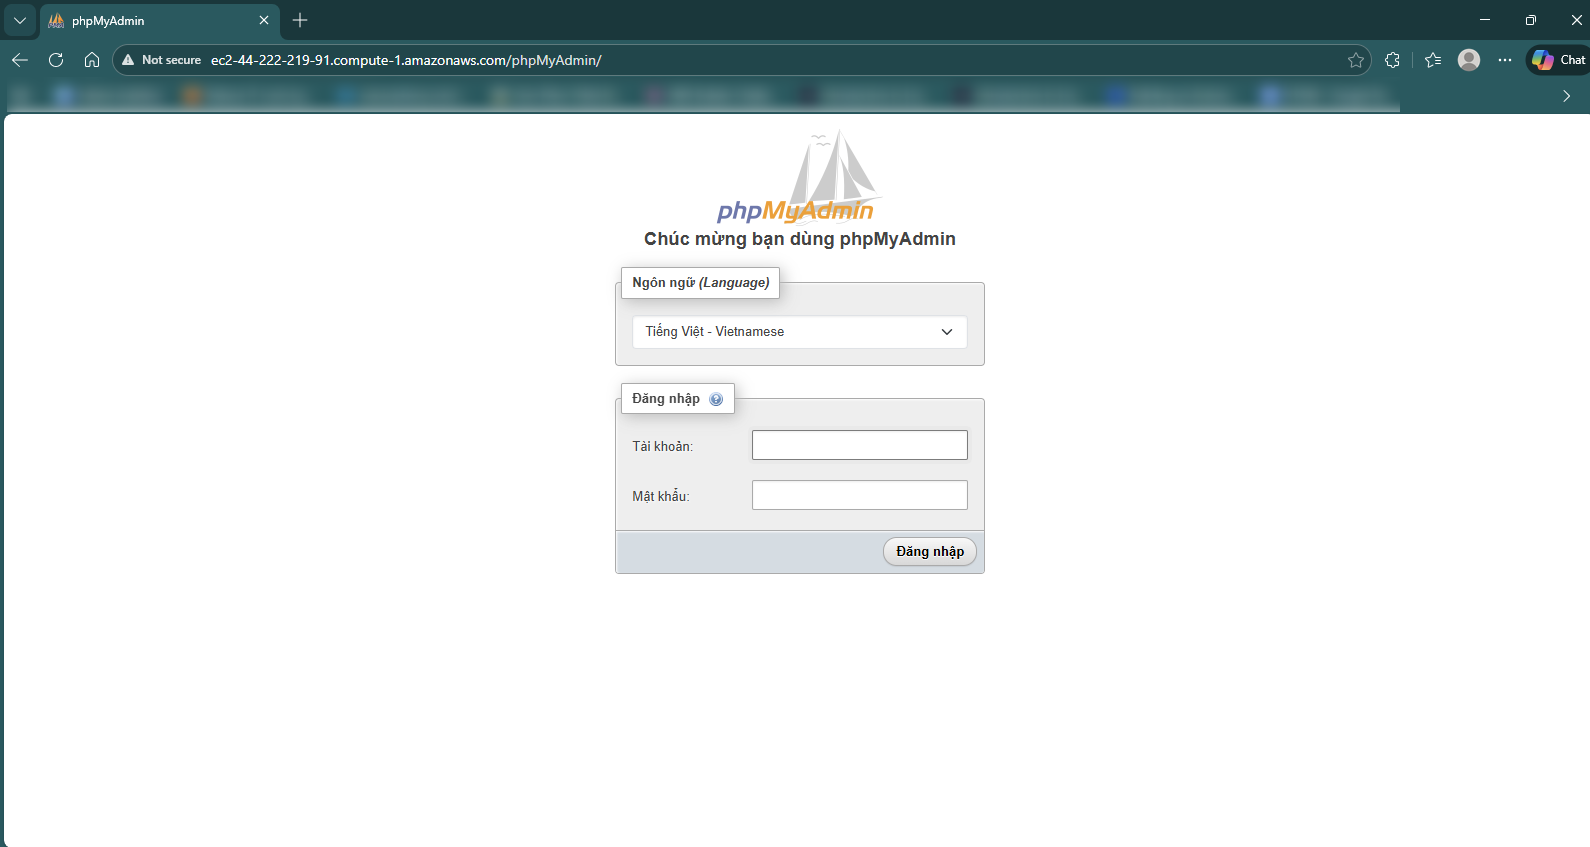
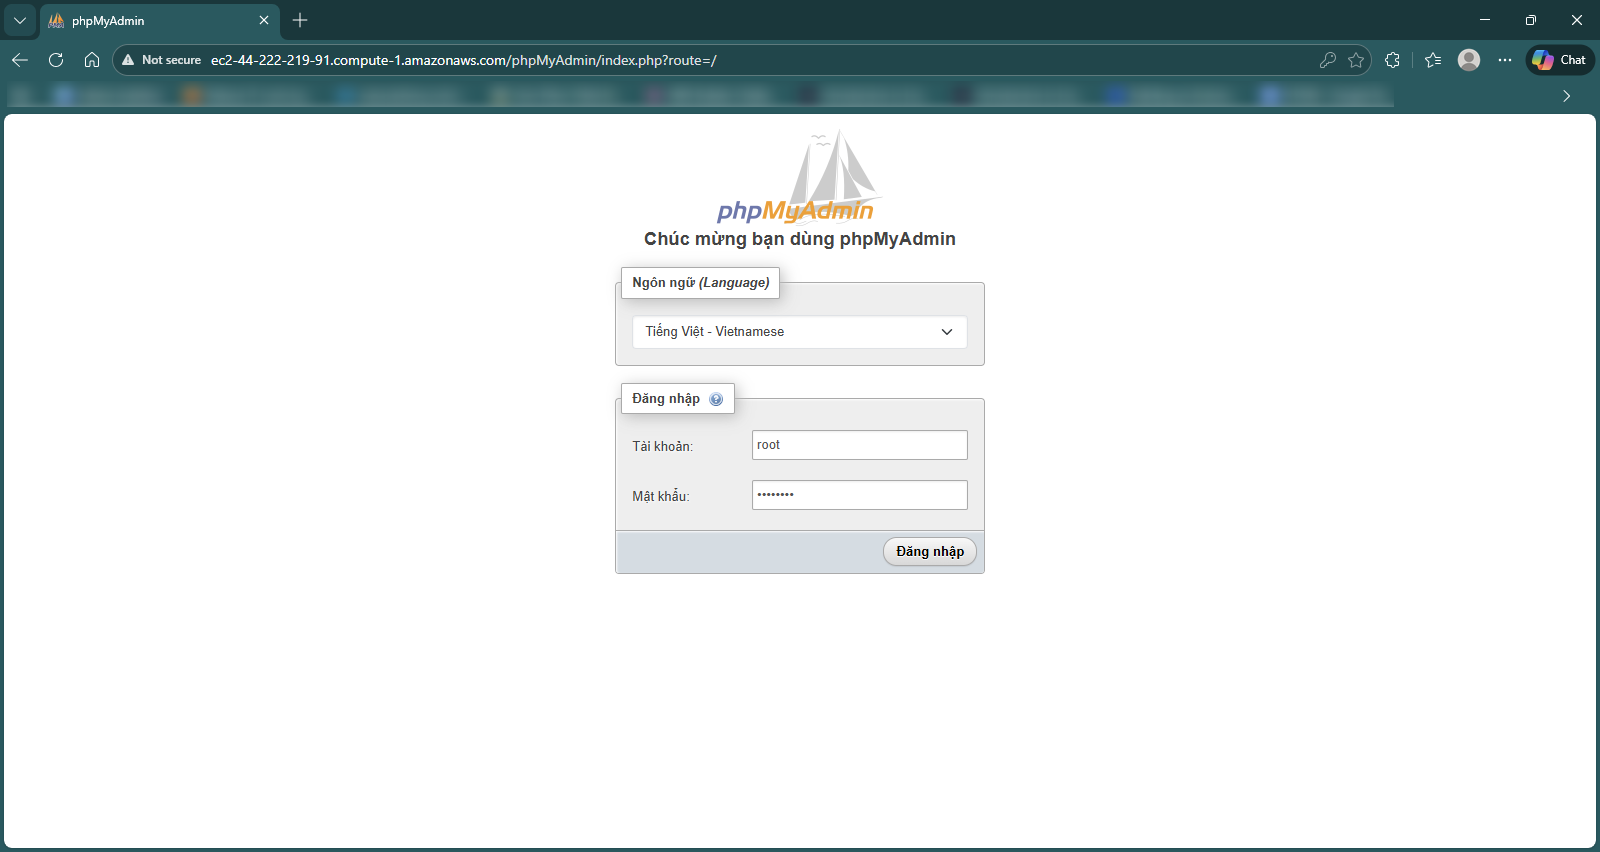
- You will see the phpMyAdmin login page.
- Proceed to login with user name: root and password: 123Admin
- Select Login
The root account and password have been configured in the database server security configuration step
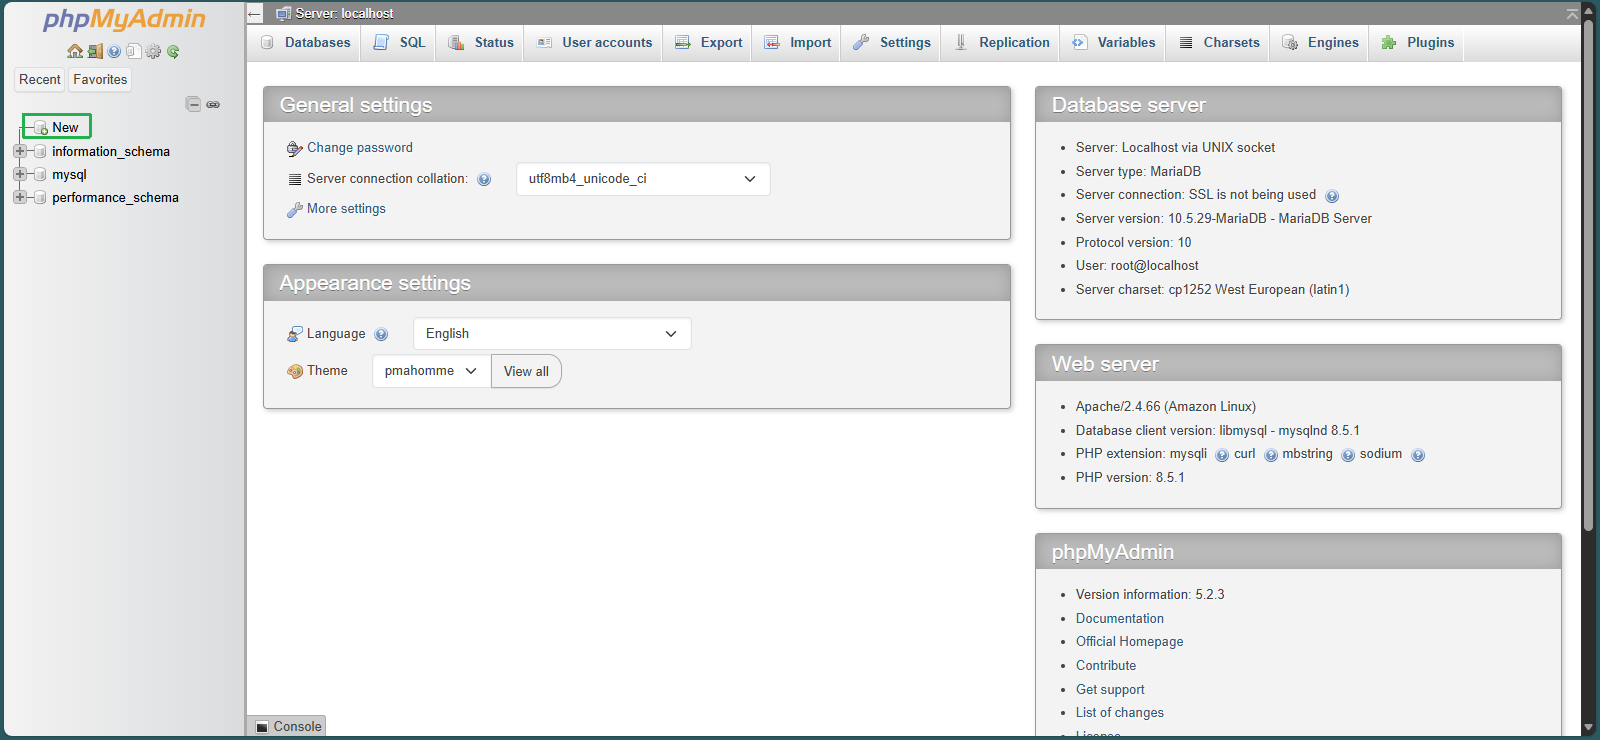
- In the phpMyAdmin interface
- Create a new database by selecting New
- Database Configuration
- Enter database name as awsuser
- Then select Create
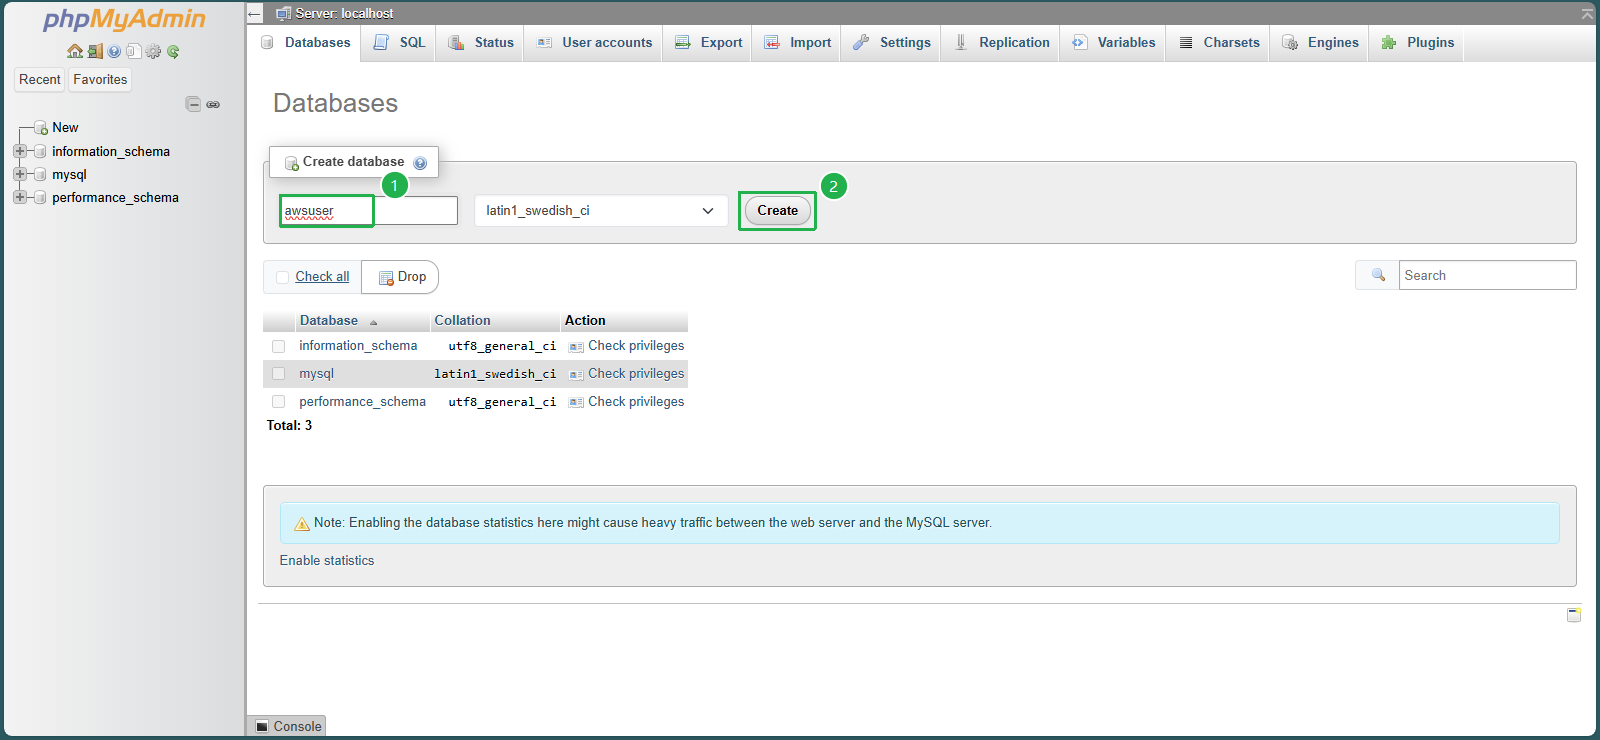
- Finish creating a database
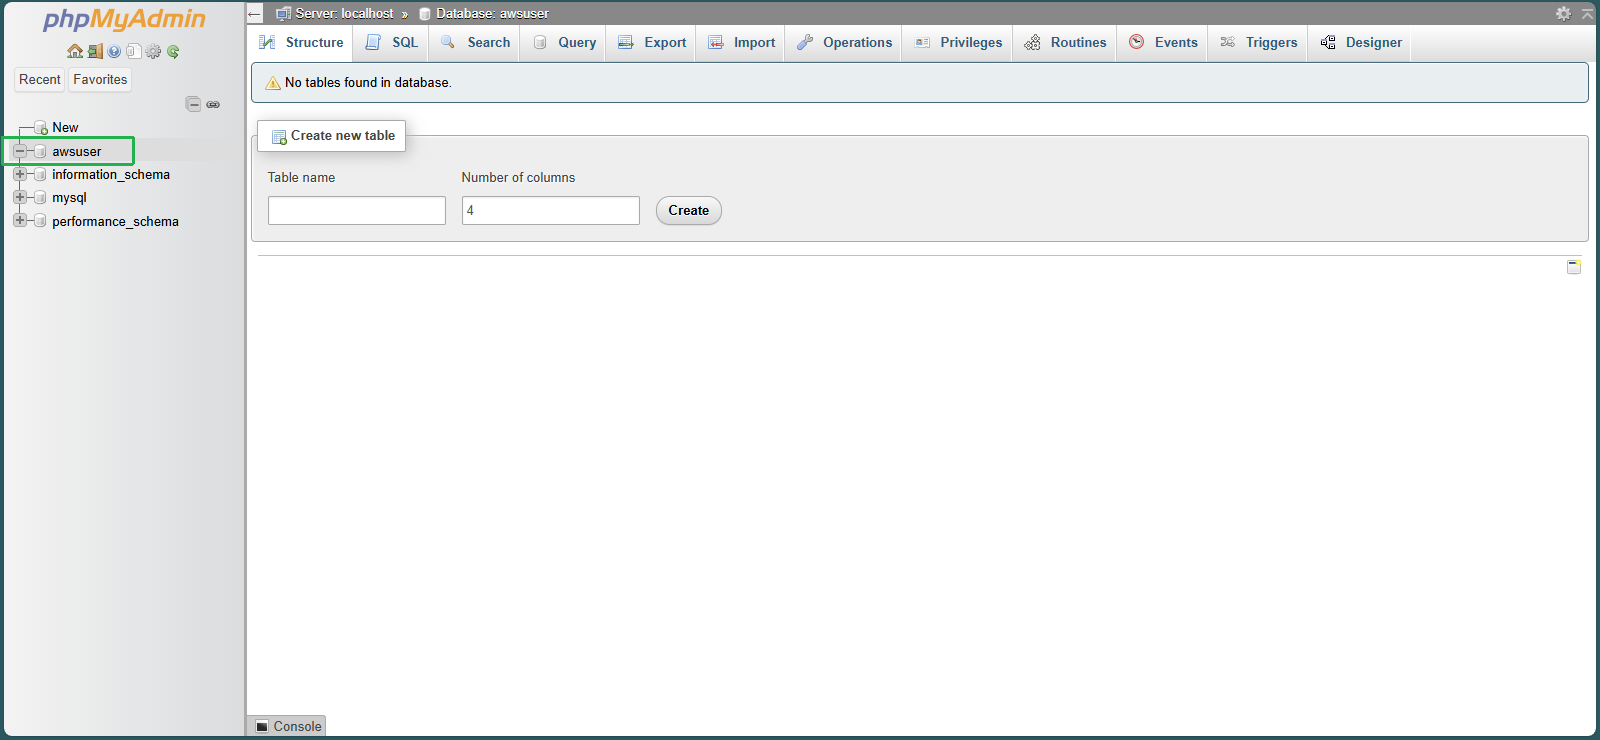
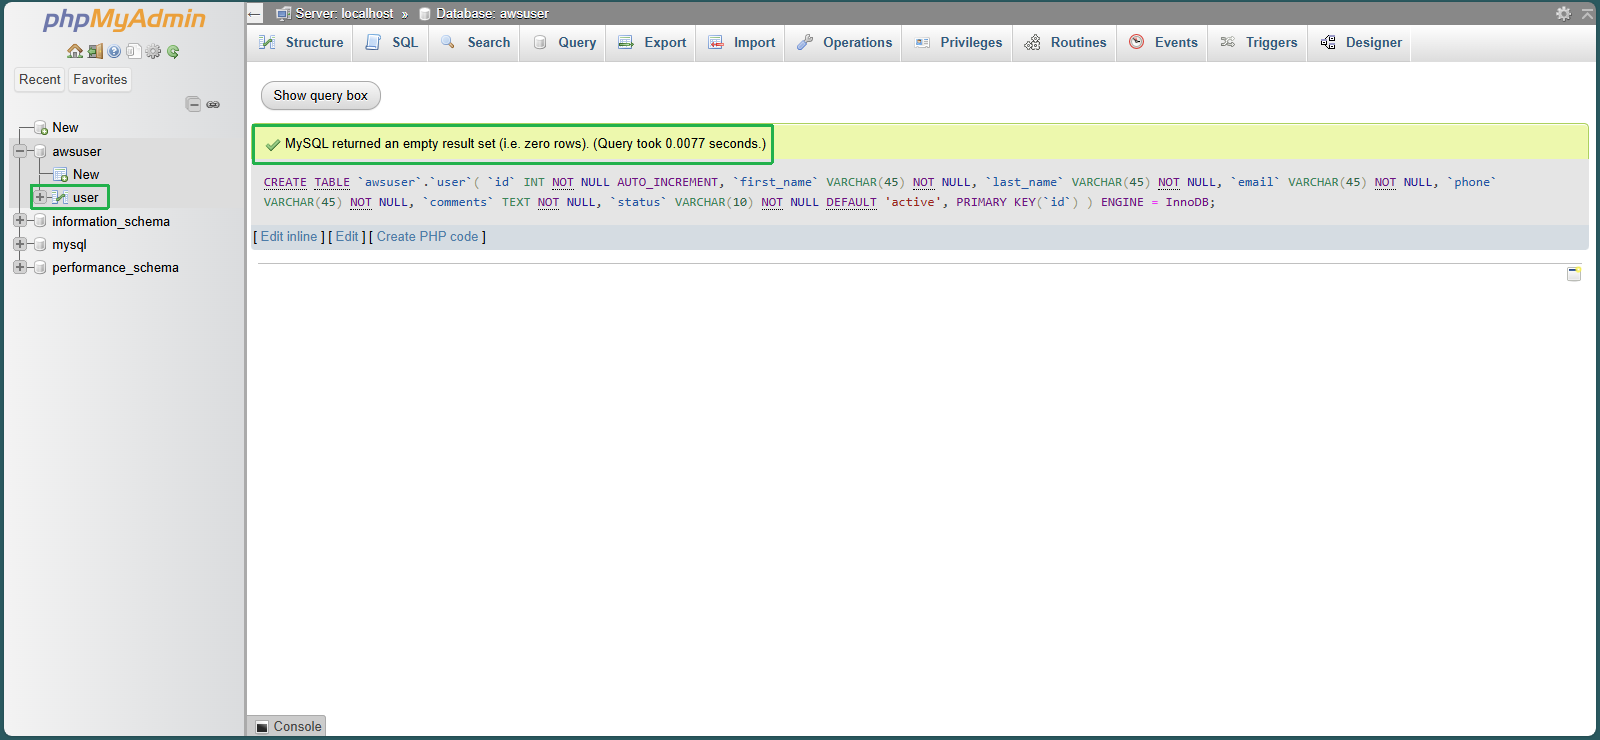
- Perform step SQL Schema to create a table user to manage user information for the database. Execute the following SQL query:
CREATE TABLE `awsuser`.`user` ( `id` INT NOT NULL AUTO_INCREMENT , `first_name` VARCHAR(45) NOT NULL , `last_name` VARCHAR(45) NOT NULL , `email` VARCHAR(45) NOT NULL , `phone ` VARCHAR(45) NOT NULL , `comments` TEXT NOT NULL , `status` VARCHAR(10) NOT NULL DEFAULT 'active' , PRIMARY KEY (`id`)) ENGINE = InnoDB;
- Select awsuser database just created
- Select SQL
- Paste the code SQL query in
- Select Format to customize the format of SQL
- Then select Go
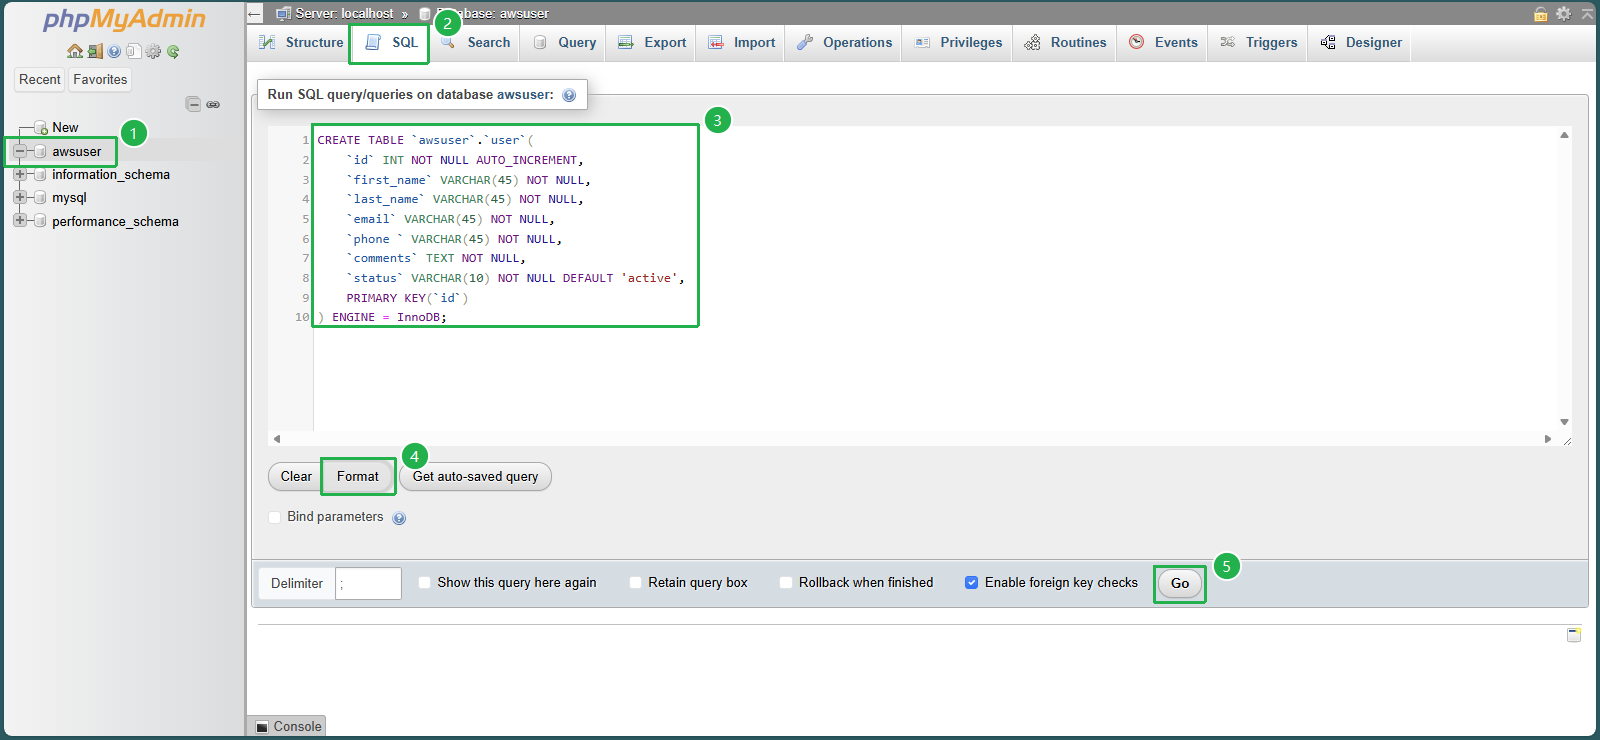
- Complete database creation and create tables in the database.
Information about the database must be accurate and stored to perform the configuration for the application