Remote Desktop to EC2-Ubuntu
Remote Desktop to EC2-Ubuntu
Some users prefer the Desktop interface of the Windows operating system, and transitioning to the Terminal interface of the Linux operating system can be a bit challenging. This guide will walk you through installing a desktop interface on Ubuntu, which is a Debian GNU/Linux-based computer operating system. This will allow you to seamlessly switch between these two interfaces.
- Launch an EC2 Instance with Ubuntu Operating System
- Open the EC2 console at: https://console.aws.amazon.com/ec2/
- Click Launch Instance
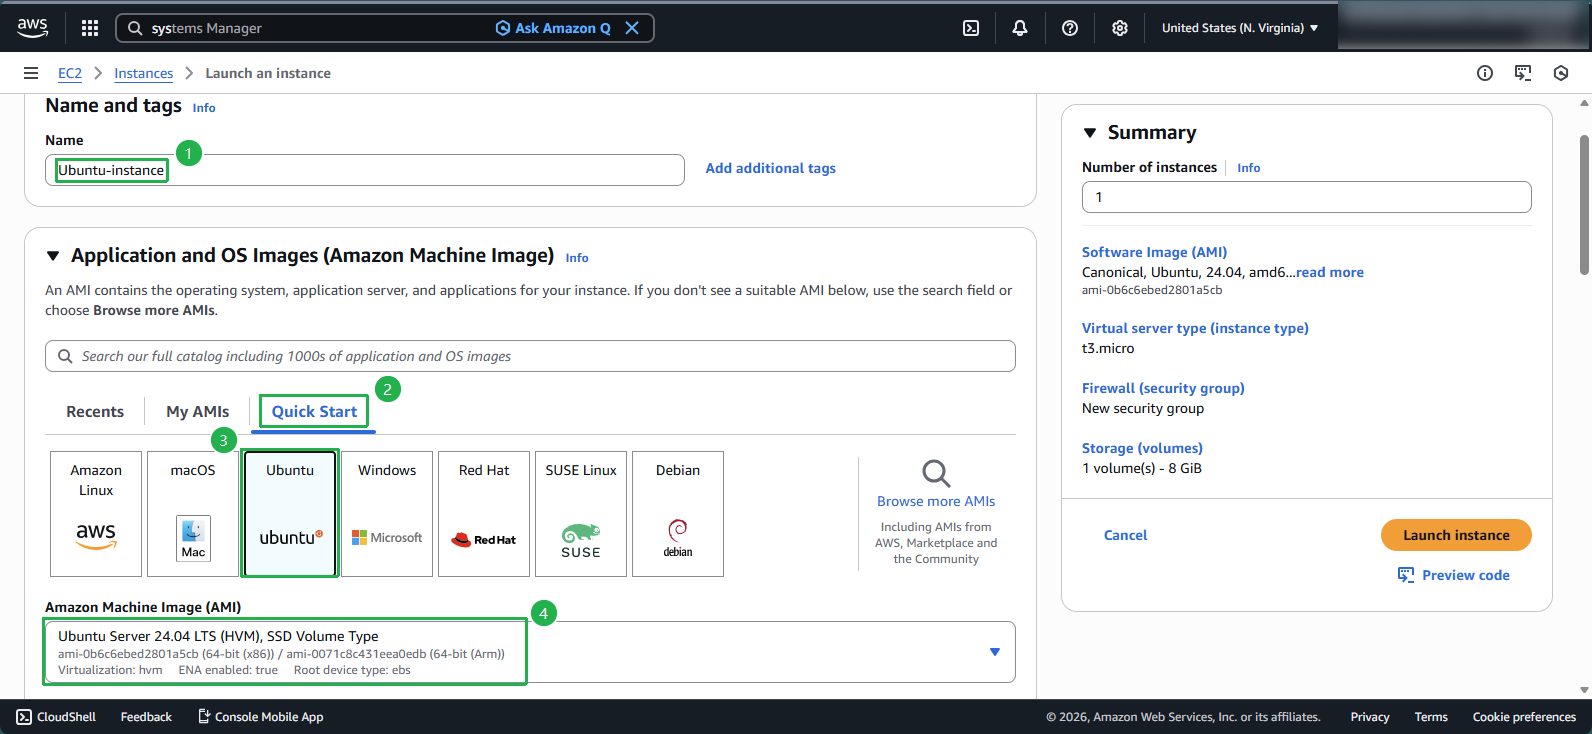
- In the AMI selection step, use the following information:
- Name:
Ubuntu-instance - Choose Quick Start
- Select Ubuntu
- AMI: Ubuntu Server 24.04 LTS
- Name:
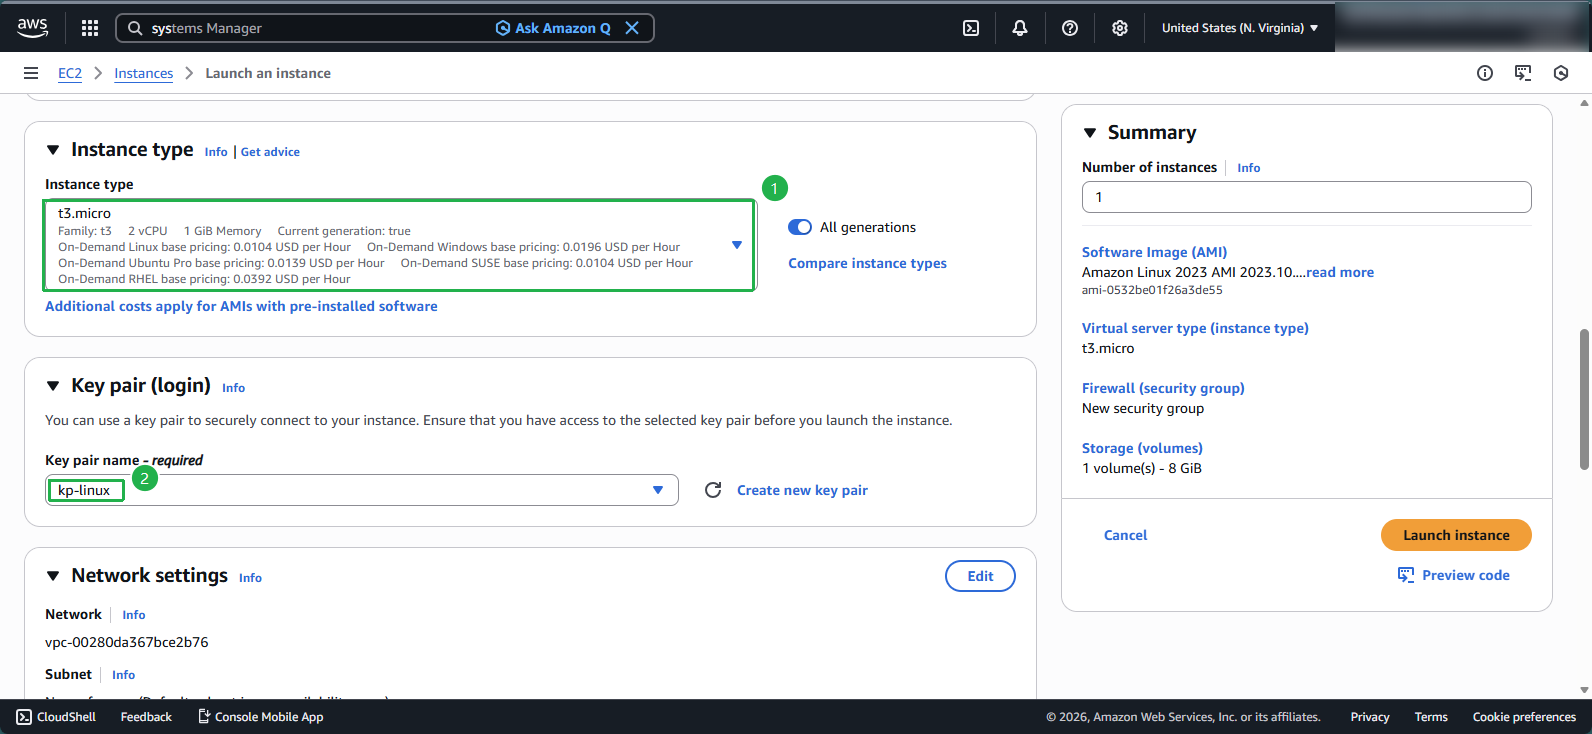
- In the Instance type step, choose t3.micro (or any other instance type)
- In the Key pair step, select or create a key pair
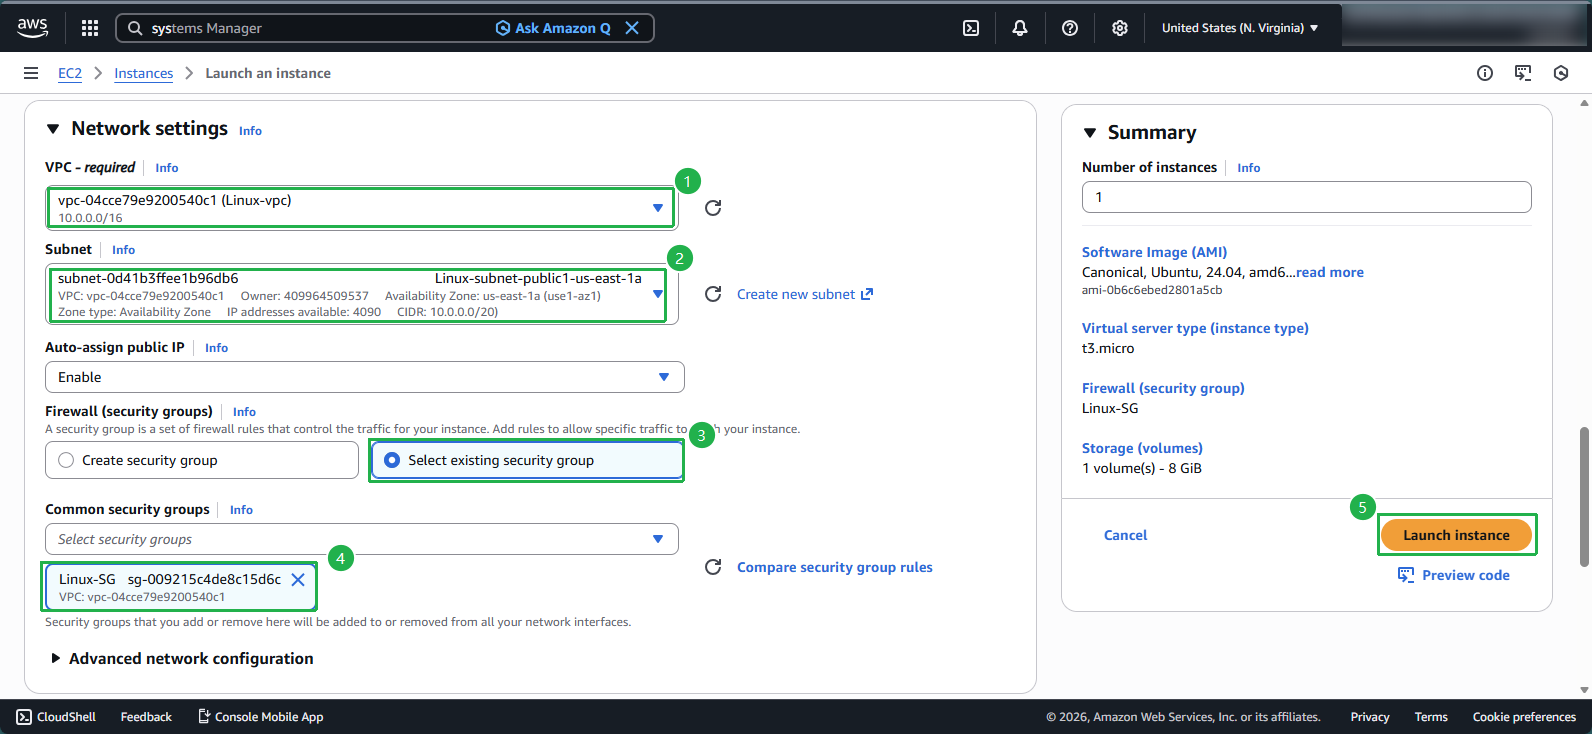
- In the Network step:
- Select Linux-vpc or create a new VPC
- In the Security group step, select Linux-SG or create a new security group
- Click Launch instance
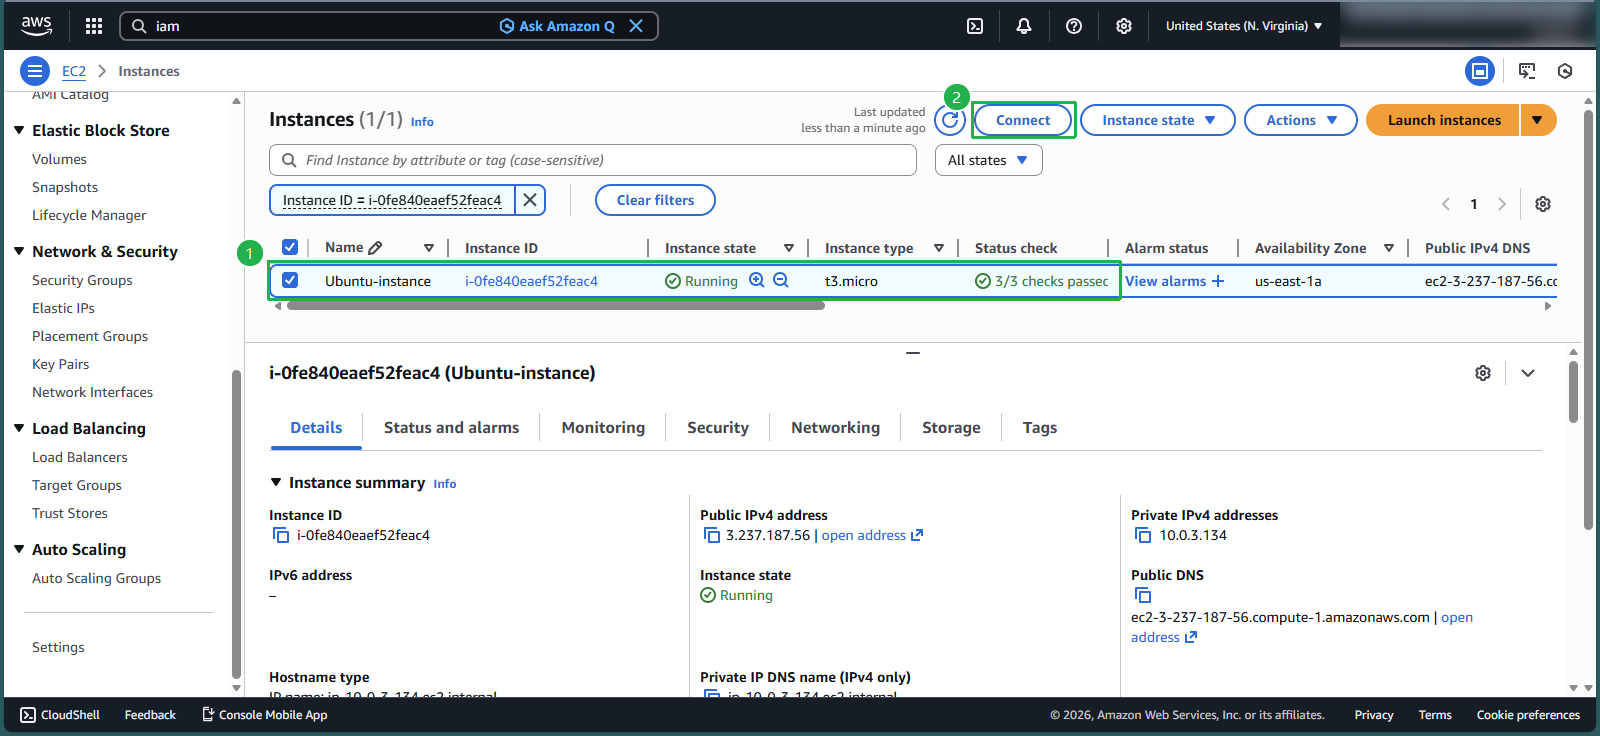
- Check Ubuntu-instance Status in the EC2 Console
- Verify that Ubuntu-instance is selected
- Ensure that the EC2 instance is in a Running state
- Connect to the EC2 Instance
- Choose Ubuntu-instance
- Click Connect
- Select EC2 Instance Connect
- Click Connect
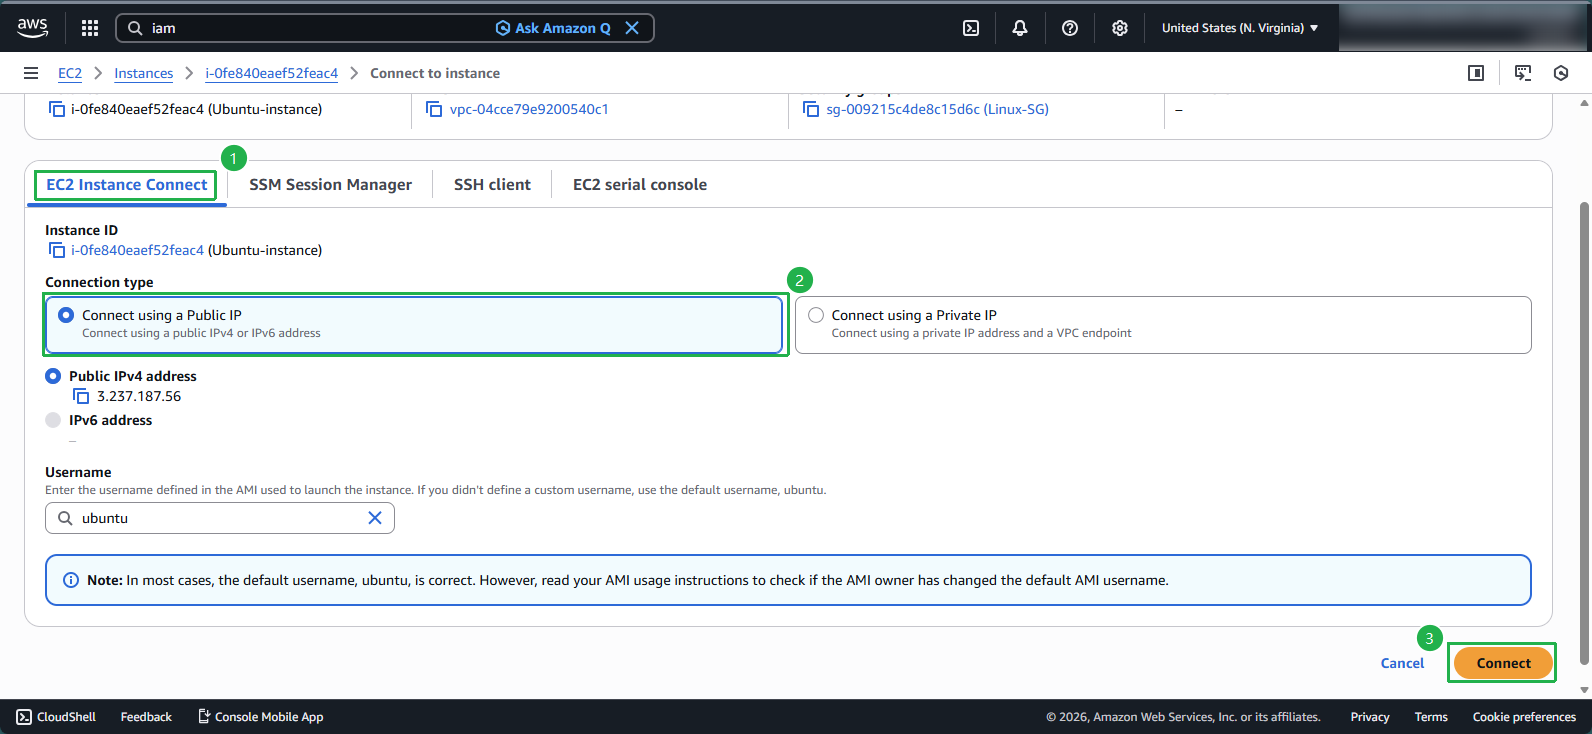
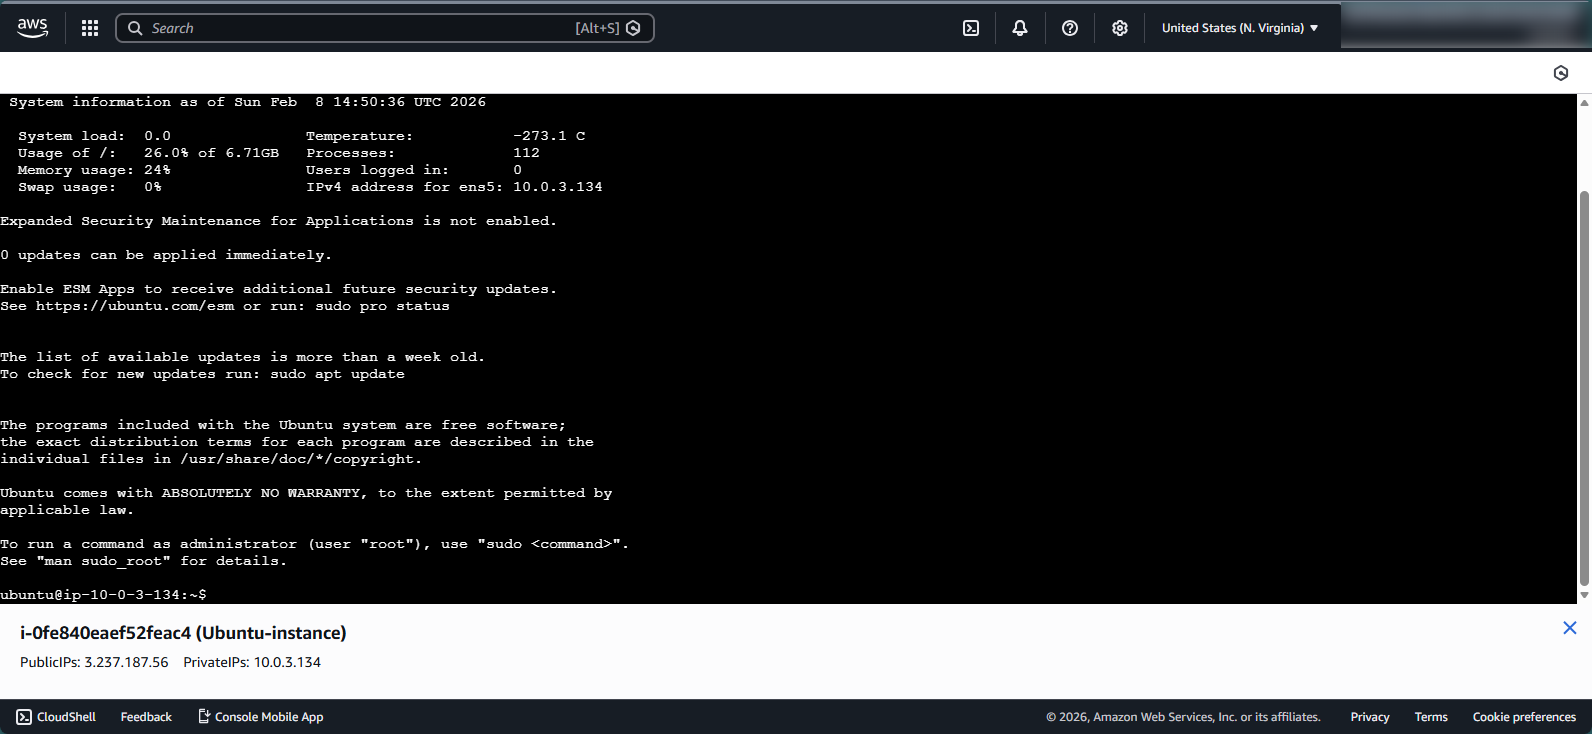
- In about 10 seconds, you will be redirected to the Terminal screen of Ubuntu-instance
- Install the Desktop Interface Environment on Ubuntu-instance
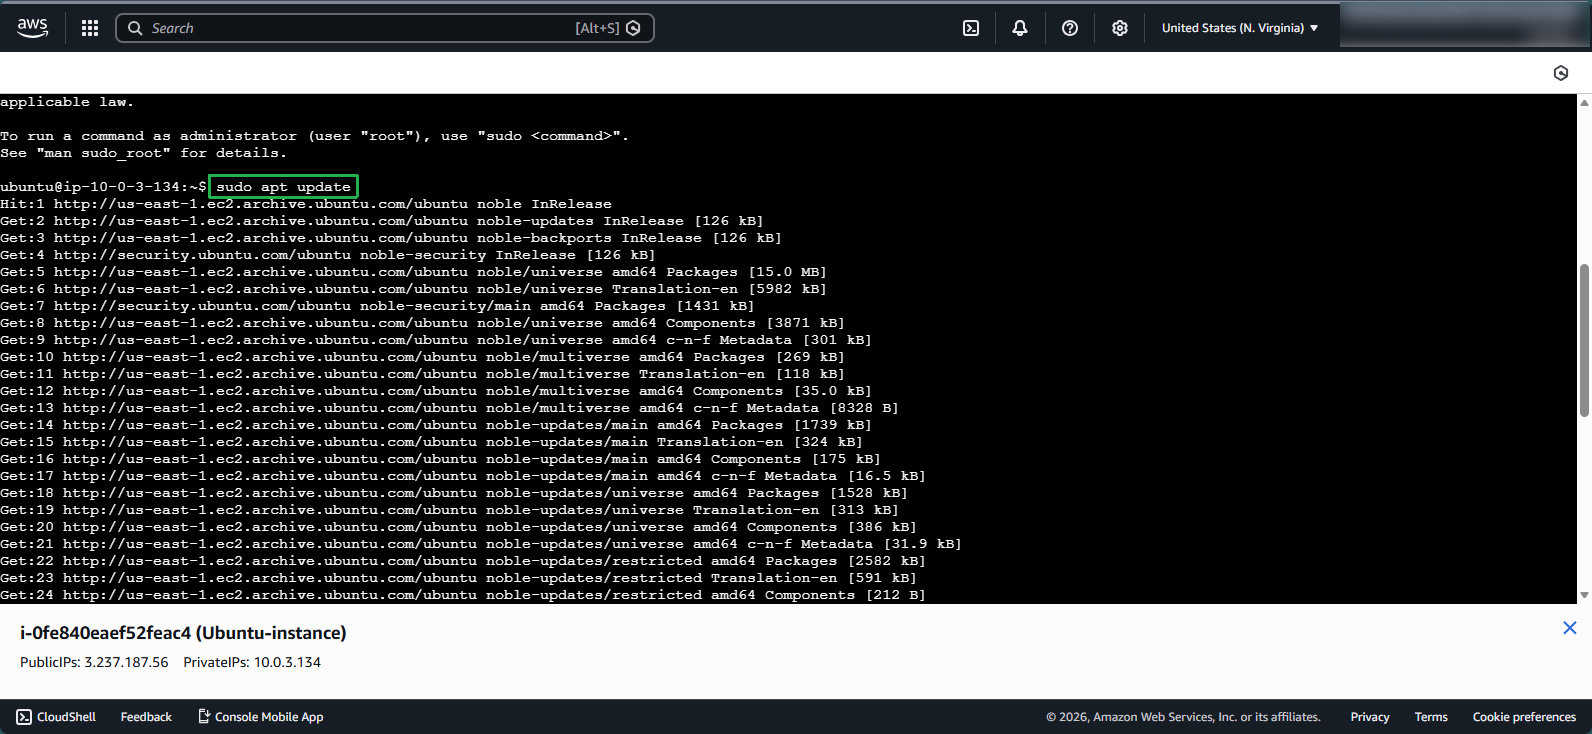
- Run the command:
sudo apt updateto update the list of available packages
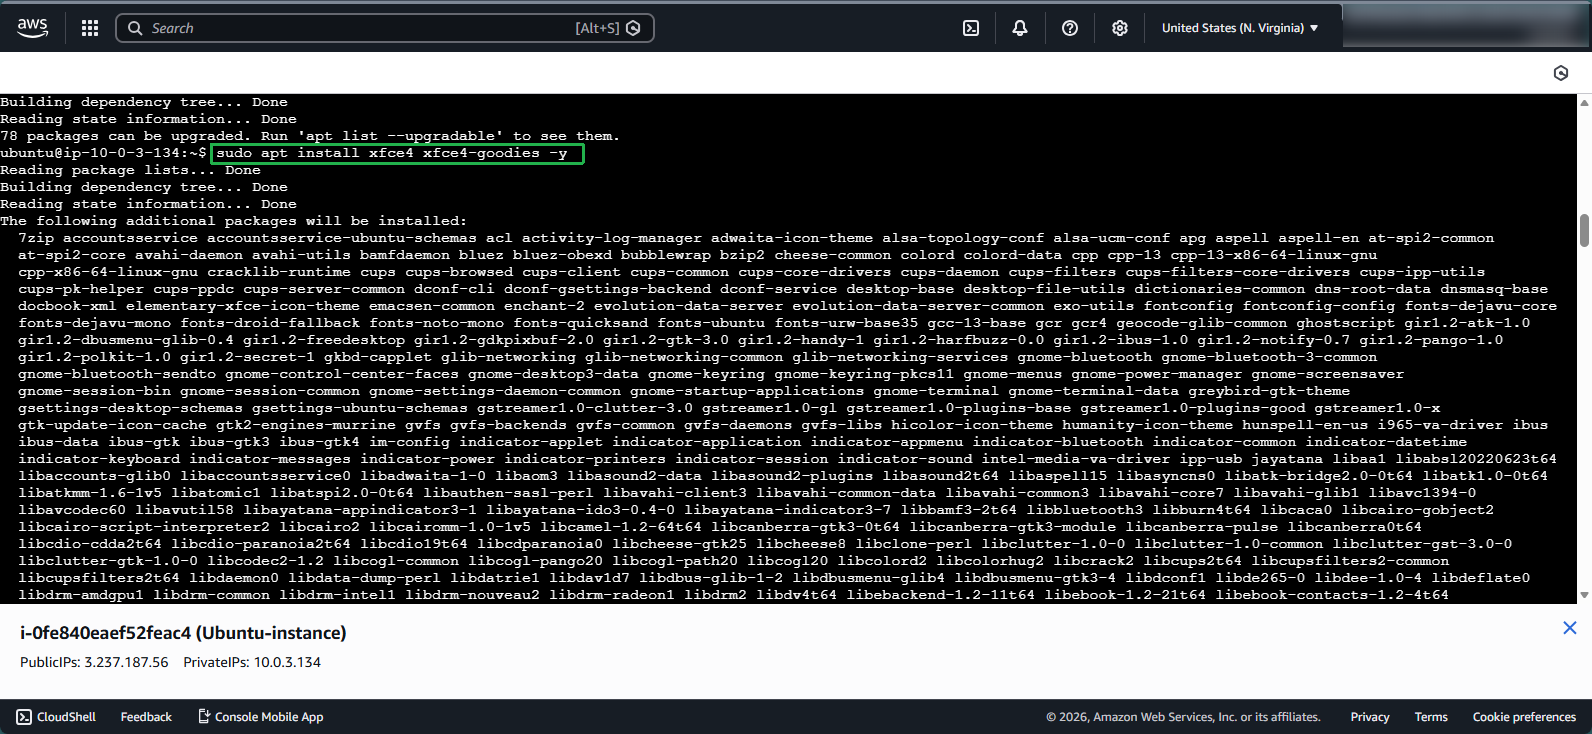
- Run the command:
sudo apt install xfce4 xfce4-goodies -yto install Xfce and Xfce goodies - Xfce is a lightweight and user-friendly desktop environment for Ubuntu virtual machines, running on Linux.
- Note: This may take 5-10 minutes to download and install the packages, depending on your network bandwidth and EC2 instance type. Learn more: link
- Note: If prompted to choose a graphical login mechanism and user session, select gdm3 for this lab. Otherwise, ignore this note.
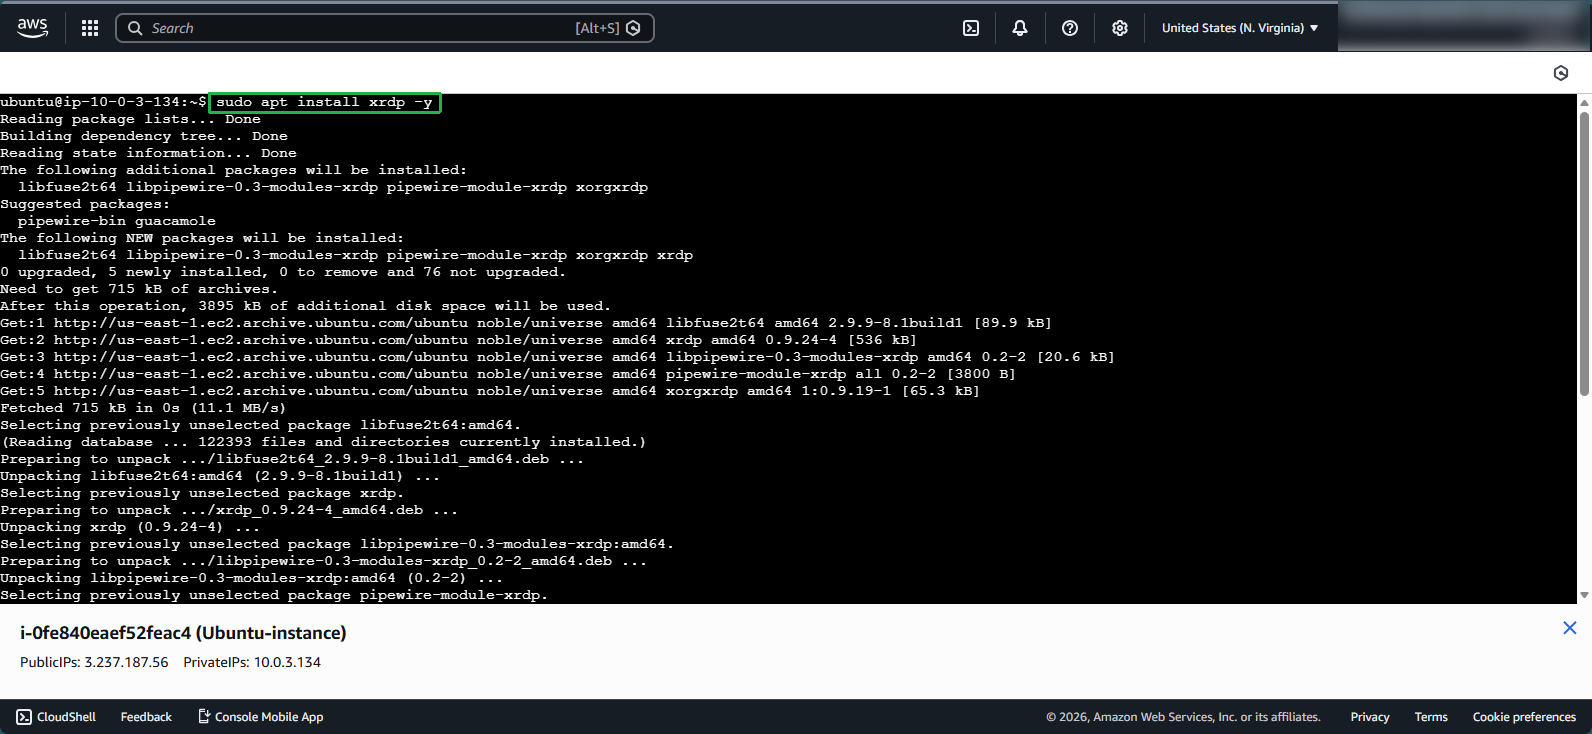
- Install xRDP on Ubuntu-instance
xrdp is an open-source software that enables RDP connections for servers running Linux operating systems.
Run the command:
sudo apt install xrdp -yto install xrdp
- Run the command:
sudo systemctl status xrdpto verify the status of xrdp
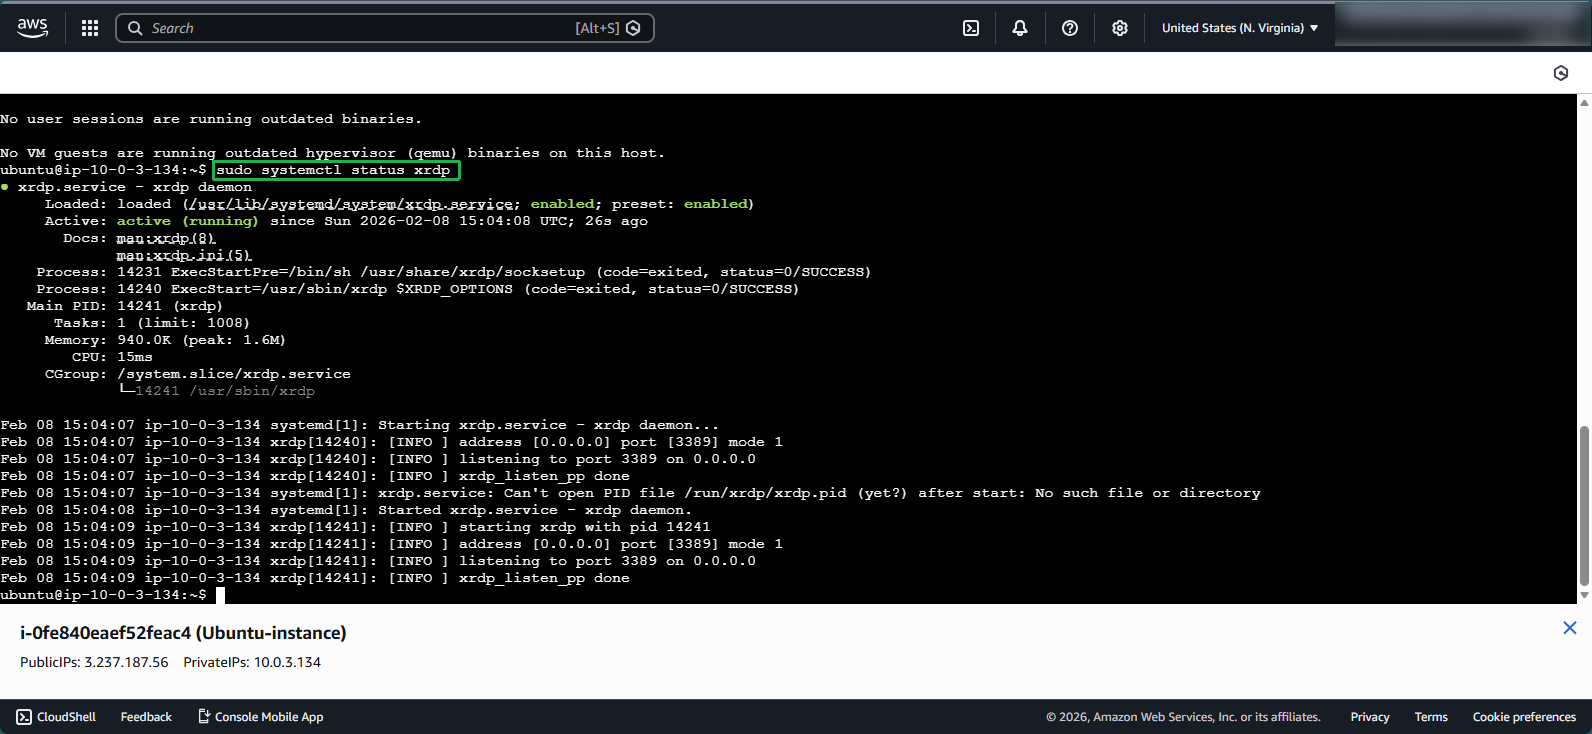
Note: If xrdp is not running, use the following commands to start the service:
- Run the command:
sudo systemctl start xrdp, then - Run the command:
sudo systemctl status xrdpto verify the status of xrdp
- Review the default configuration of xrdp
- Run the command:
sudo nano /etc/xrdp/xrdp.iniNote: By default, the user and password parameters are set to ask, meaning the user will need to enter their user and password to connect via RDP.
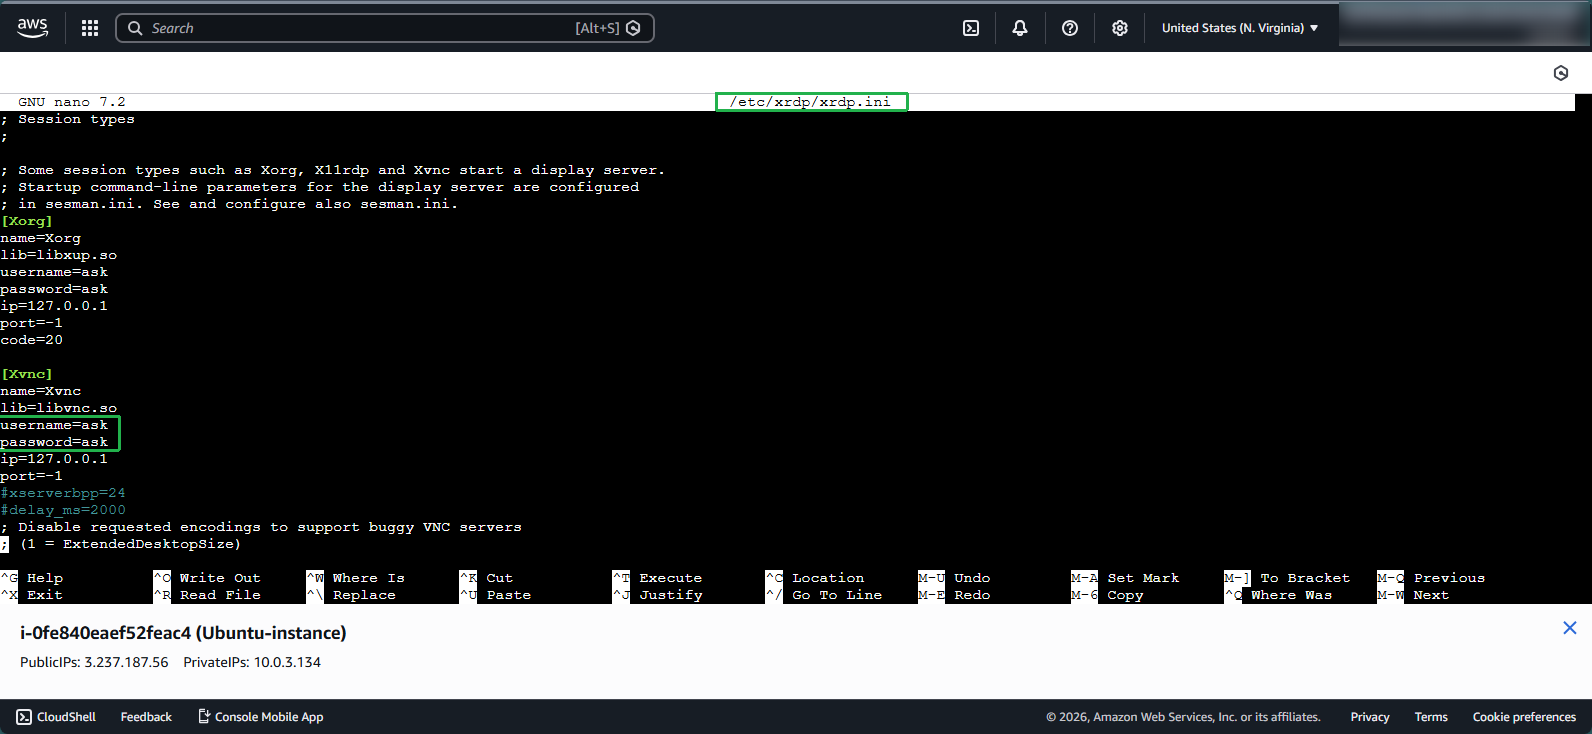
To exit the nano editor and return to the Terminal interface, press: Ctrl + X
- Create a .xsession File
The .xsession file adds xfce4-session as the session manager for login.
- Run the command:
echo "xfce4-session" | tee .xsession - Authorize the file:
chmod 644 ~/.xsession
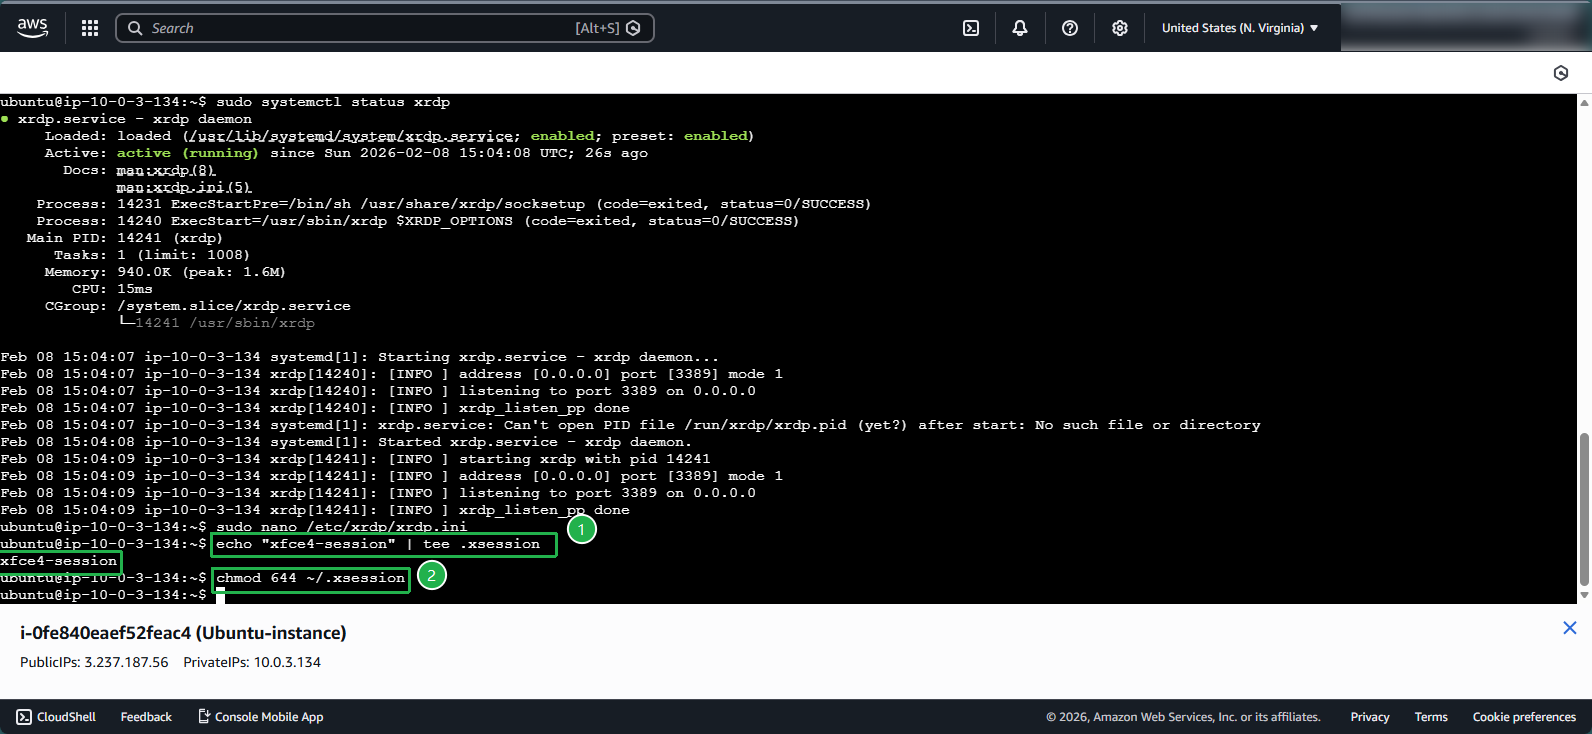
Note: This configuration ensures that xfce4-session is used as the session manager for the graphic login - Desktop interface. Since xfce is the chosen environment for the Desktop interface, xfce4-session functions as the session manager. Failing to include this in the .xsession file will prevent RDP sessions from connecting to the graphical login - Desktop interface.
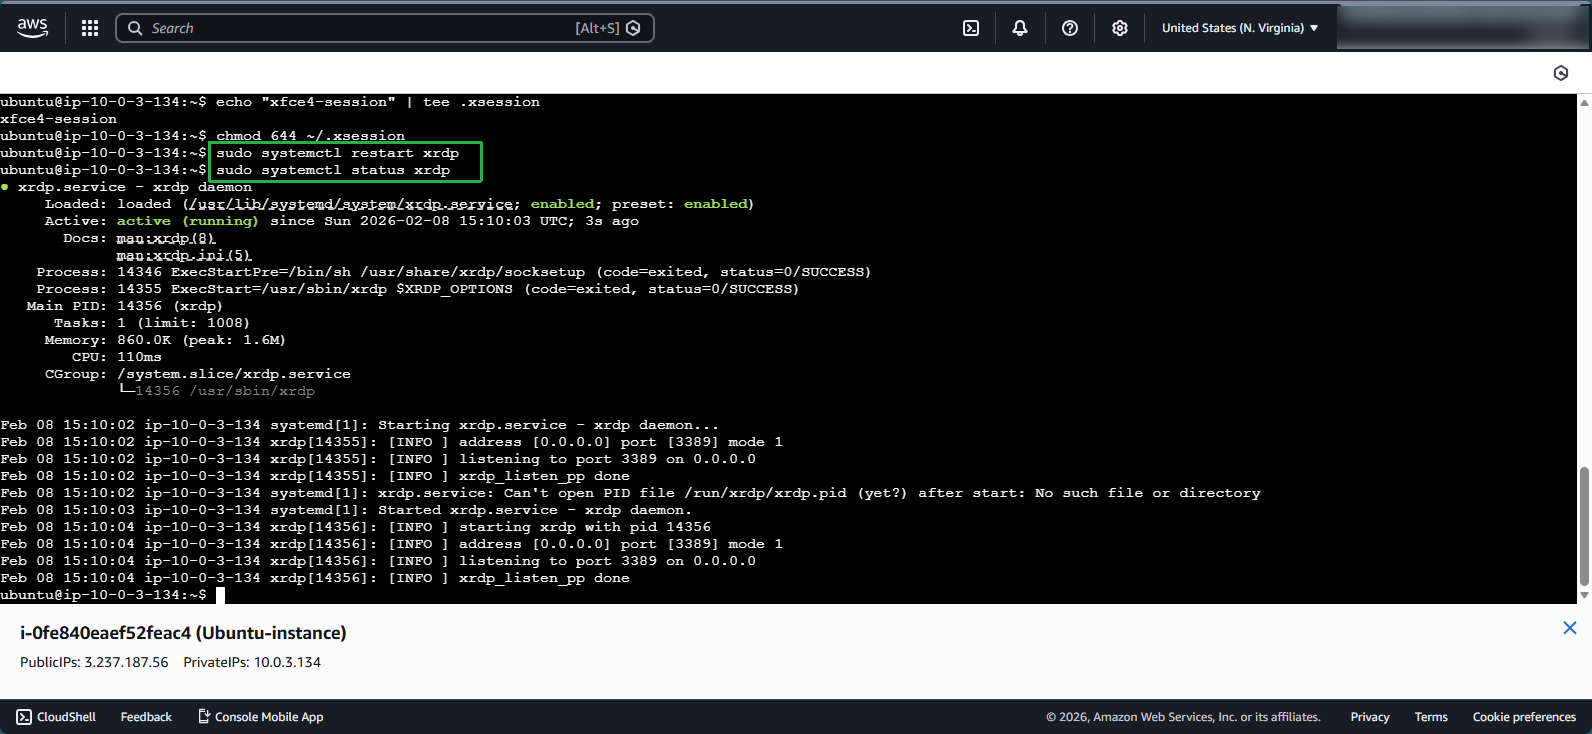
- Run the command:
sudo systemctl restart xrdpto restart xrdp, then - Run the command:
sudo systemctl status xrdpto verify the status of xrdp
- Create a Password to Login to EC2-Ubuntu Using RDP
- Run the command:
sudo passwd ubuntu - Enter a password (e.g.,
rdp123) - Re-enter the password:
rdp123
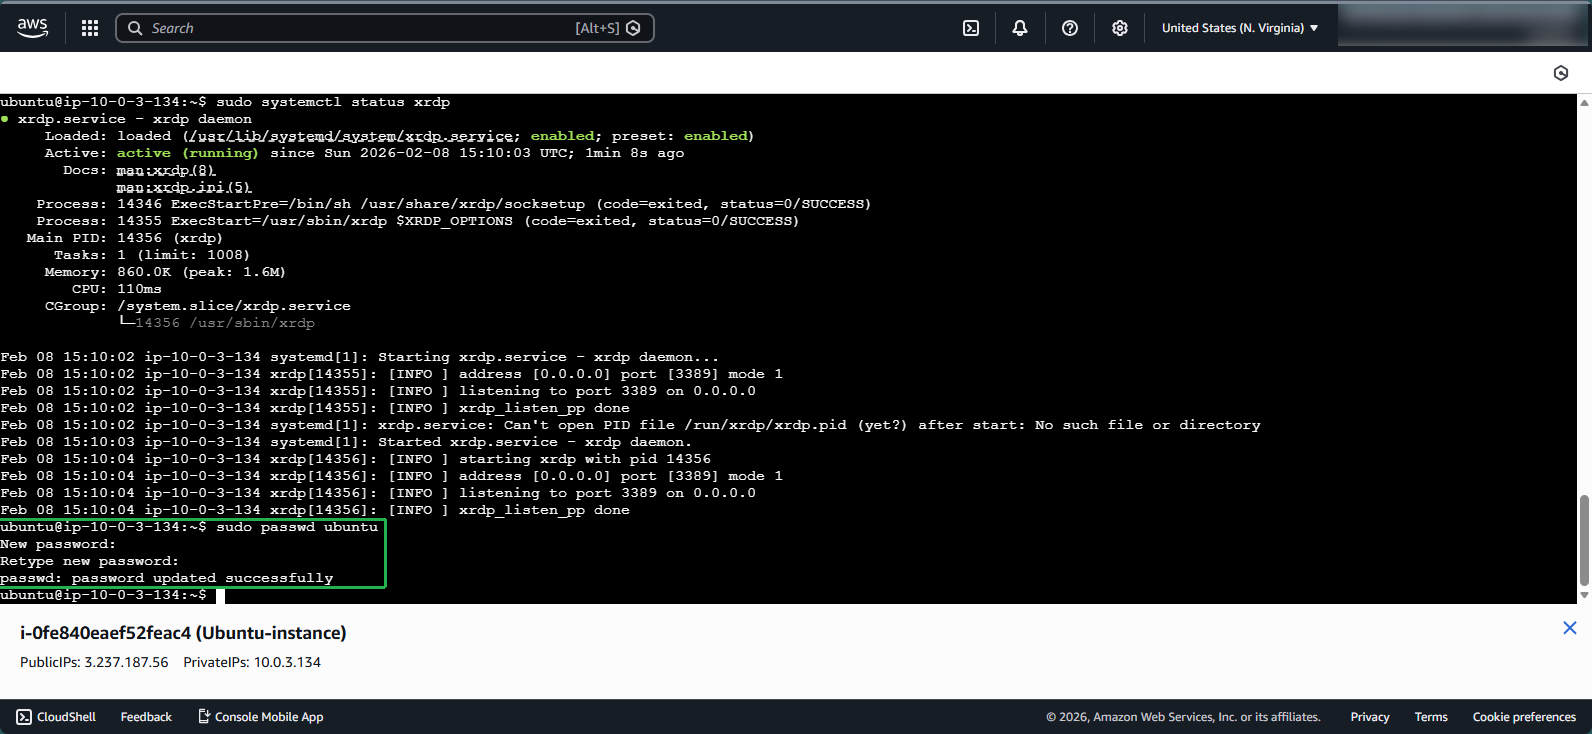
Note: Remember to save the password you’ve just created; you’ll need it for step 10.
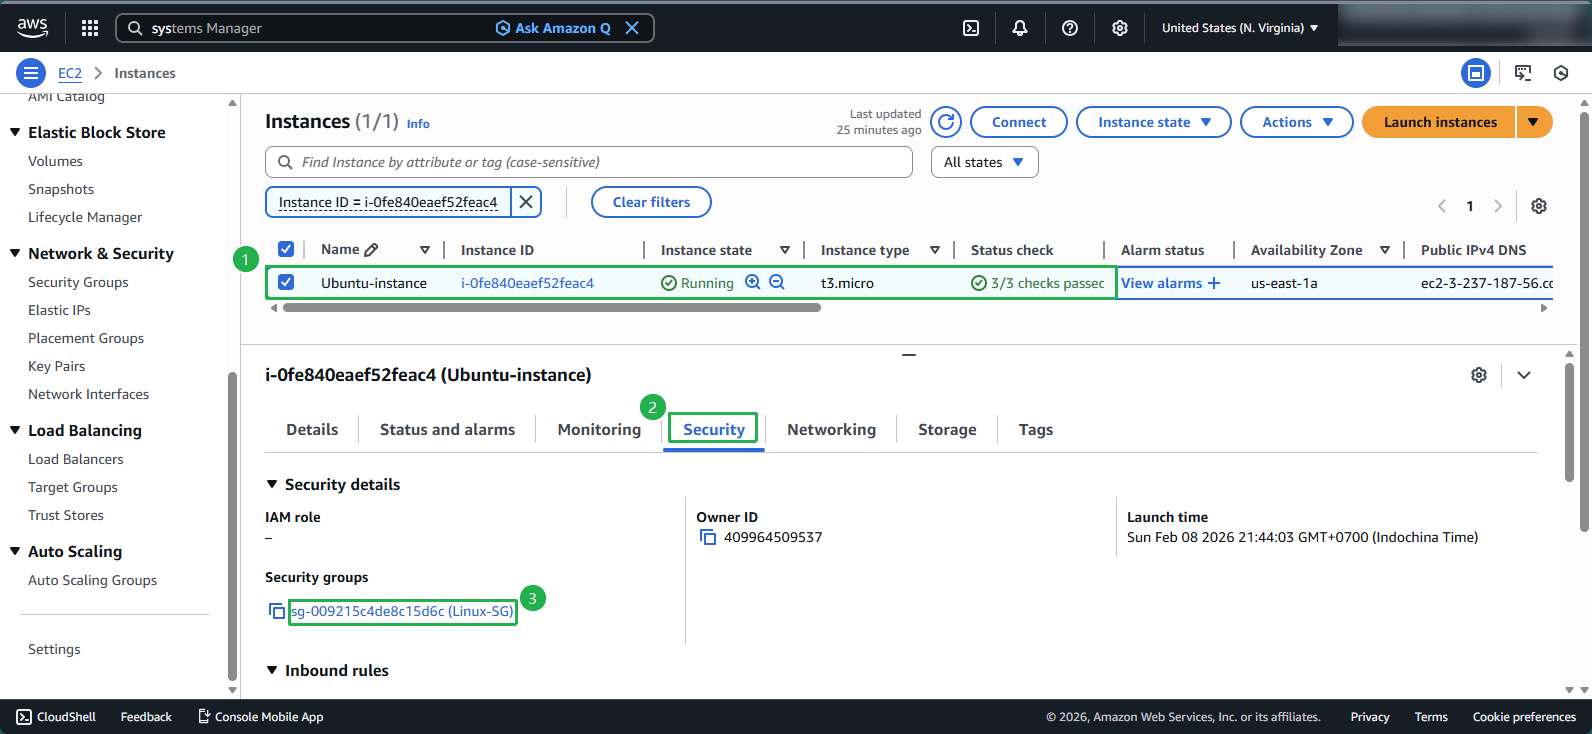
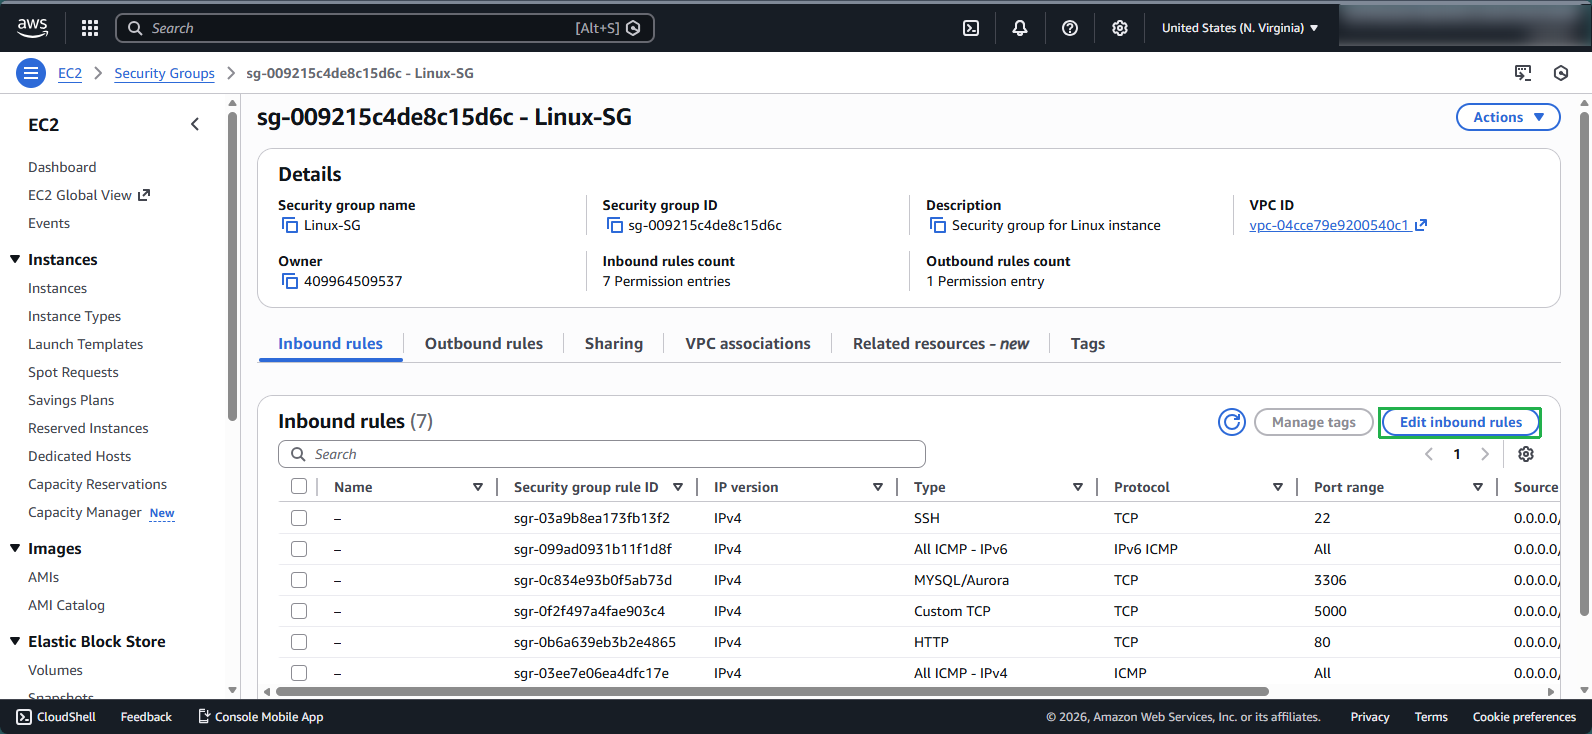
- Configure Inbound Rule for RDP Protocol on EC2 Ubuntu-instance
- In the EC2 console, select your EC2 Ubuntu-instance
- Choose Security
- Select Security Groups, e.g., sg-009215c4de8c15d6c(Linux-SG)
- You’ll be redirected to the Security Groups console; choose Edit inbound rules
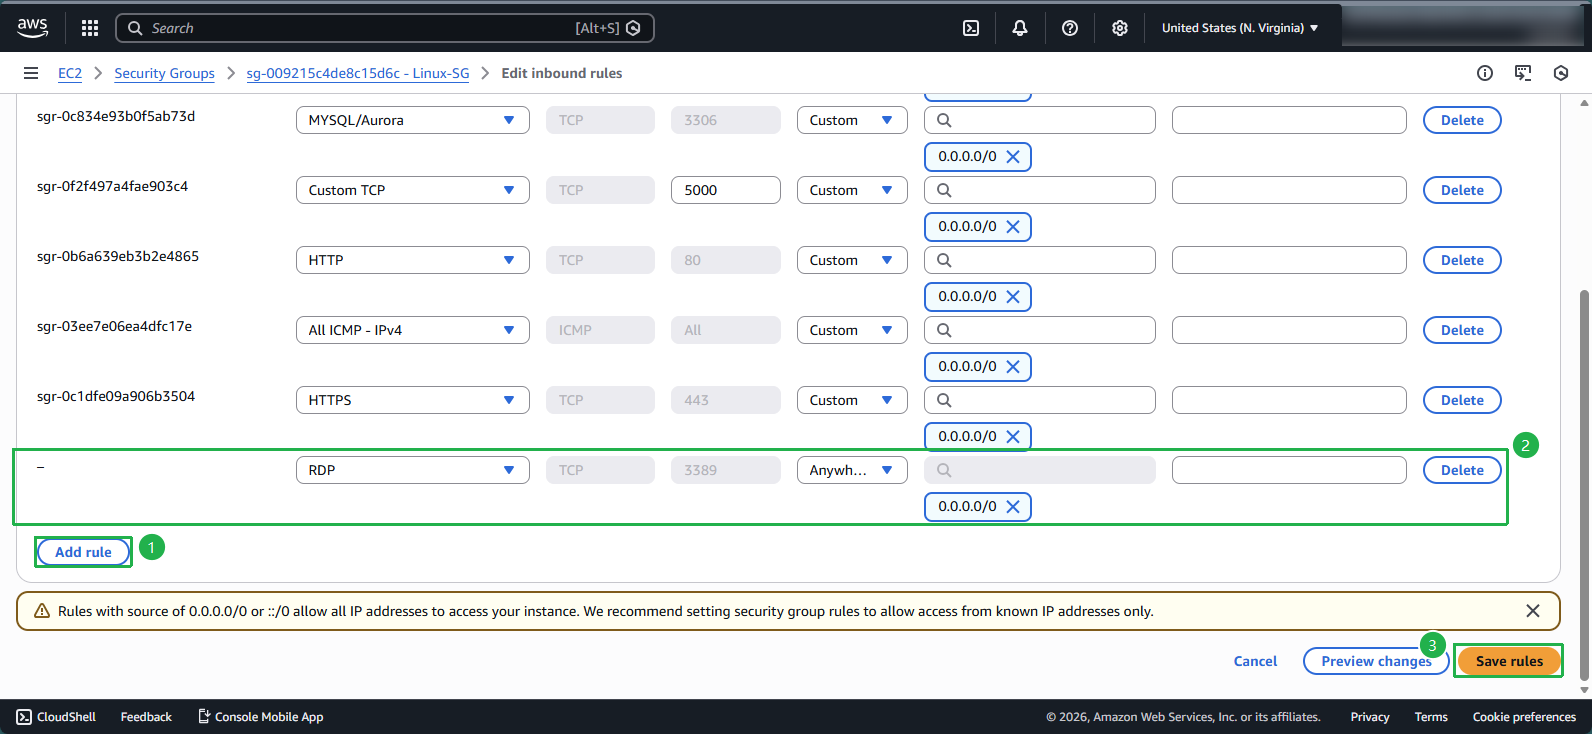
- Click Add rule in the top left corner
- Select RDP from the Type dropdown menu
- Select Anywhere-IPv4 from the Source dropdown menu
- Click Save rules
🔒 Security Note: For better security, avoid using Anywhere-IPv4 (0.0.0.0/0) because it allows any IP address on the Internet to attempt an RDP connection to your instance. Instead, it is strongly recommended to choose MyIP or specify a particular IP address or IP range that you trust. This reduces the exposure of port 3389 and minimizes the risk of unauthorized access or brute-force attacks.
- Log into EC2 Ubuntu-instance Using RDP Protocol
On your local Windows desktop:
- Click the search icon in the bottom left corner of the screen
- Type: RDP in the search box
- Choose Remote Desktop Connection
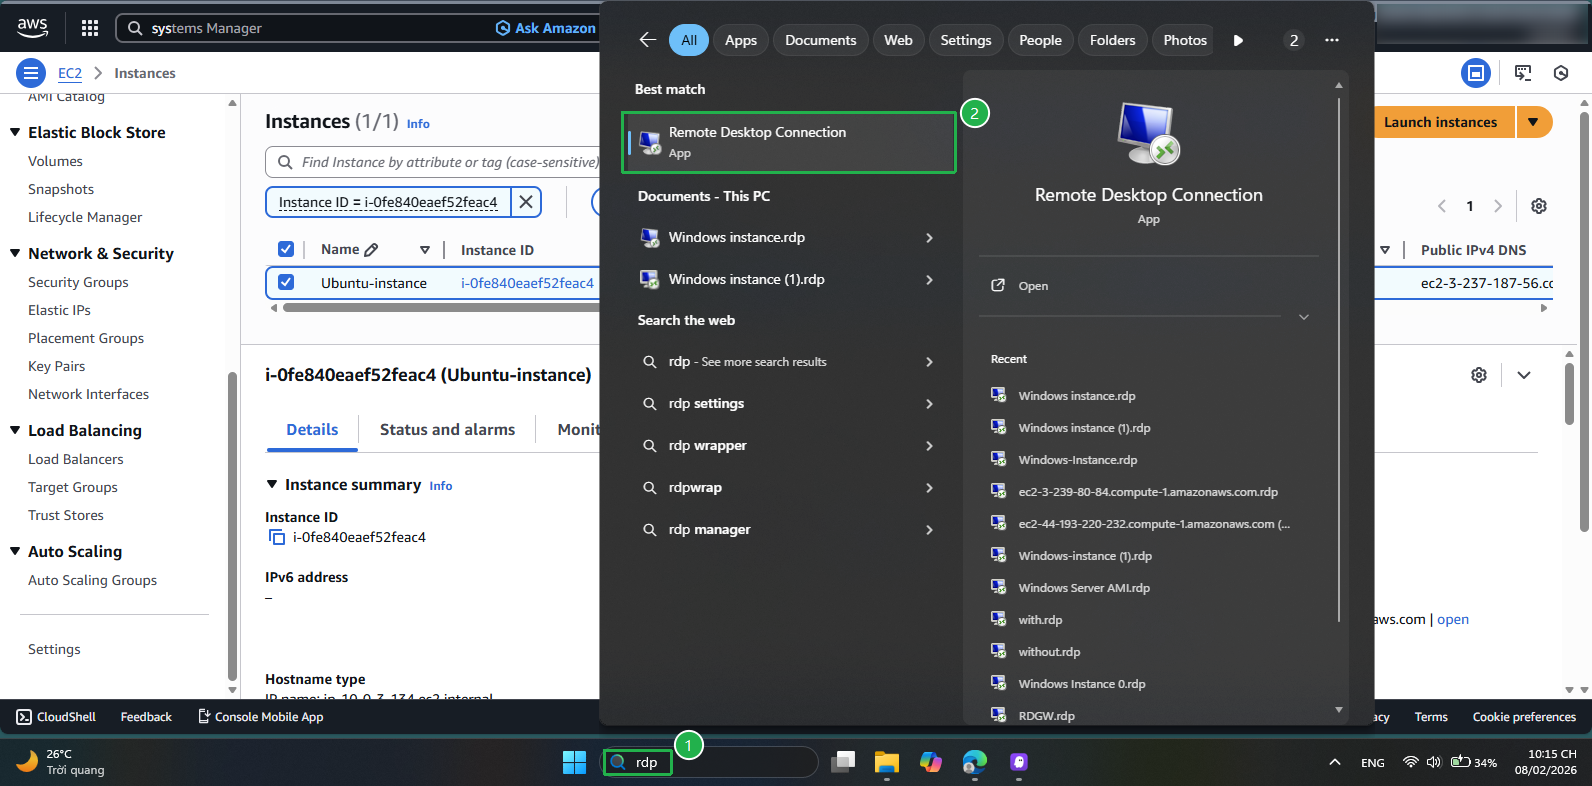
The Remote Desktop Connection window appears
- In the Computer field, paste the Public IP address of your EC2 Ubuntu-instance
- Click Connect
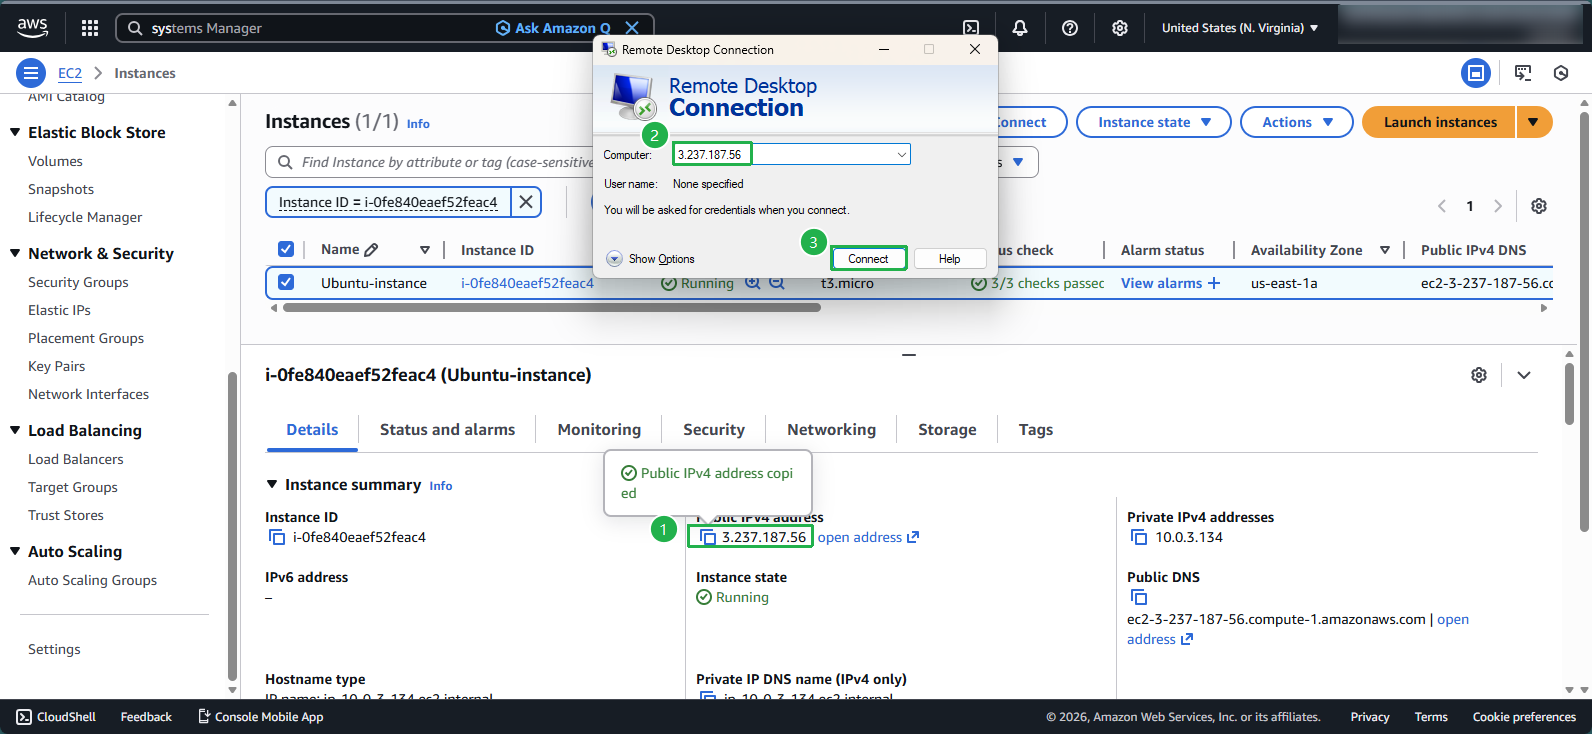
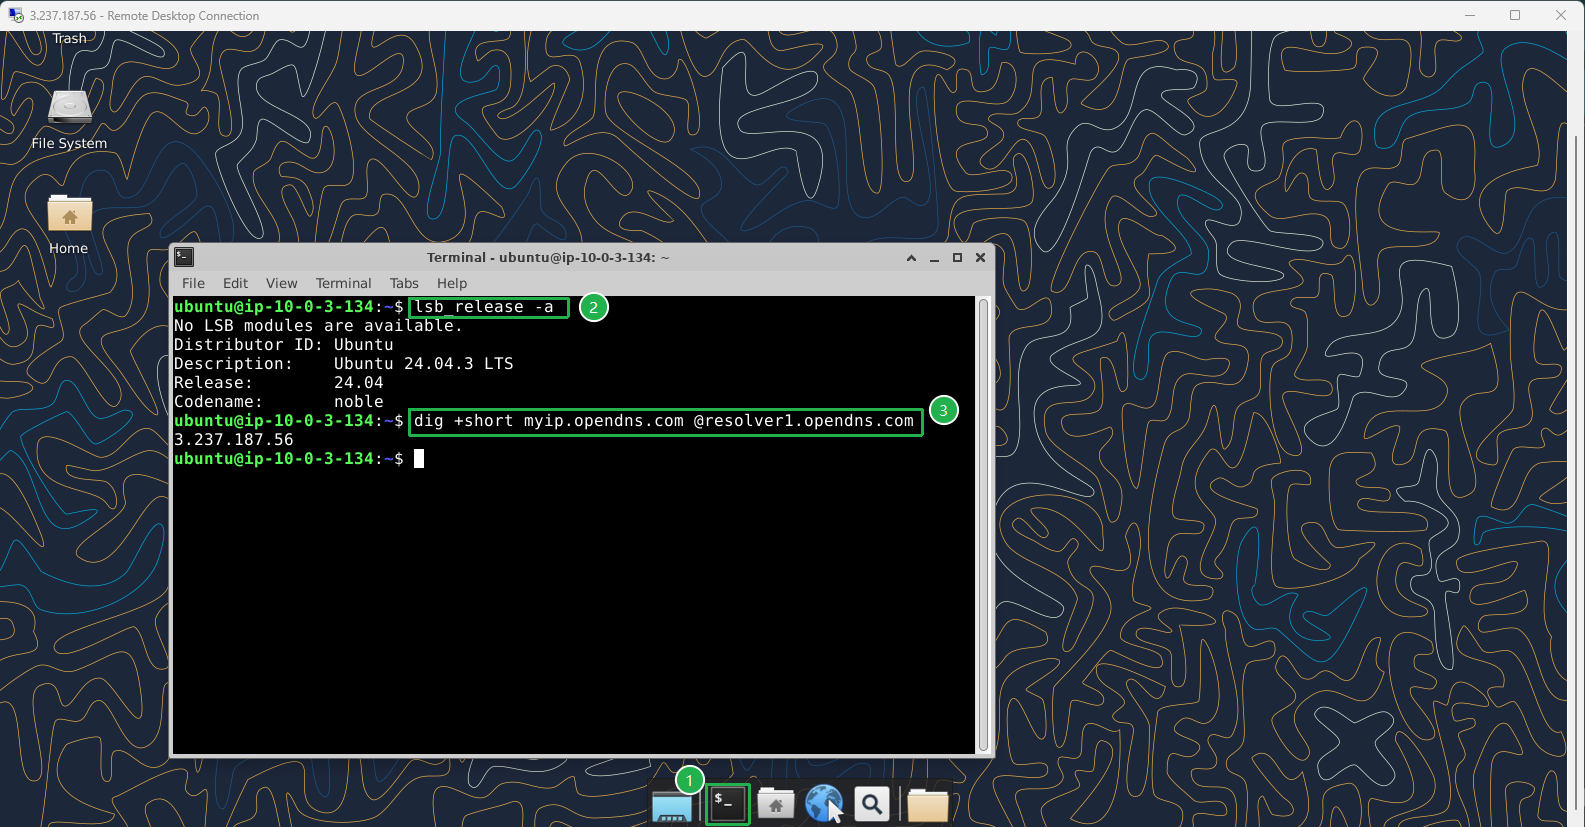
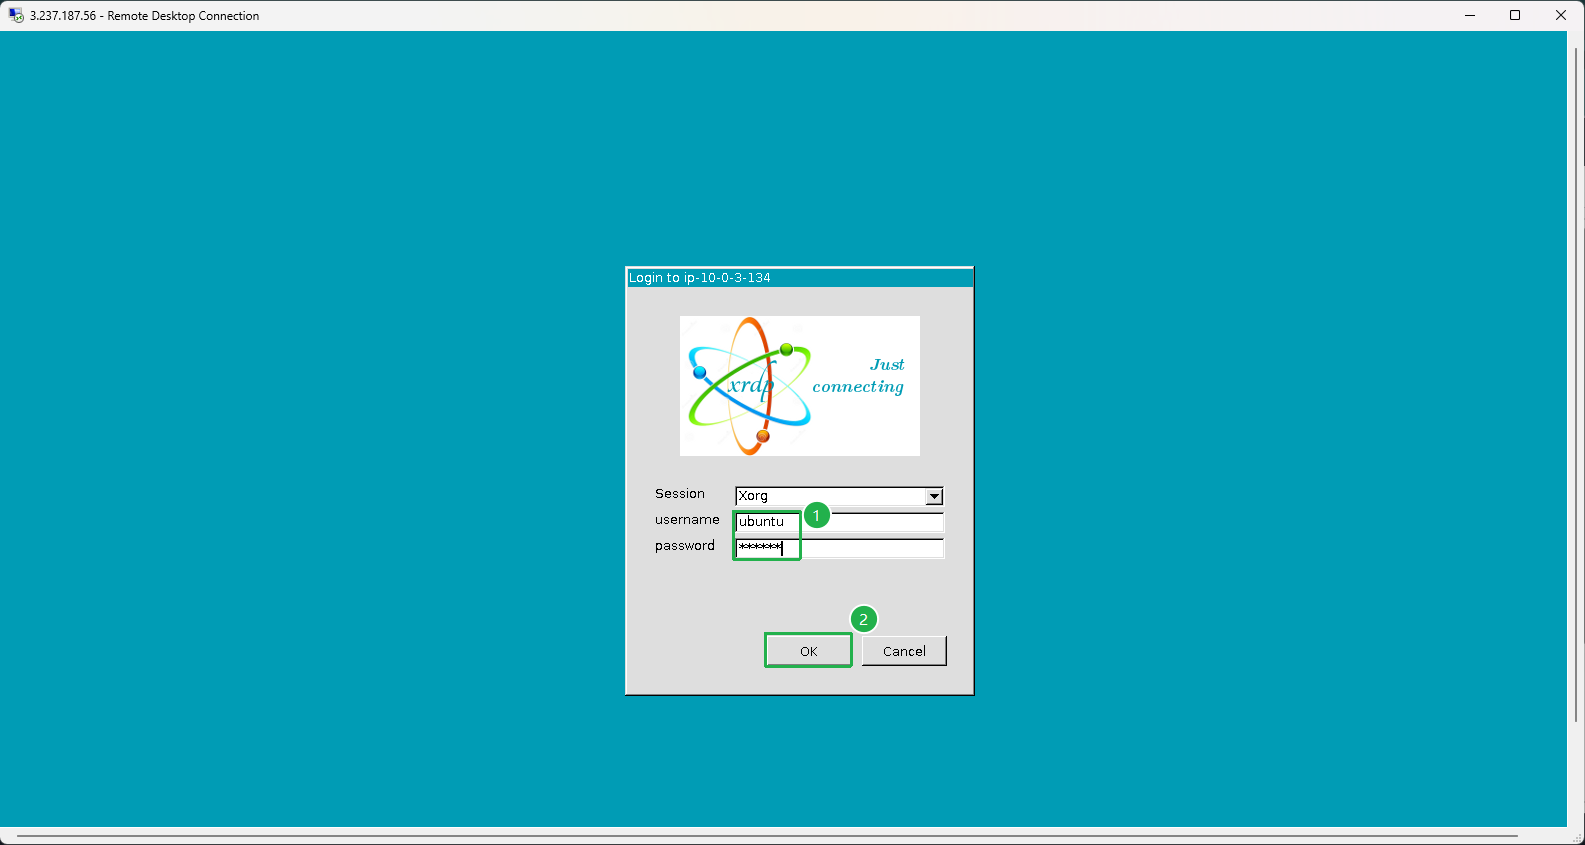
The 3.237.187.56 - Remote Desktop Connection window appears
- Session: Xorg
- Username:
ubuntu - Password:
rdp123(created in step 8) - Click OK
Congratulations! You’ve successfully connected to EC2 Ubuntu-instance using the RDP protocol. From here, you can easily switch between the Desktop interface and the Terminal.
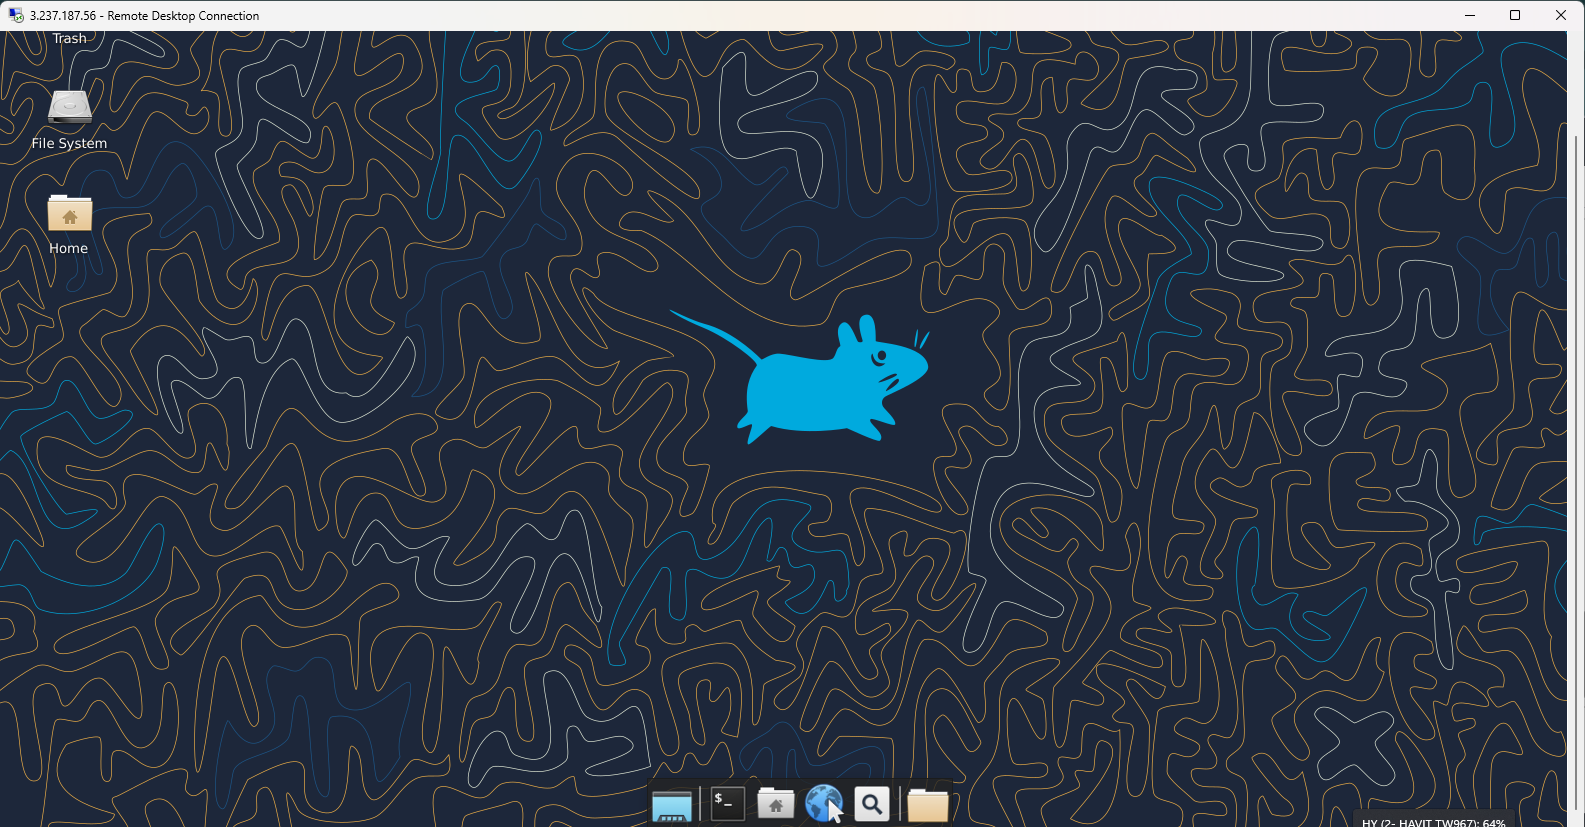
- Let’s Try Some Commands in the Terminal!
- In the bottom corner of the screen, click the Terminal icon
- Run the command:
lsb_release -ato check the Ubuntu version - Run the command:
dig +short myip.opendns.com @resolver1.opendns.comto check the Public IP