Recovering Access to Windows Instances
Recovering Access to Windows Instances When Key Pair is Lost
ℹ️ Information: The key pair is essential for encrypting and decrypting login credentials for your EC2 Windows instances. If you lose your key pair file, you can use AWS Systems Manager to regain access to your instance without needing to recreate it.
Prerequisites for Systems Manager Access Recovery
⚠️ Warning: For AWS Systems Manager to manage your EC2 instance, the following requirements must be met:
- The EC2 instance must have internet access via a public IP, NAT gateway, or VPC Endpoint
- The SSM Agent must be installed and running on the instance
- The instance must have an IAM role with appropriate Systems Manager permissions
💡 Pro Tip: Many AWS-provided AMIs come with the SSM Agent pre-installed. You can check the official documentation for a complete list of supported AMIs.
Step 1: Create an IAM Role with SSM Permissions
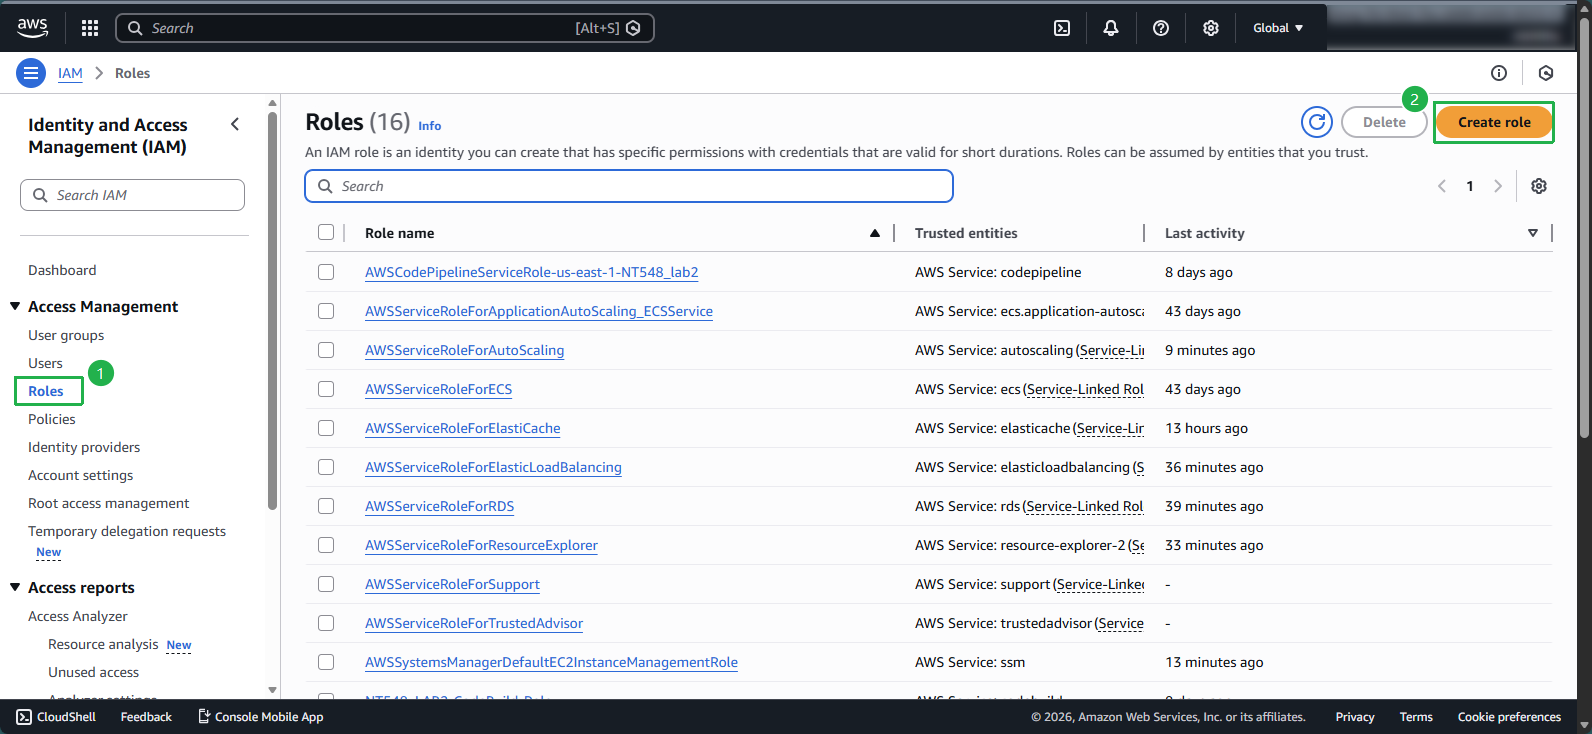
Navigate to the IAM console:
- Select Roles
- Click Create role
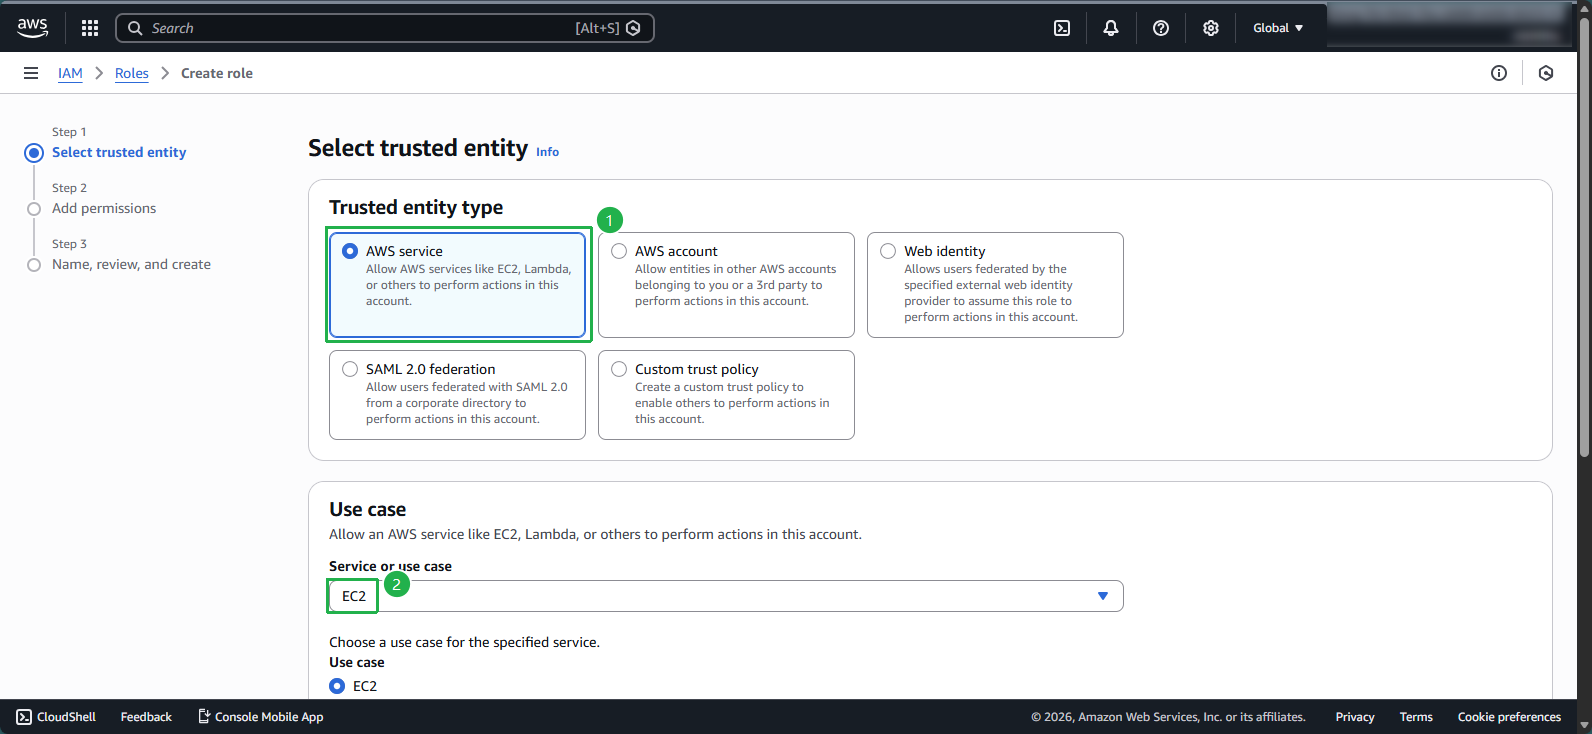
Configure the trusted entity:
- Select AWS service
- Choose EC2
- Click Next
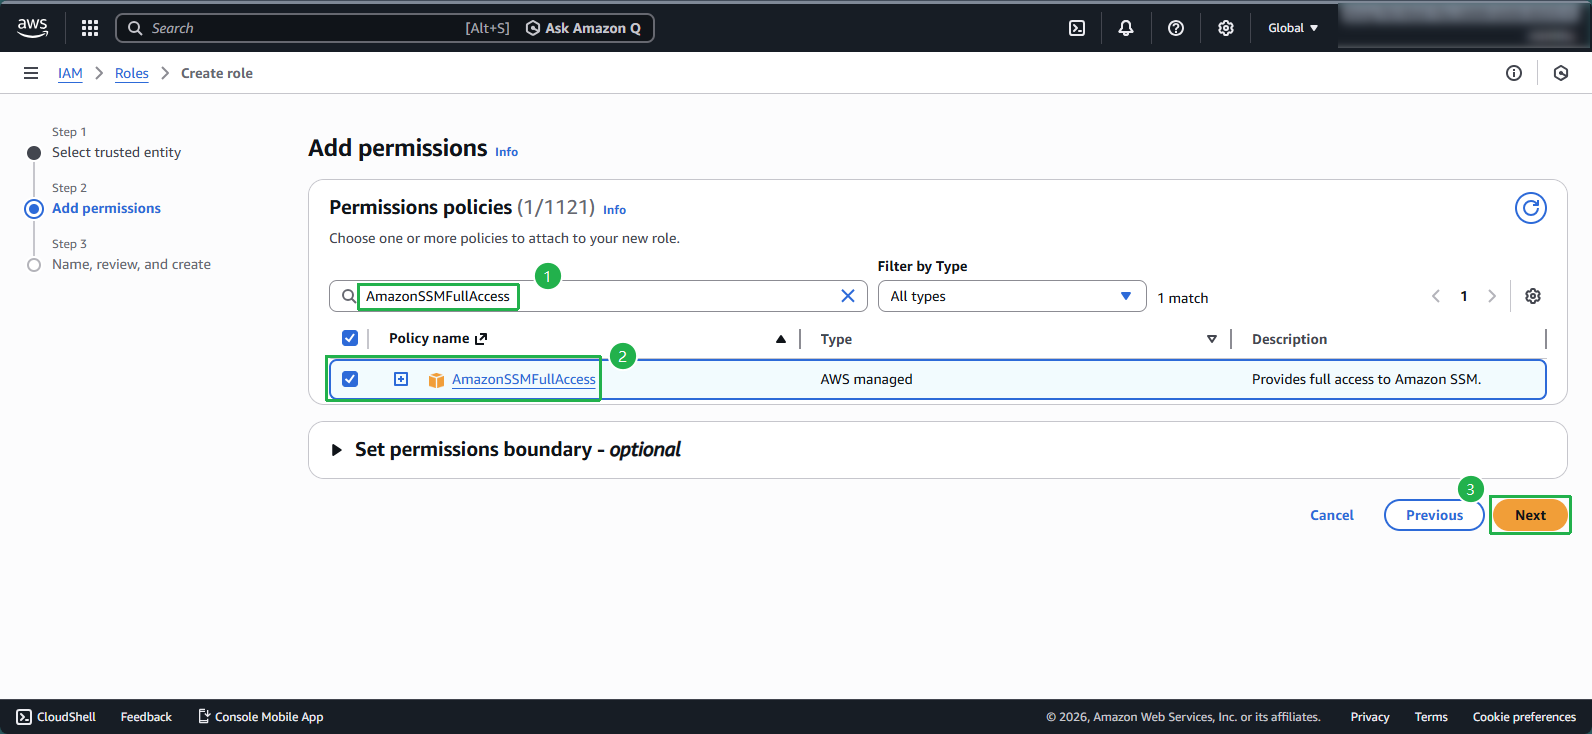
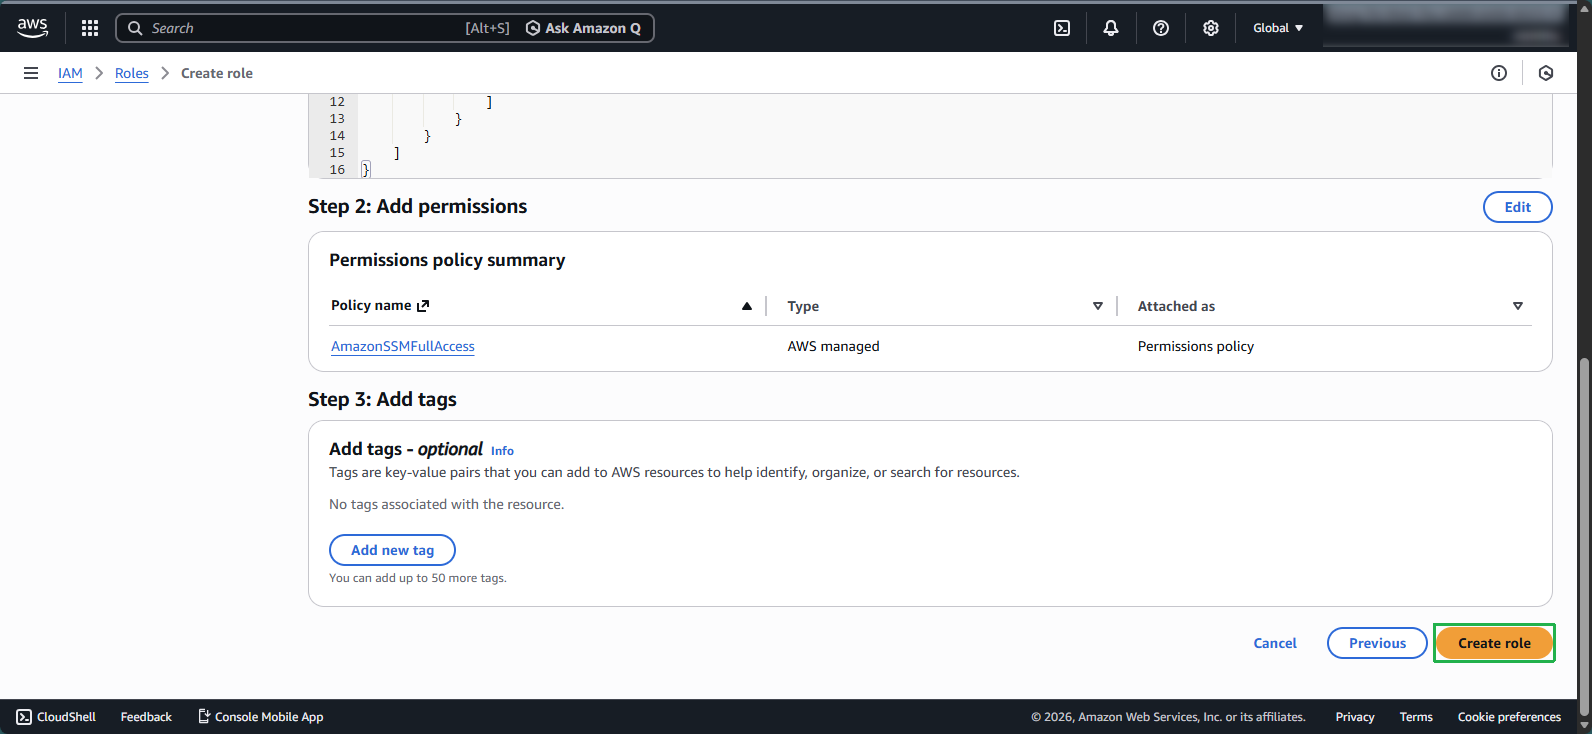
Attach permissions policies:
- Search for AmazonSSMFullAccess
- Select the checkbox for AmazonSSMFullAccess
- Click Next
Name and create the role:
- Enter Windows-instance as the role name
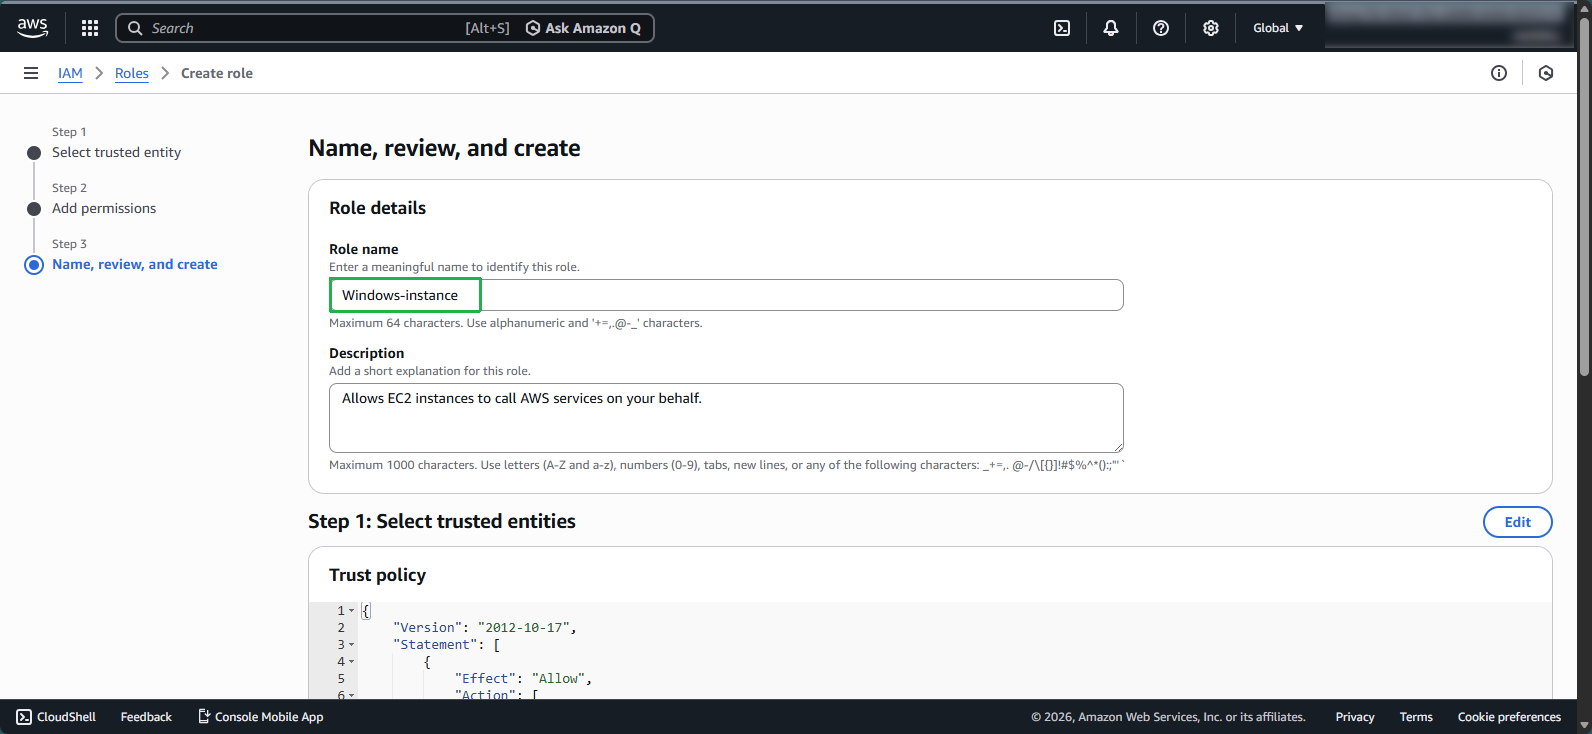
- Review the settings
- Click Create role
🔒 Security Note: In production environments, follow the principle of least privilege by using more restrictive policies like AmazonSSMManagedInstanceCore instead of AmazonSSMFullAccess. For more details, refer to: AWSSupport-RunEC2RescueForWindowsTool
Step 2: Attach the IAM Role to Your EC2 Instance
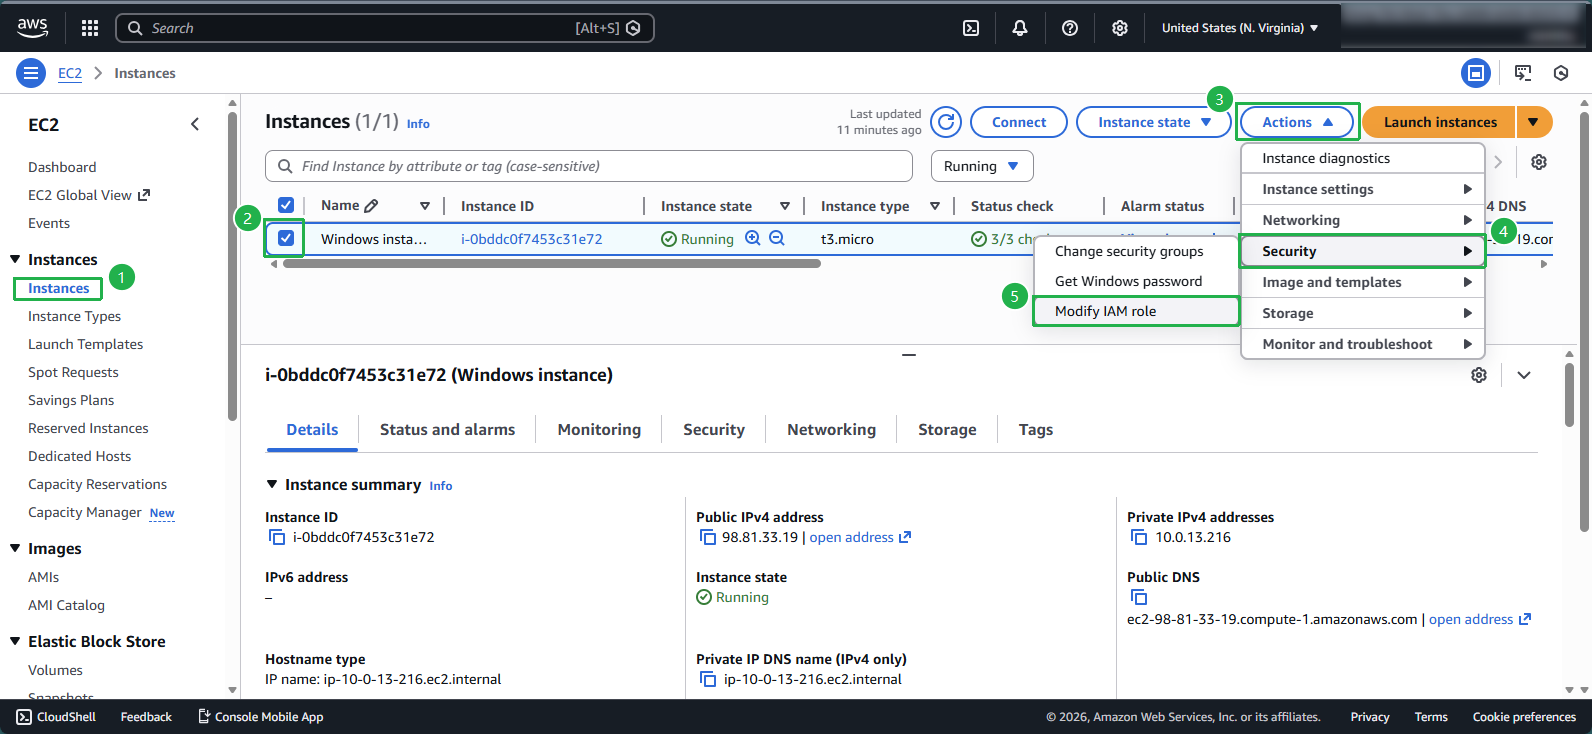
Return to the EC2 console:
- Select your Windows-instance
- Click Actions
- Navigate to Security
- Select Modify IAM role
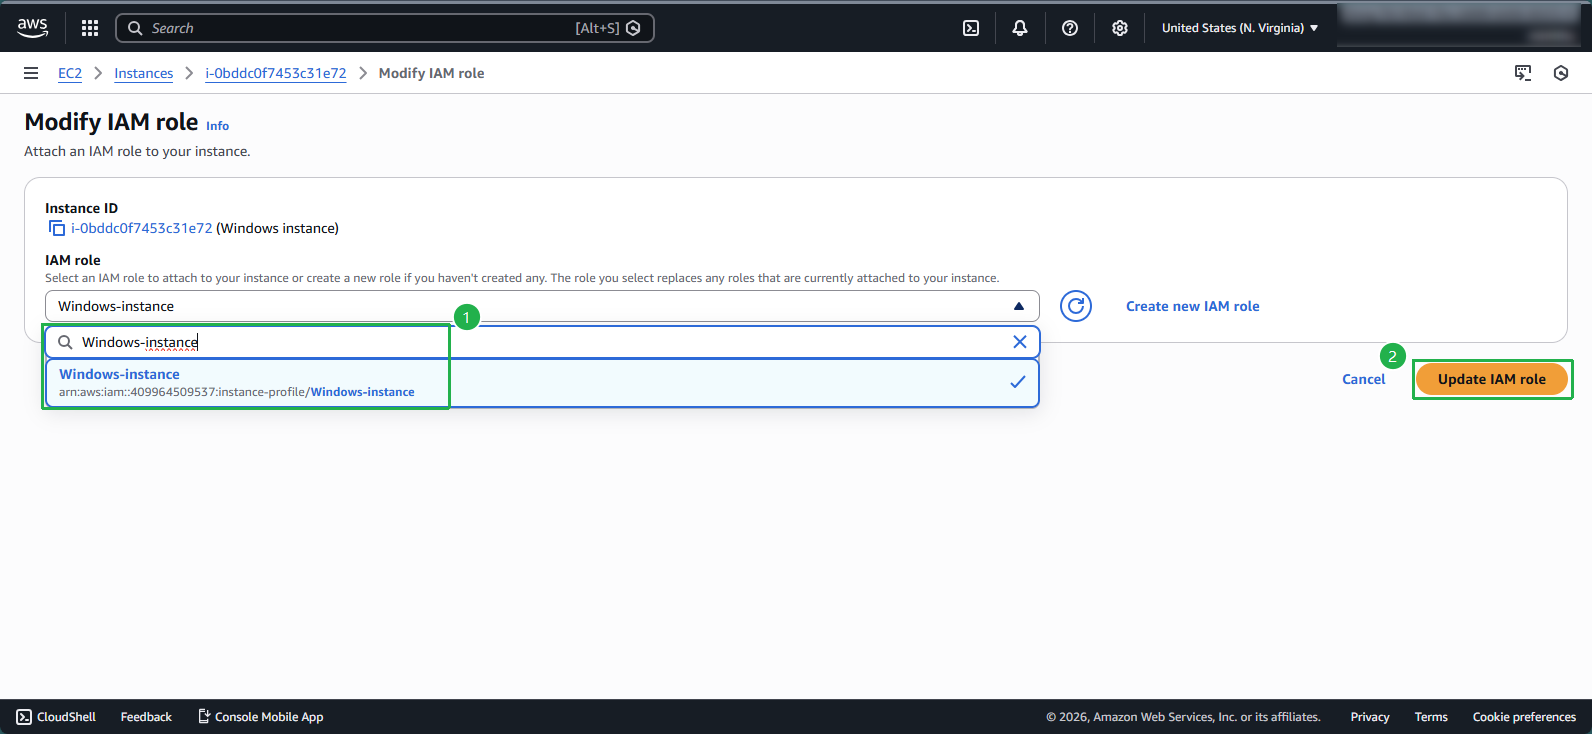
Assign the role:
- From the dropdown, select the Windows-instance role you created
- Click Update IAM role
Step 3: Install AWSPowerShell module
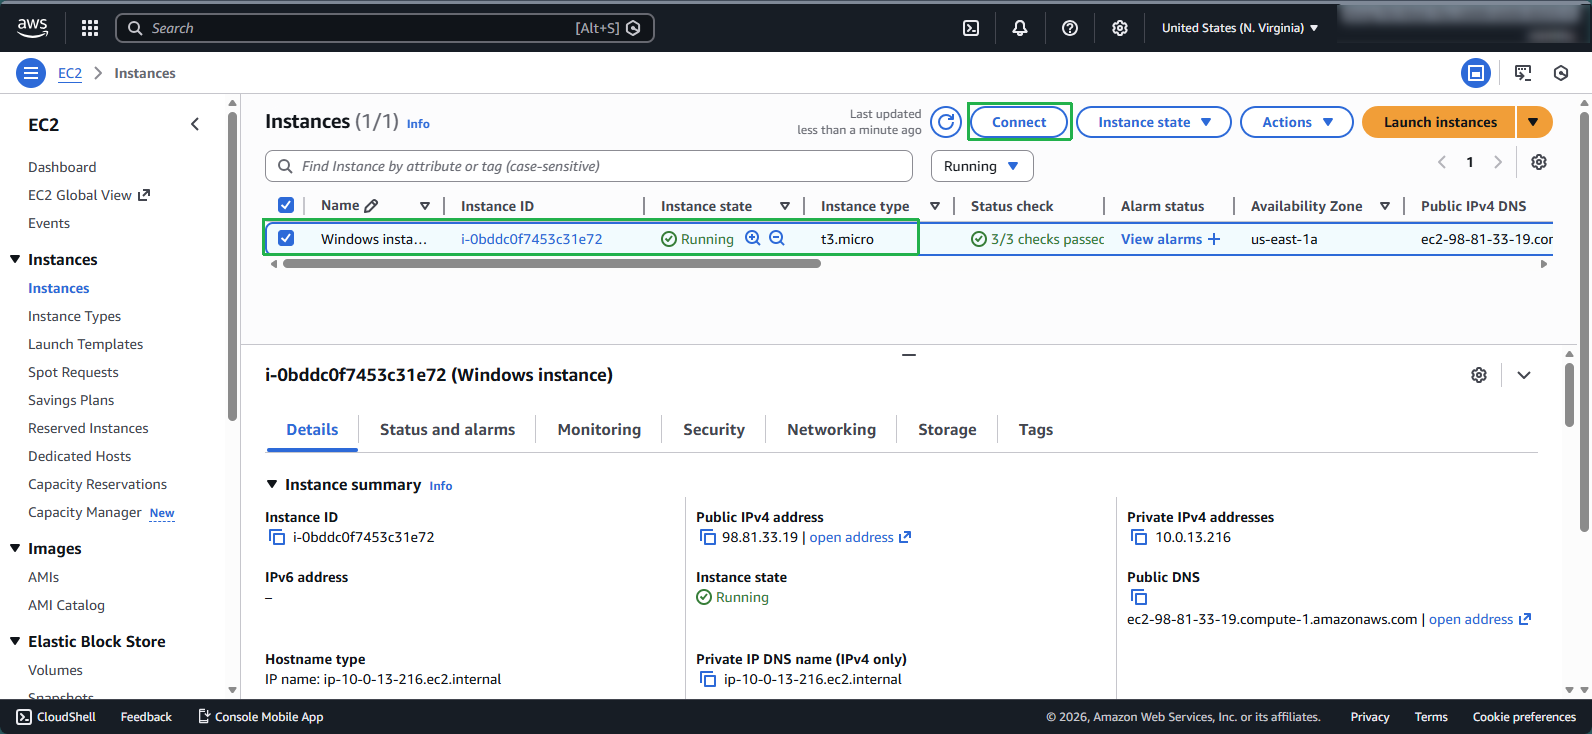
Navigate to the EC2 console:
- Select Instances
- Choose Windows-instance
- Click Connect
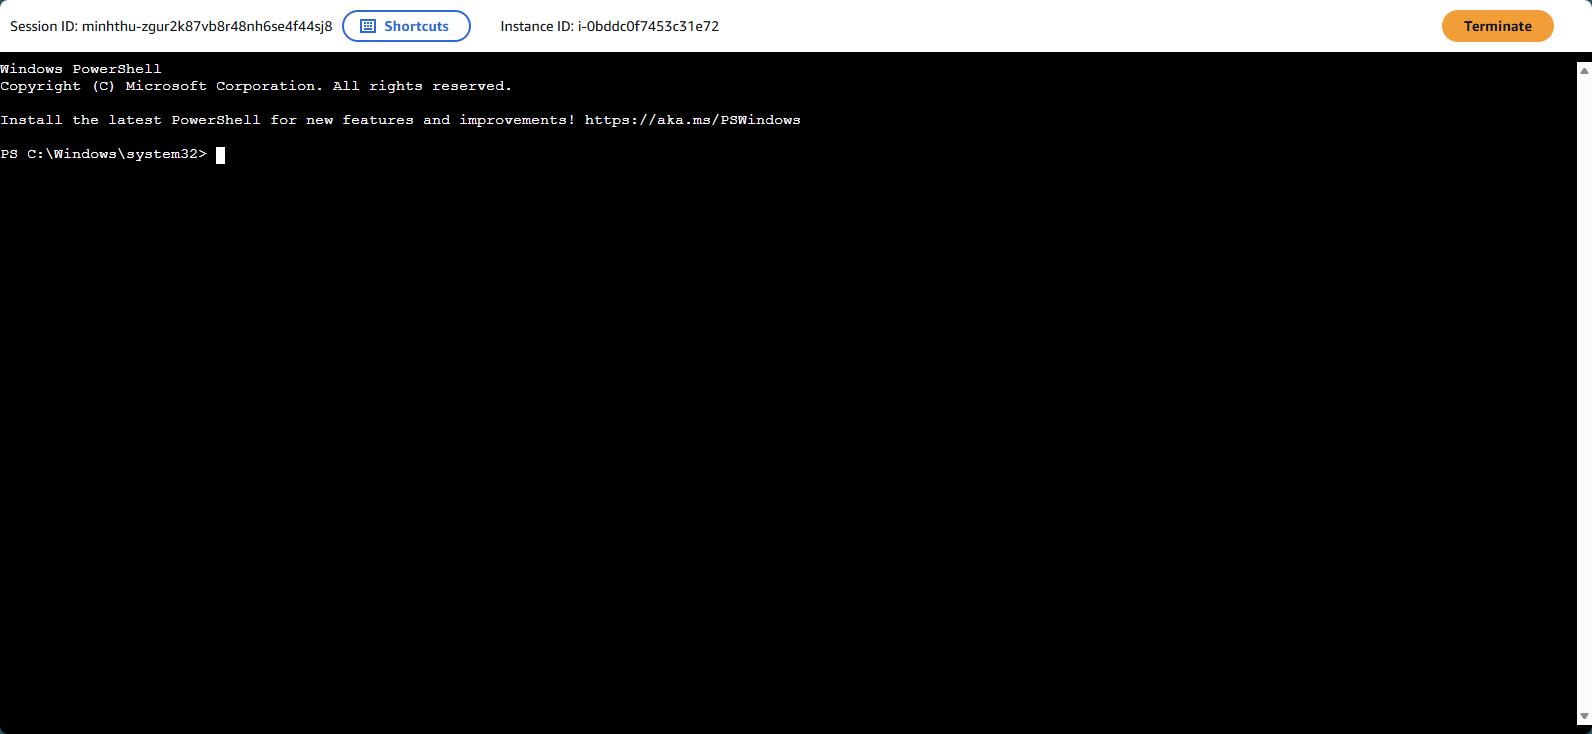
Connect to the instance
- Select Session Manager tab
- Click Connect
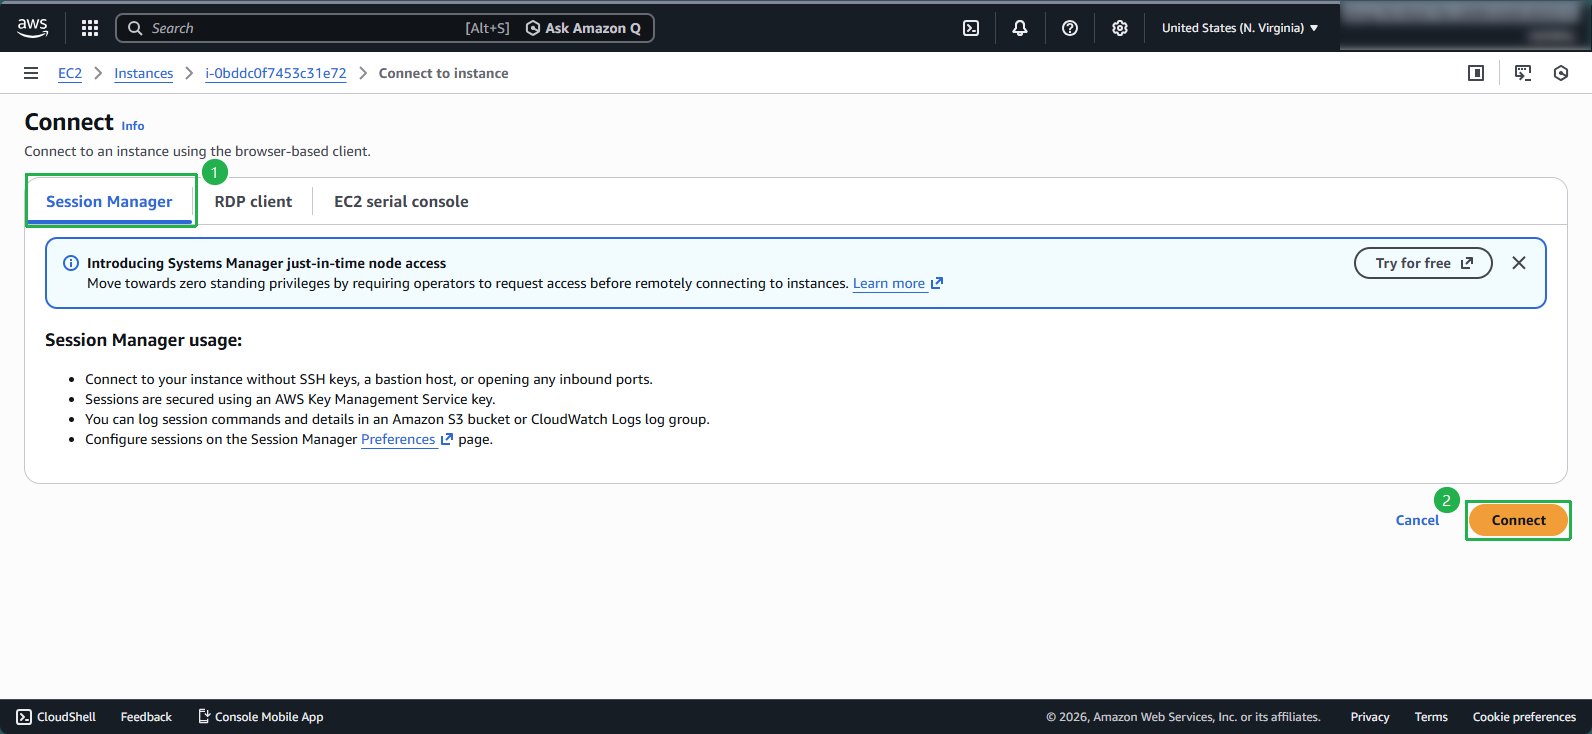
- Connect successfully
Install AWSPowerShell module
- Run the following command to install the AWSPowerShell module:
Install-Module -Name AWSPowerShell -Force -AllowClobber -SkipPublisherCheck- Verify that the module is installed:
Get-Module -ListAvailable AWSPowerShell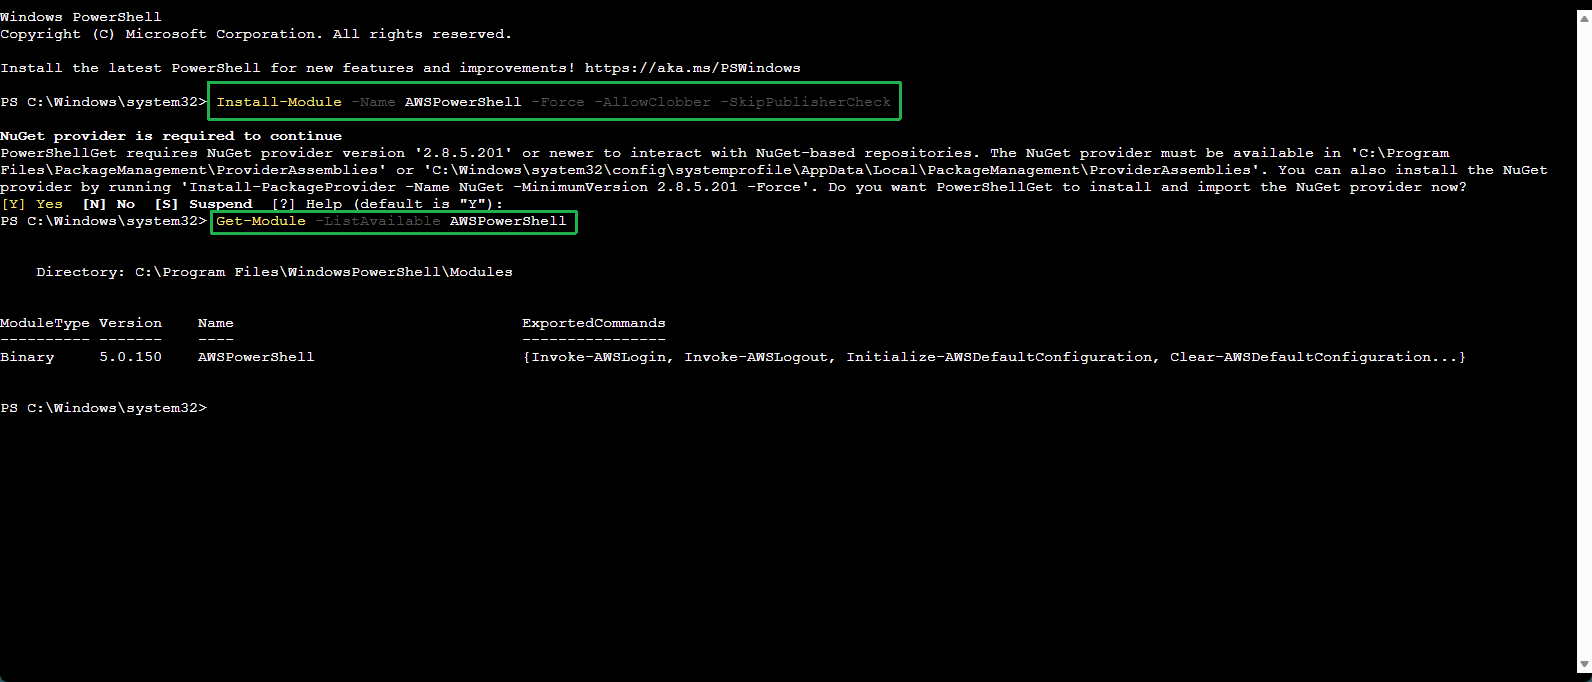
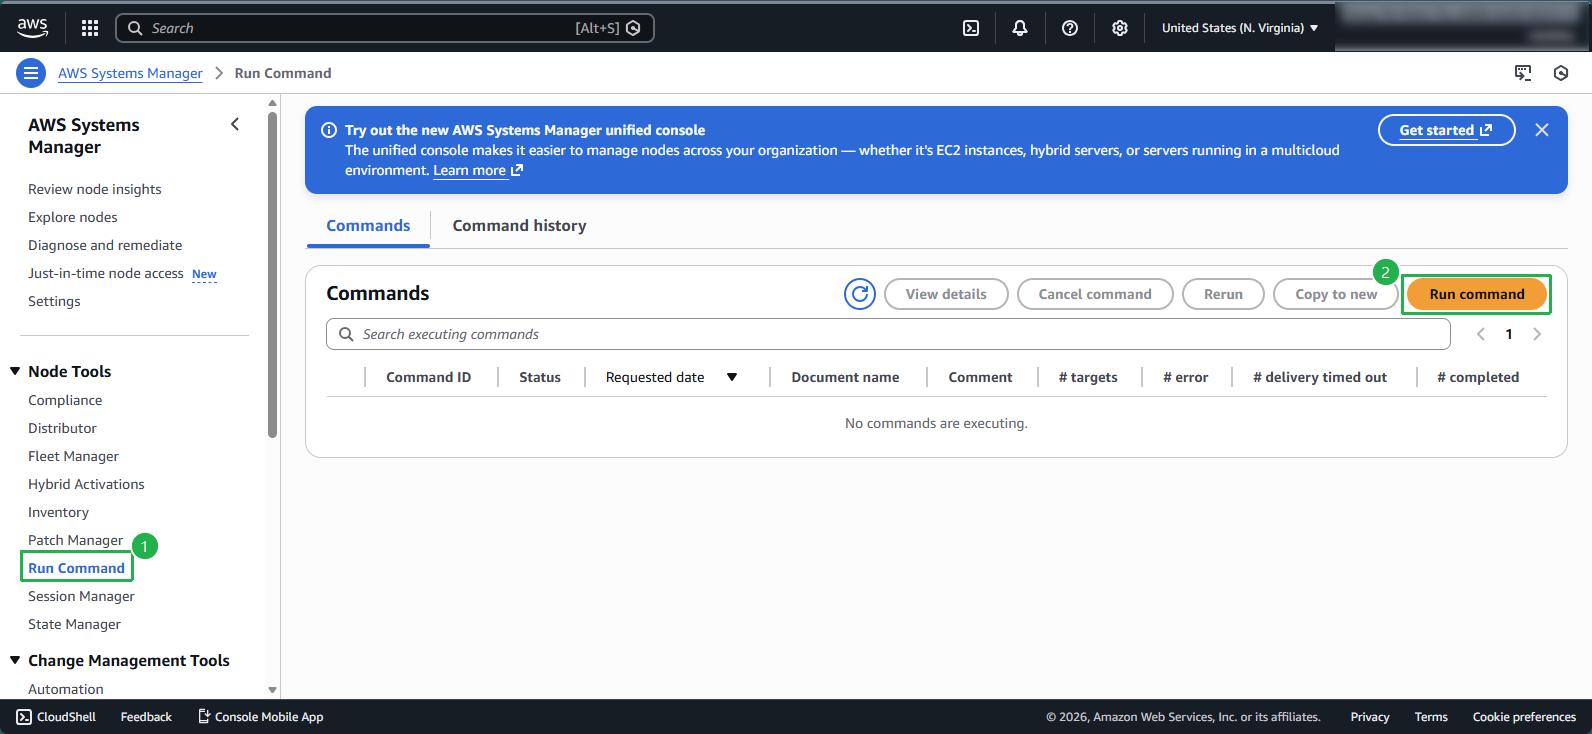
Step 4: Run the EC2Rescue Tool via Systems Manager
Navigate to the AWS Systems Manager console:
- Select Run Command
- Click Run a command
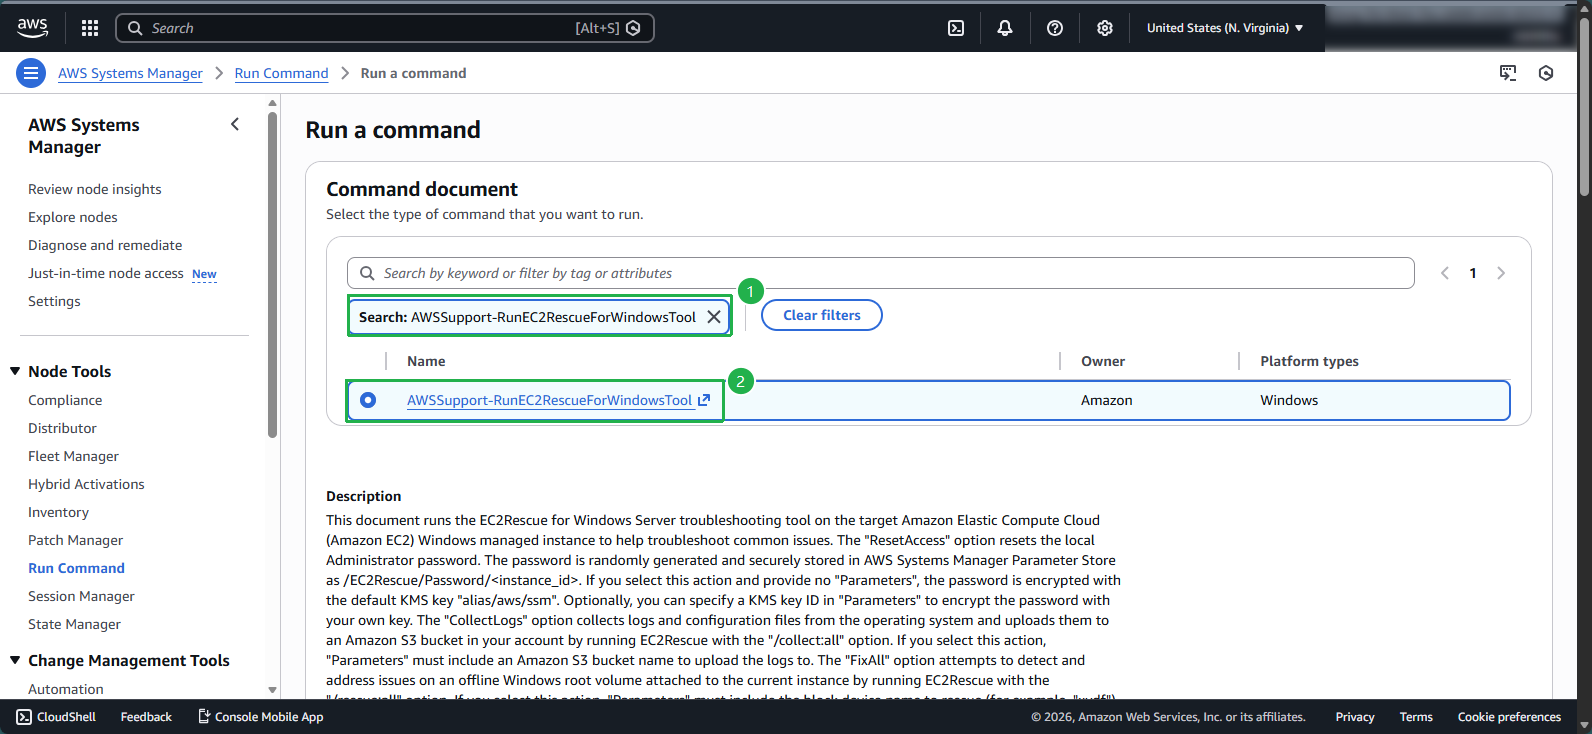
Configure the command:
- Search for and select AWSSupport-RunEC2RescueForWindowsTool
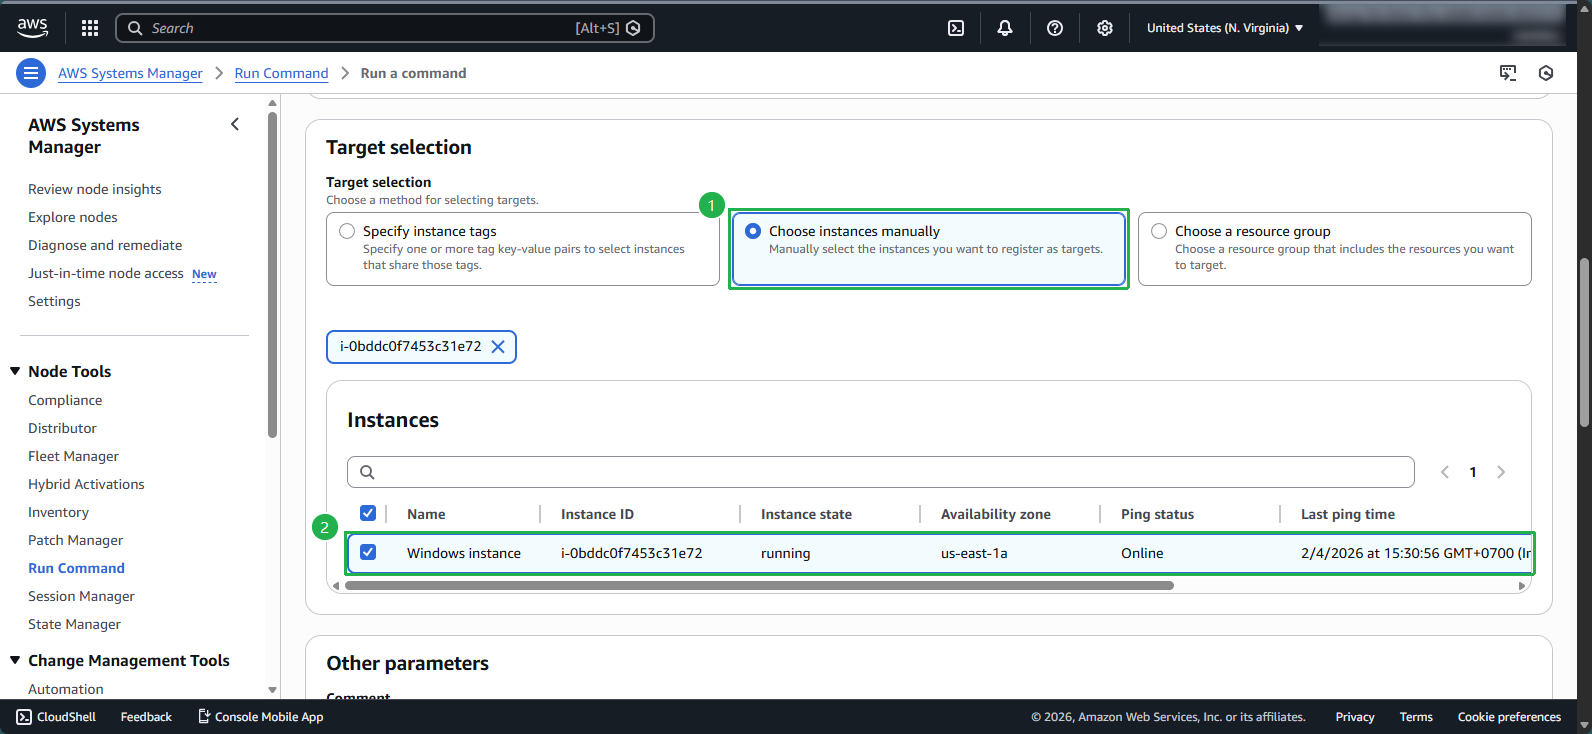
- Under Target selection, choose Choose instances manually
- Select your Windows-instance
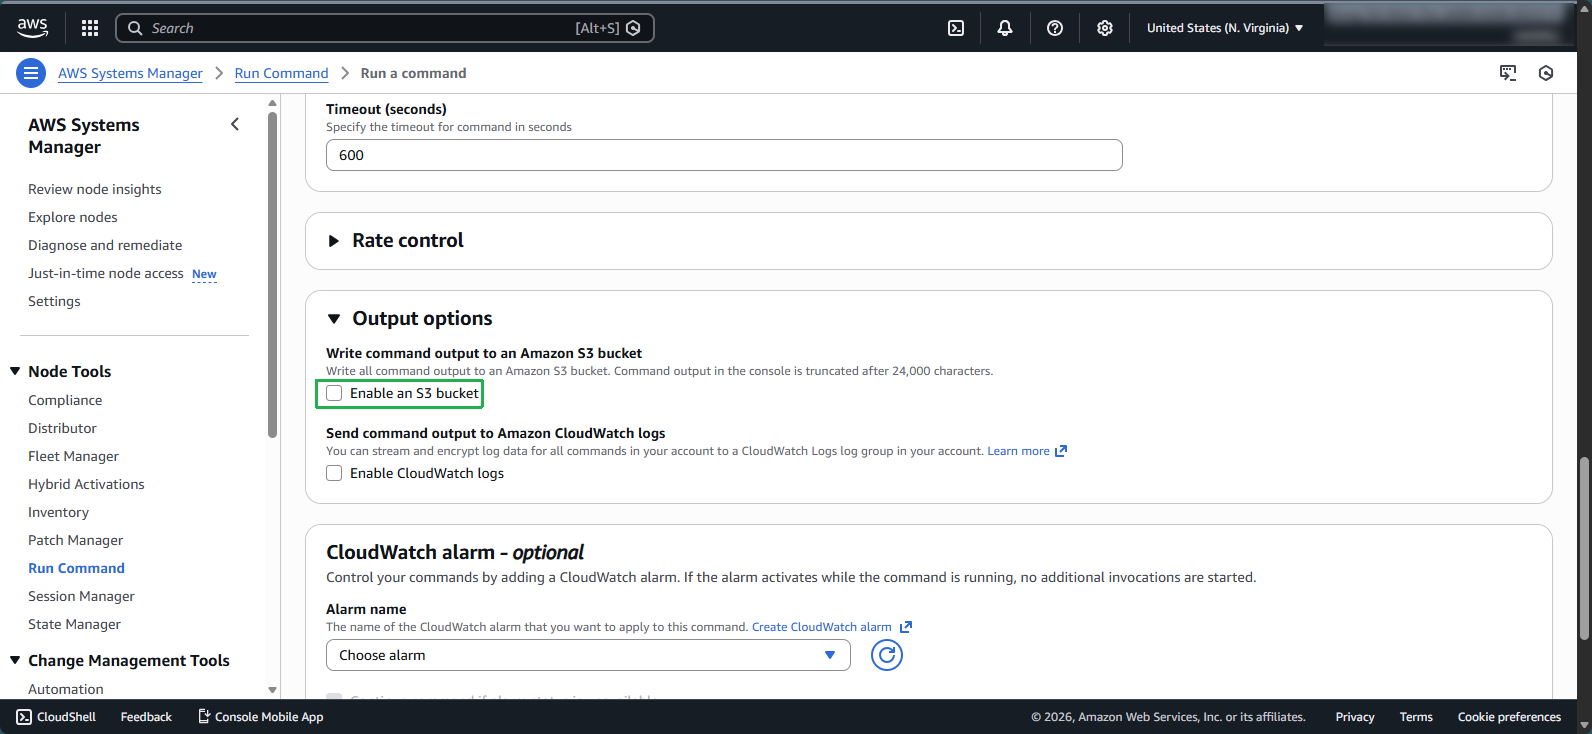
- Uncheck Enable an S3 bucket
- Click Run
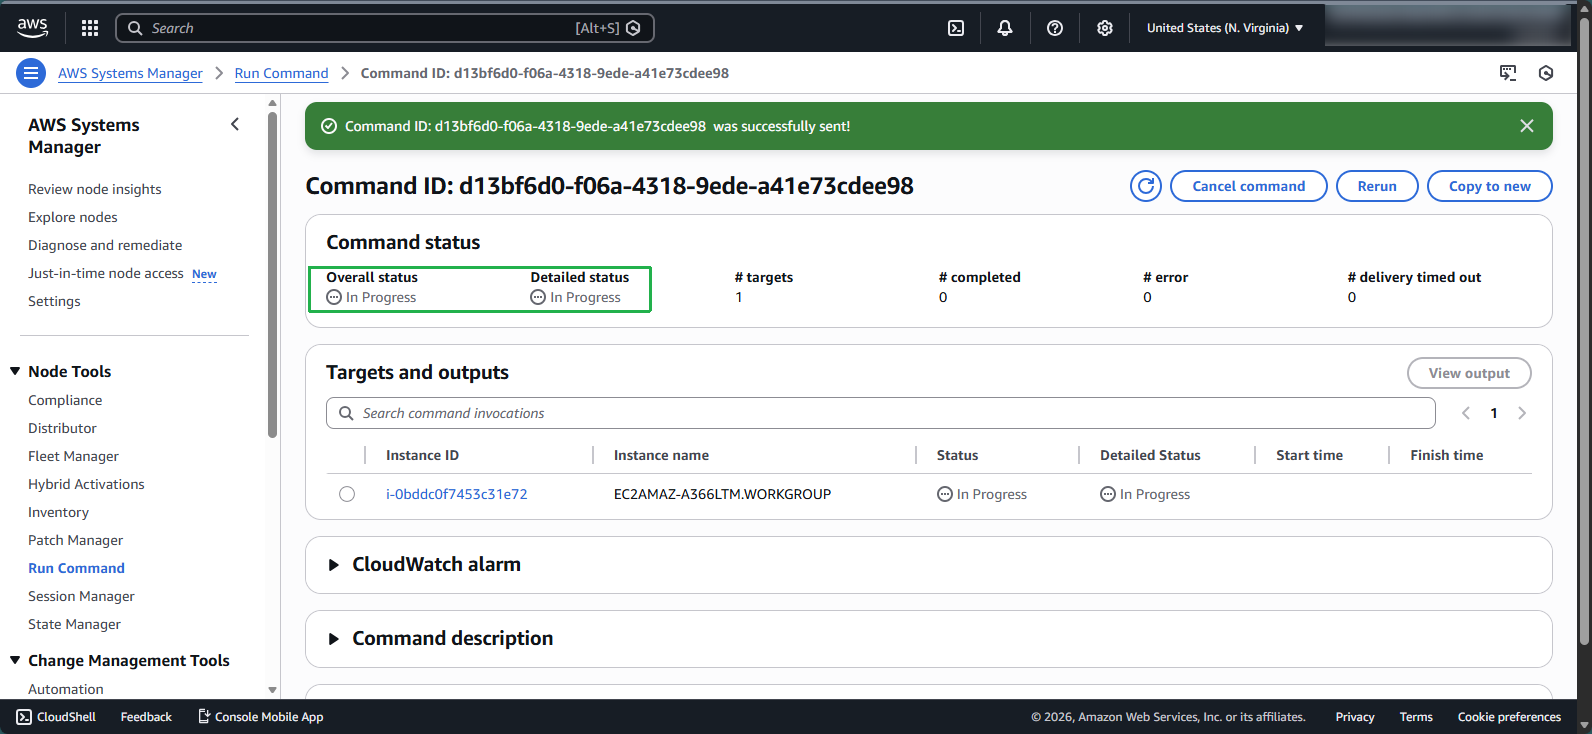
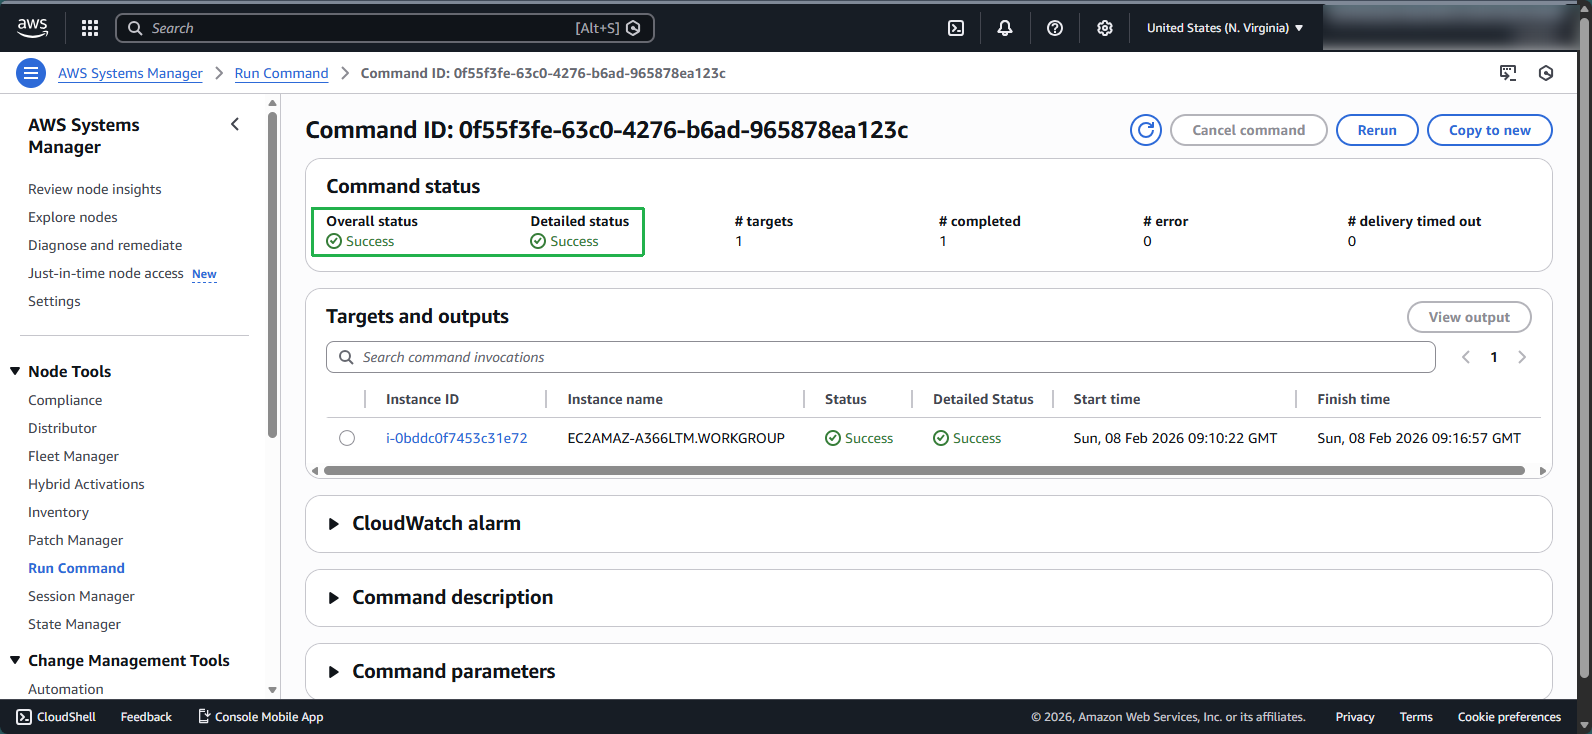
Monitor command execution:
- Wait approximately 1 minute for the status to change from In Progress to Success
Step 5: Retrieve the New Administrator Password
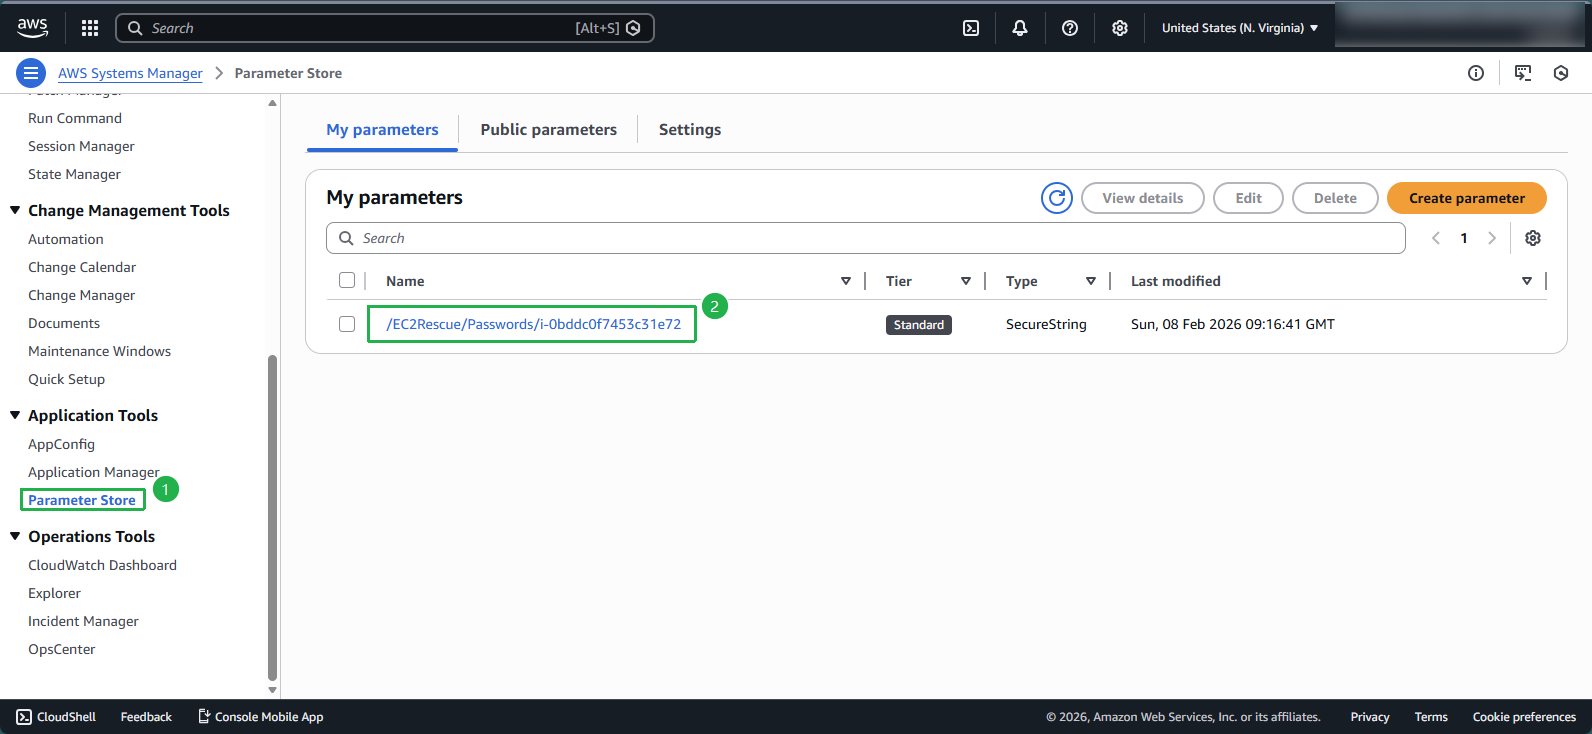
In the Systems Manager console:
- Navigate to Parameter Store
- Locate the parameter named /EC2Rescue/Passwords/[your-instance-id]
- Select this parameter
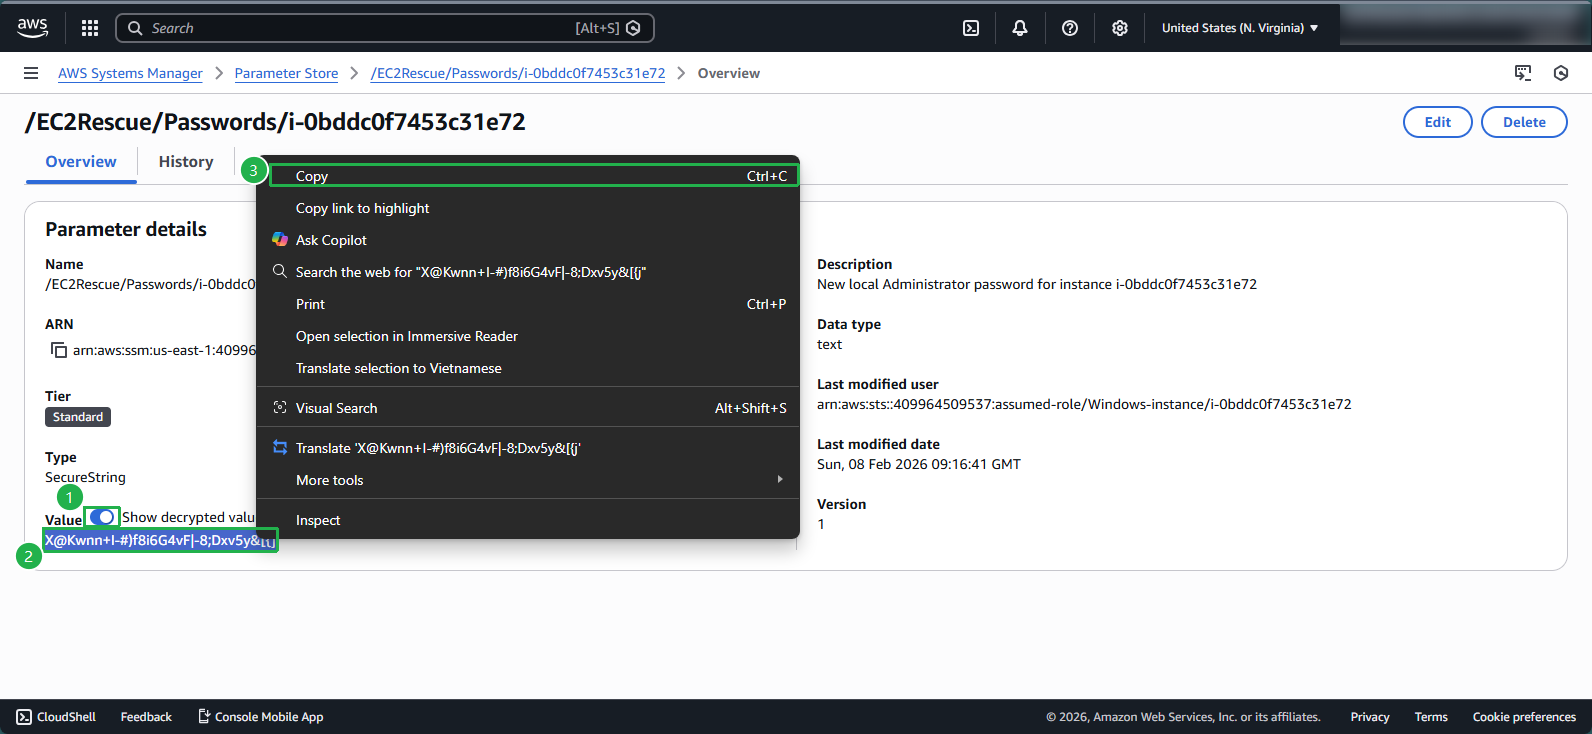
View the password:
- Under Value, click Show decrypted value to reveal the new administrator password
Copy the password for use in the next step
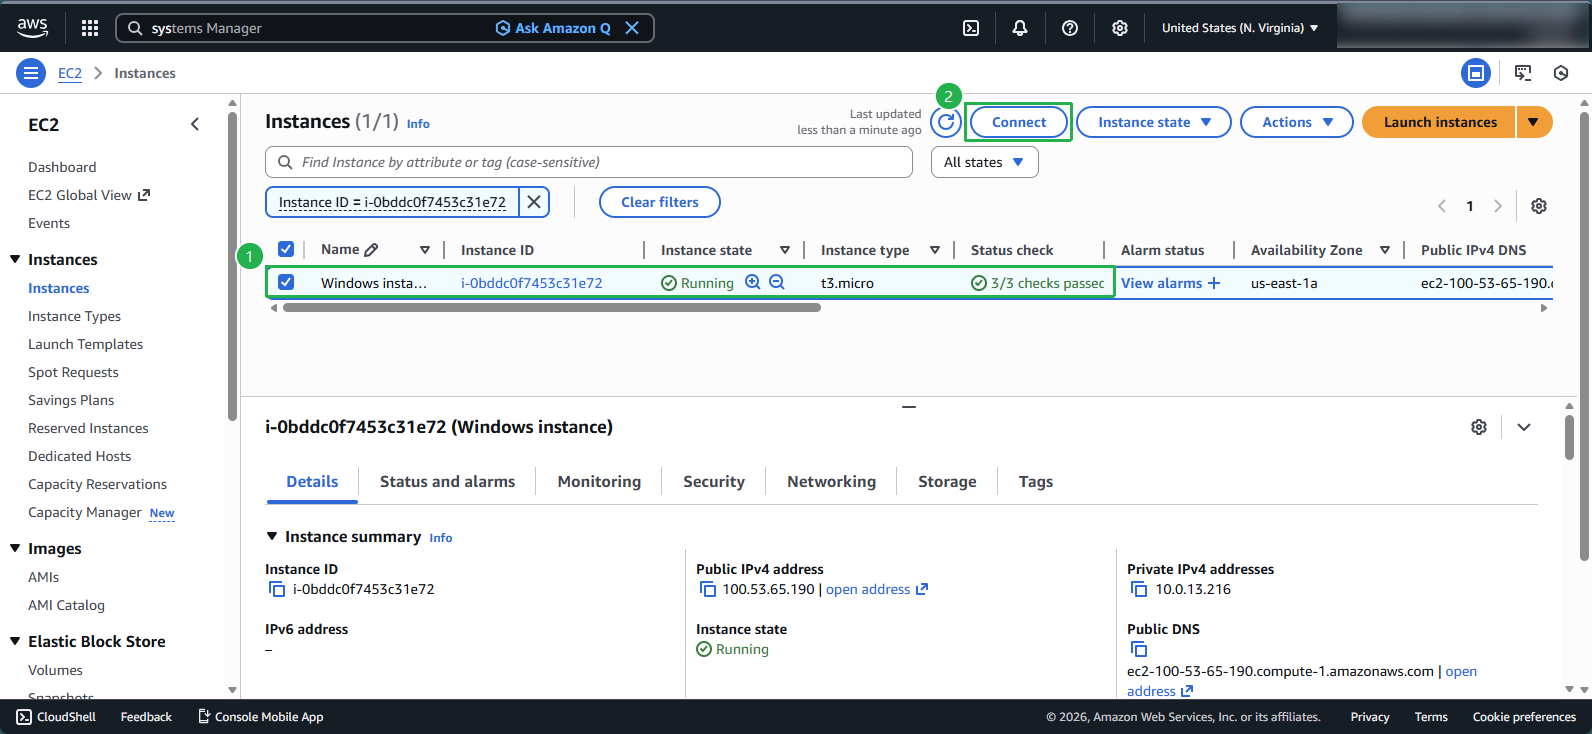
Step 6: Connect to Your Windows Instance
Return to the EC2 console:
- Select your Windows-instance
- Click Connect
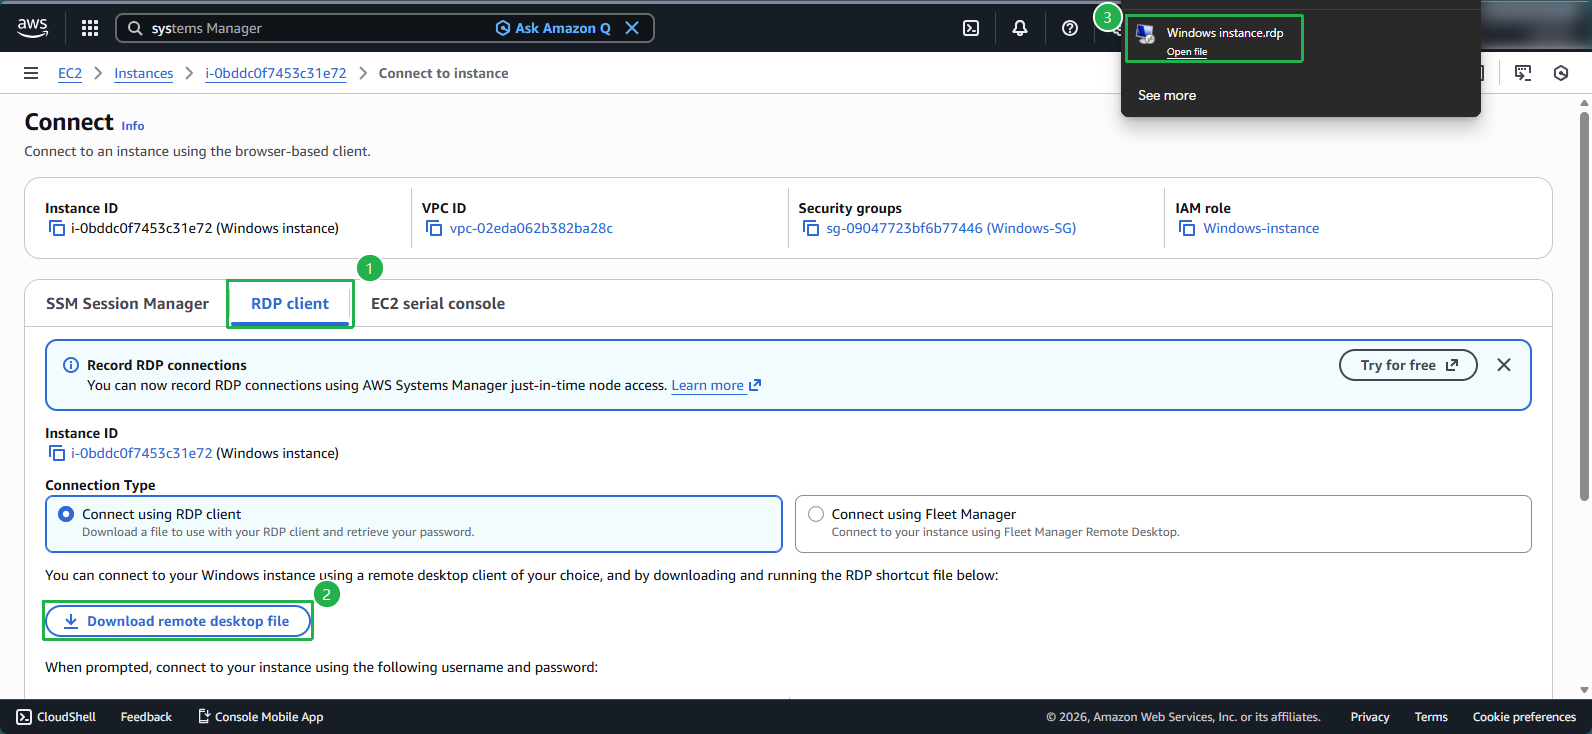
Set up the RDP connection:
- Select the RDP client tab
- Click Download remote desktop file
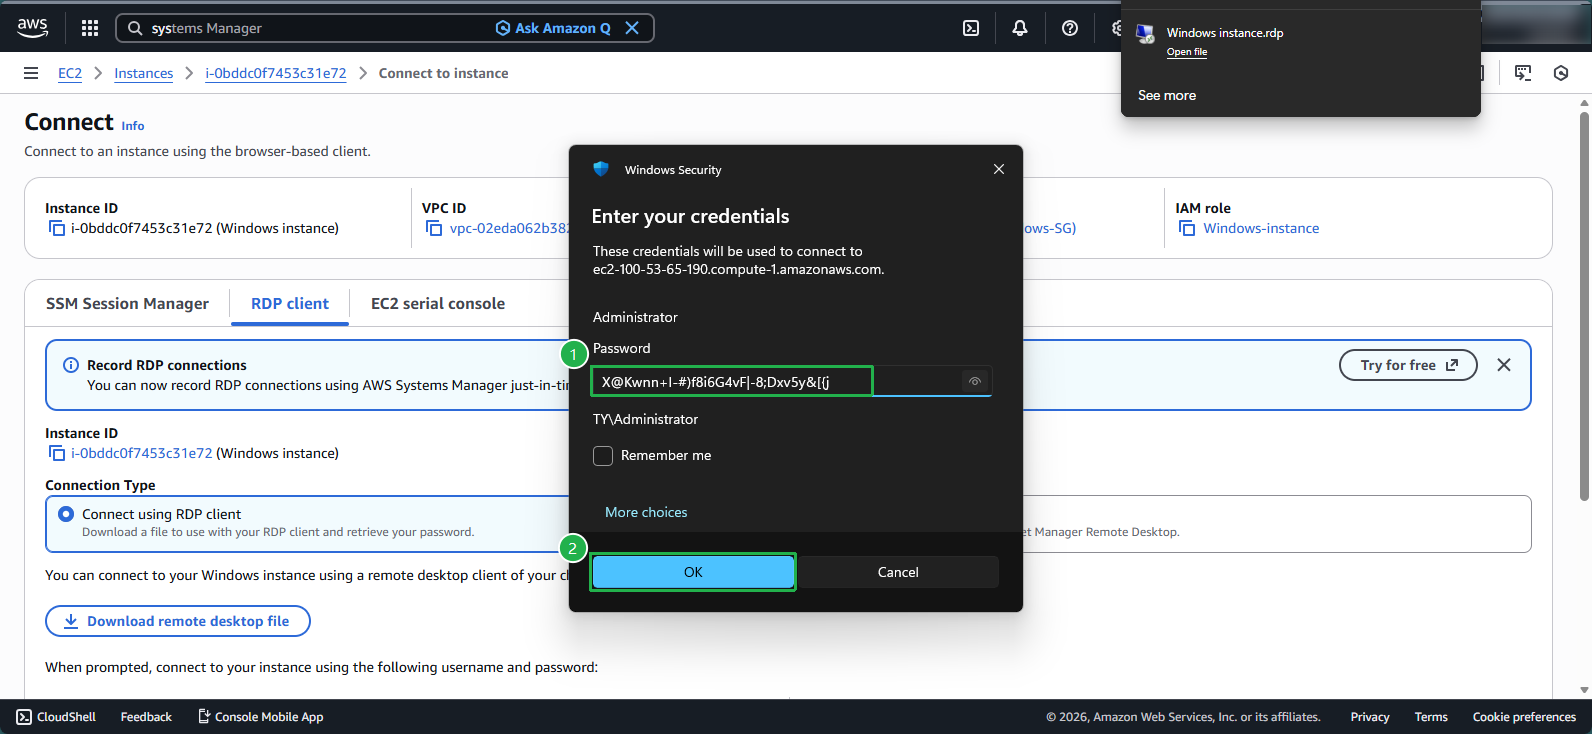
Open the RDP file:
- Locate and open the downloaded RDP file
Enter credentials:
- When prompted, paste the password you copied from Parameter Store
- Click OK and then Yes to proceed despite any certificate warnings
Verify successful connection:
- Confirm you can see the Windows desktop
- The public IP displayed should match your EC2 instance’s public IP in the console

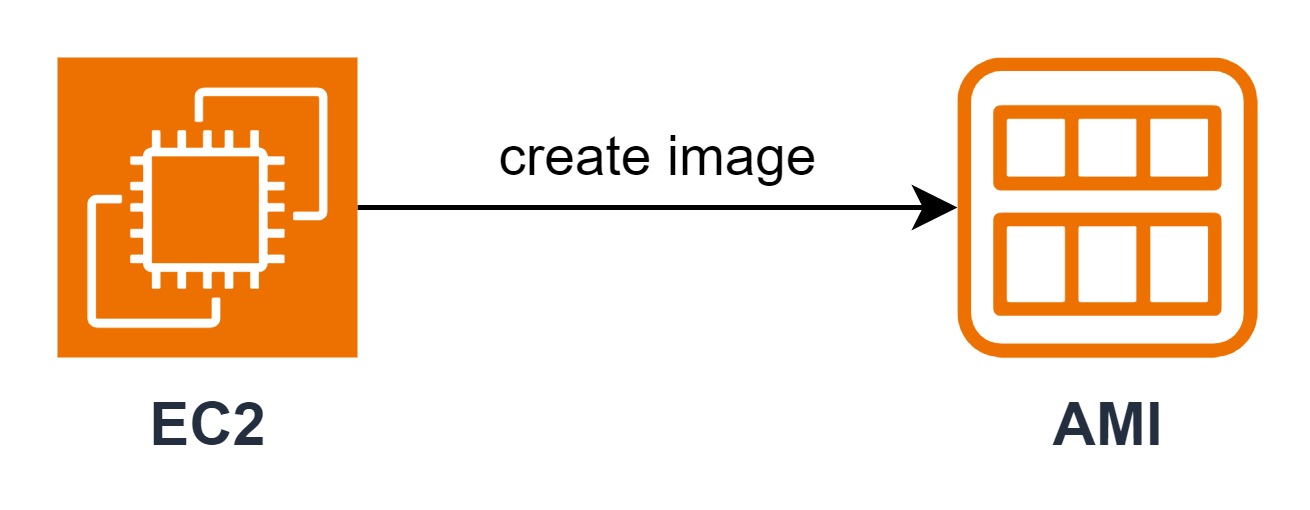
💡 Pro Tip: After successfully connecting, consider creating a new key pair and AMI for this instance to ensure you have proper backup access methods for the future.
🔒 Security Note: Remember to rotate the administrator password periodically as a security best practice, especially after using emergency access methods like EC2Rescue.