Share AMI (Optional)
Sharing Amazon Machine Images (AMIs)
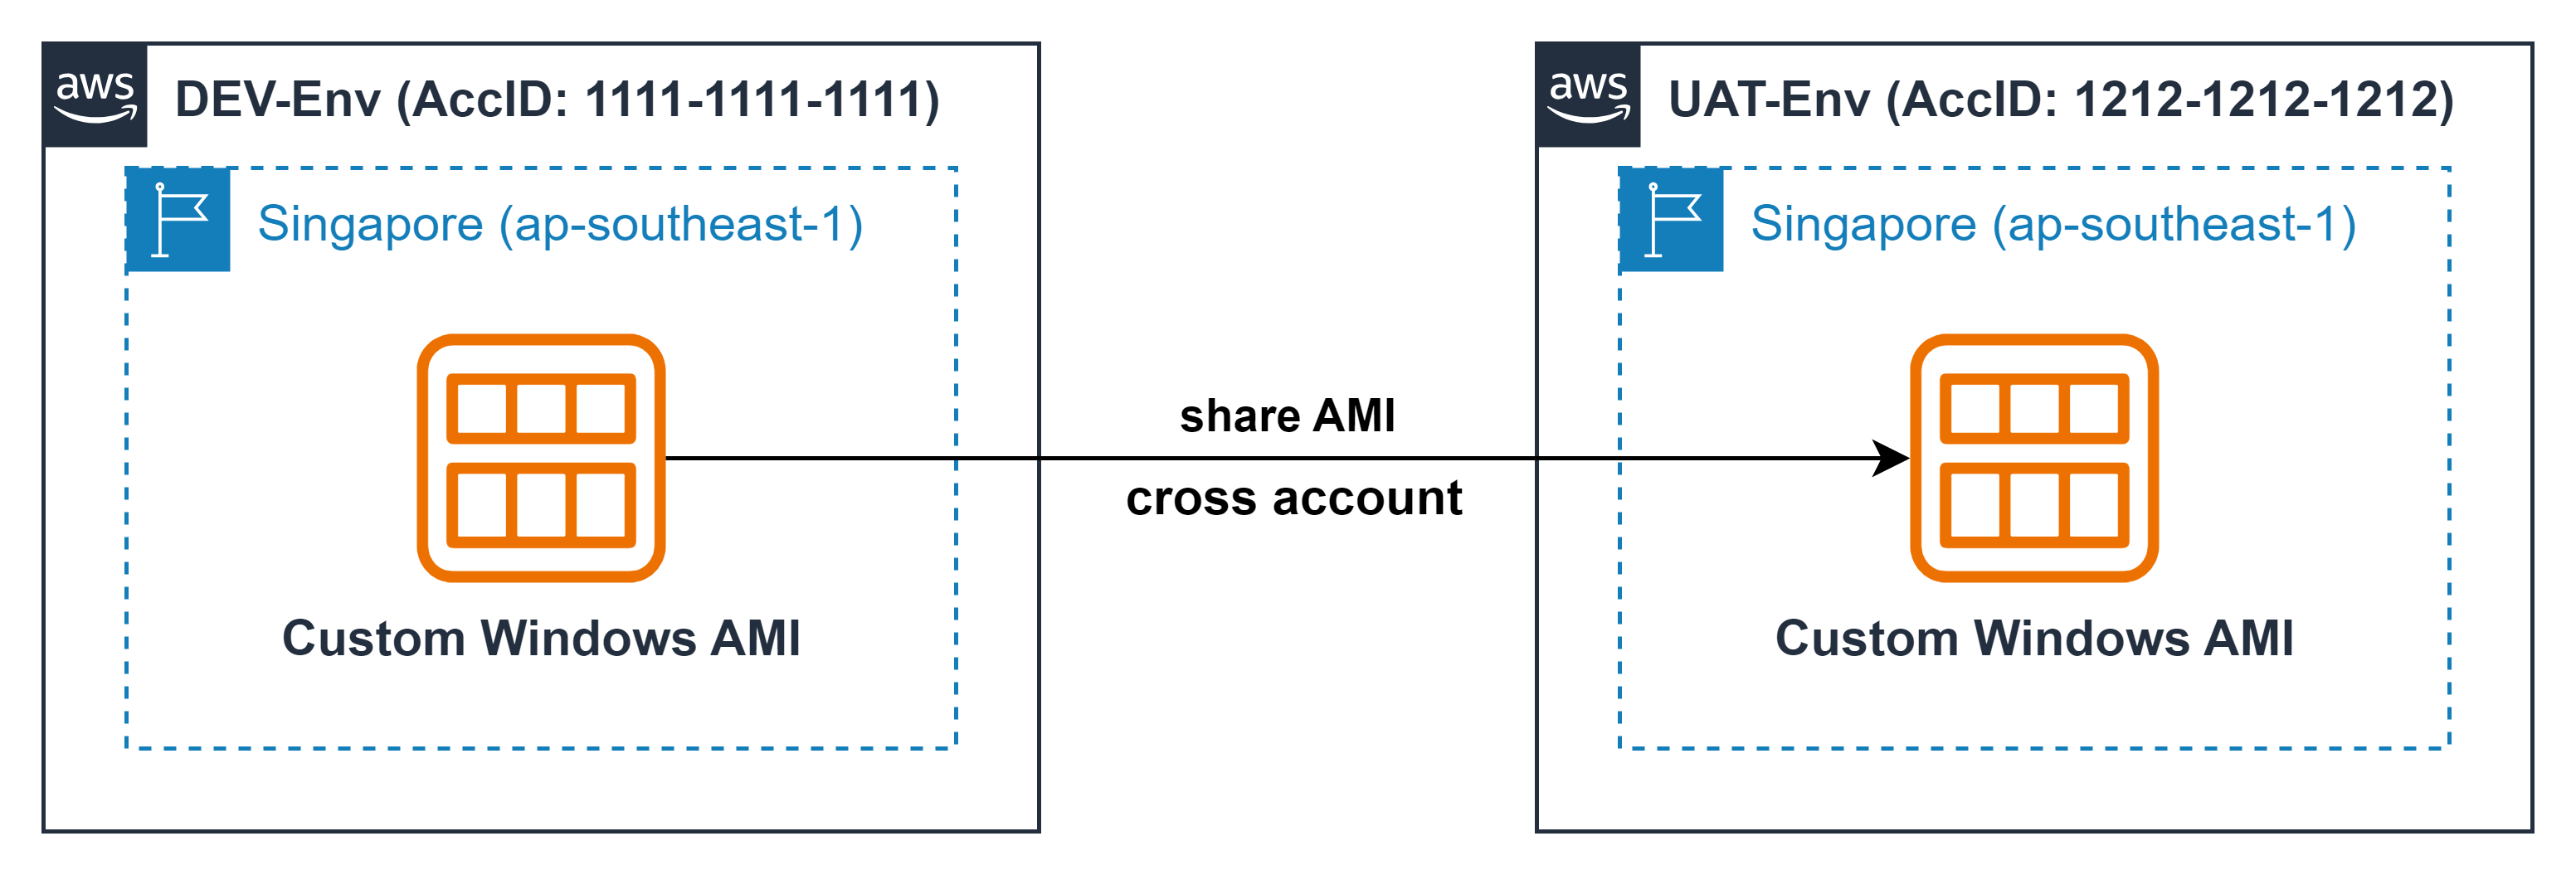
ℹ️ Information: The Share AMI feature allows you to make your custom Amazon Machine Images available to other AWS accounts. This is useful when you need to distribute standardized environments to development teams or deploy workloads across multiple AWS accounts while maintaining consistent configurations and data.
⚠️ Warning: This lab requires at least 2 AWS accounts. If you only have one account, you can create a new account through AWS Organizations and use the Switch Role feature to access it. For detailed instructions, refer to the lab: Set Up Single Sign-On (AWS IAM Identity Center) for Organizations.
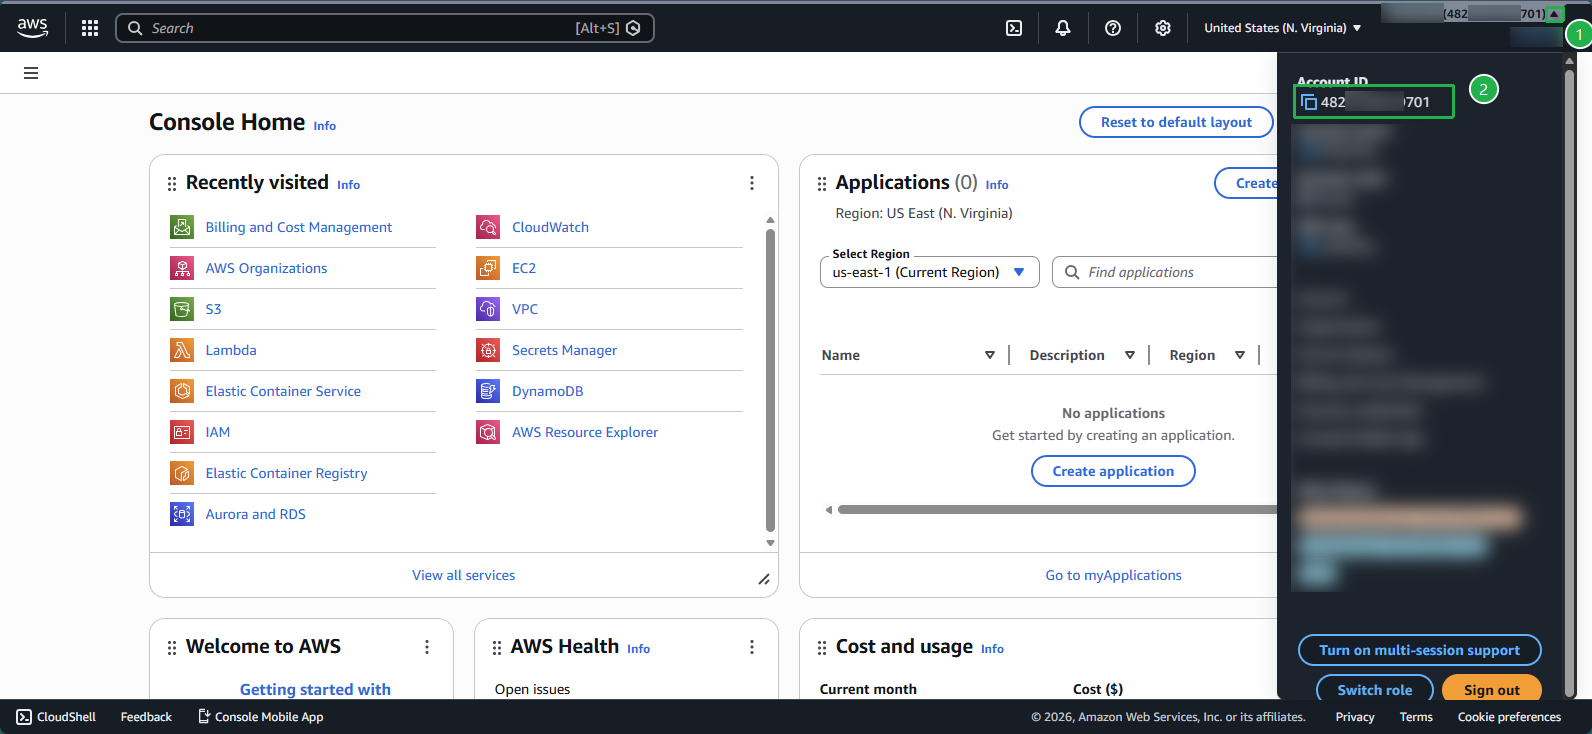
Step 1: Obtain the Target Account ID
Sign in to your second AWS account:
- In the EC2 console, locate your account identifier in the upper right corner
- Click the dropdown menu (triangle icon)
Copy your 12-digit AWS account ID:
- Click the square icon to copy the account ID to your clipboard
- Save this ID in a text editor for later use
Step 2: Select the AMI to Share
Return to your primary AWS account:
- In the search box, enter
amiand select AMIs
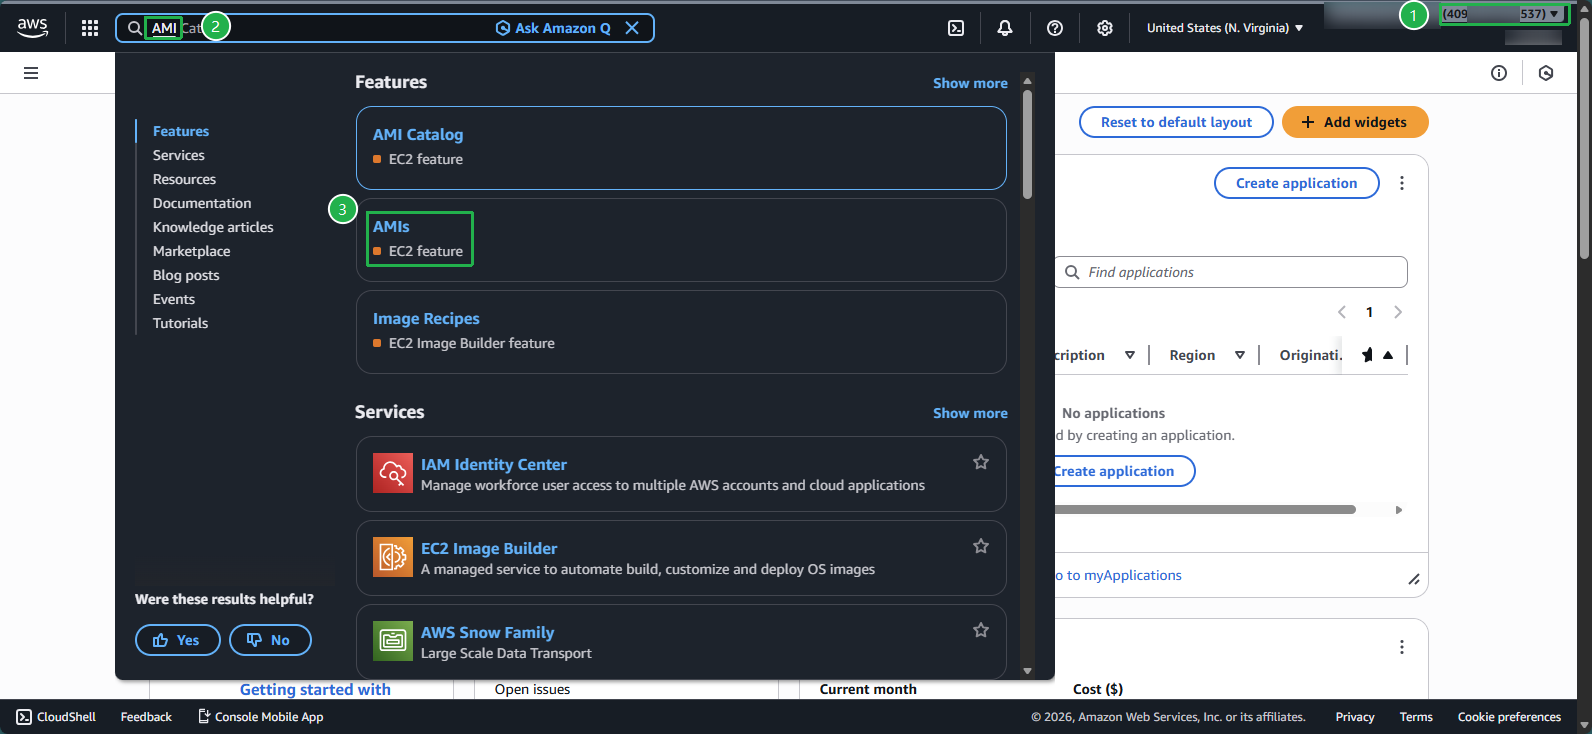
- In the search box, enter
Access the AMI sharing settings:
- Select your AMI
- Click Actions
- Choose Edit AMI permissions
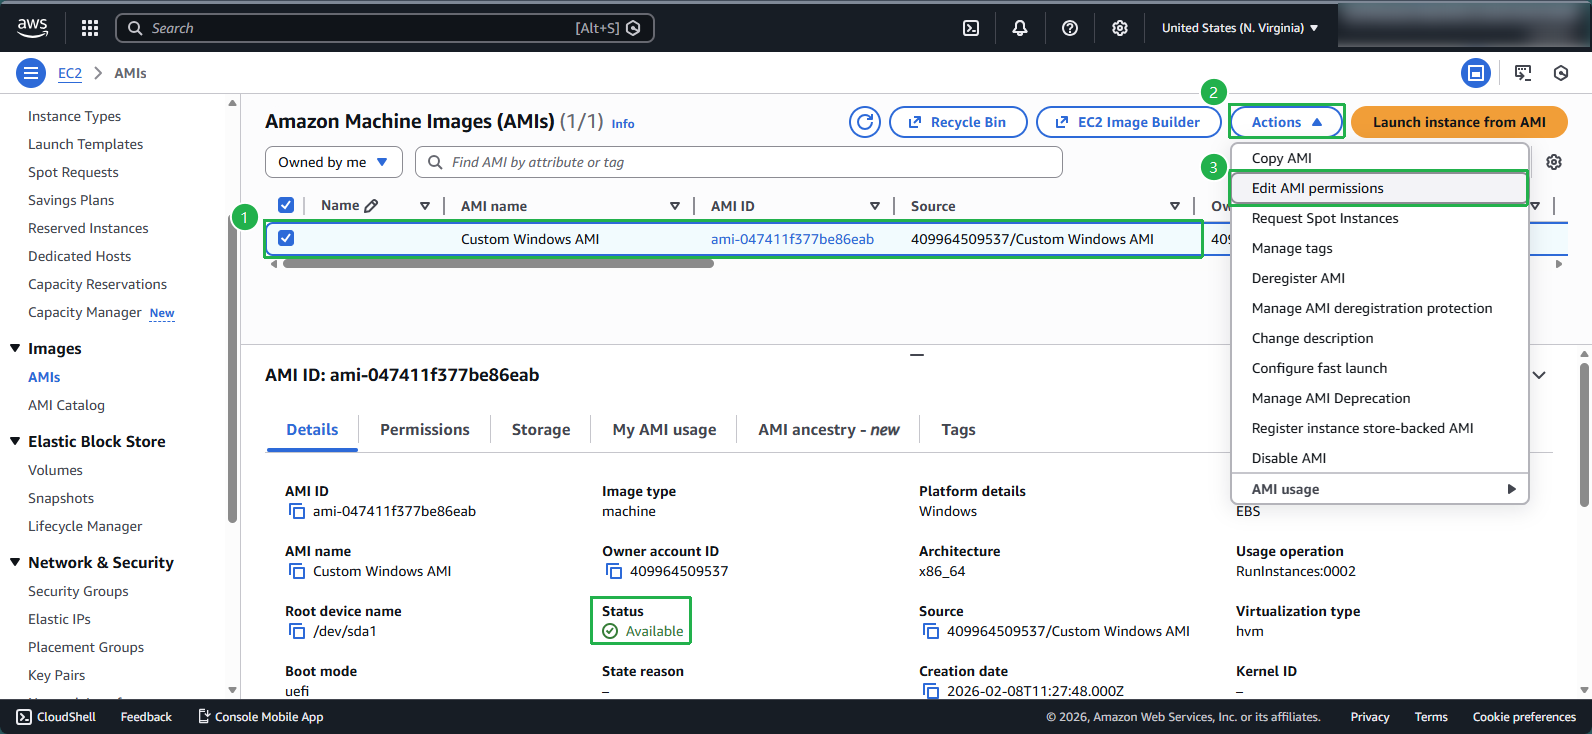
⚠️ Warning: If the AMI is in the Pending state, any attempt to update its permissions will fail. You must wait until the AMI status changes to Available before making updates.
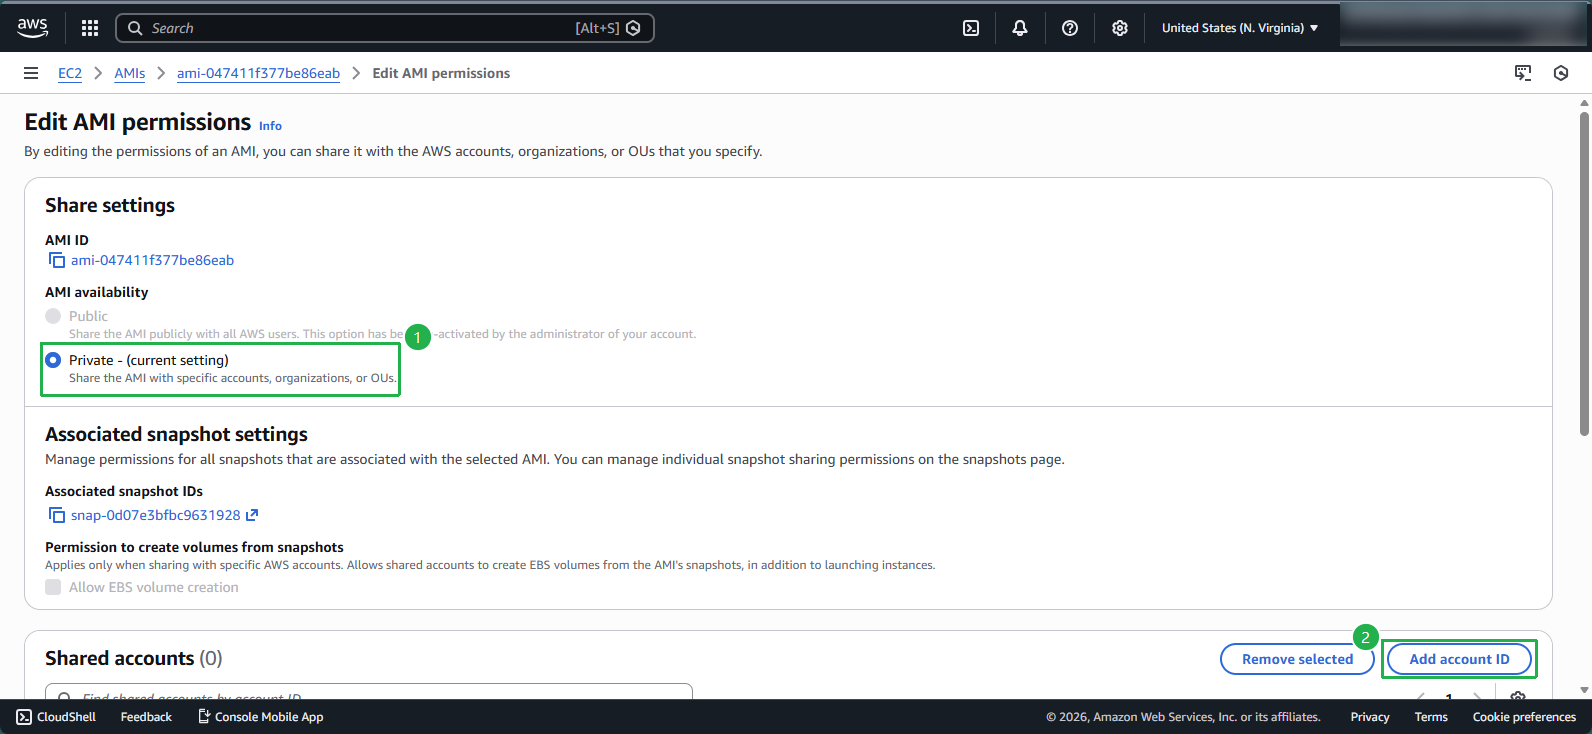
Step 3: Configure AMI Sharing Permissions
Set the AMI visibility:
- In the AMI availability section, ensure Private is selected
- This restricts access to only the accounts you specifically authorize
Add the target account:
- In the Shared accounts section, click Add account ID
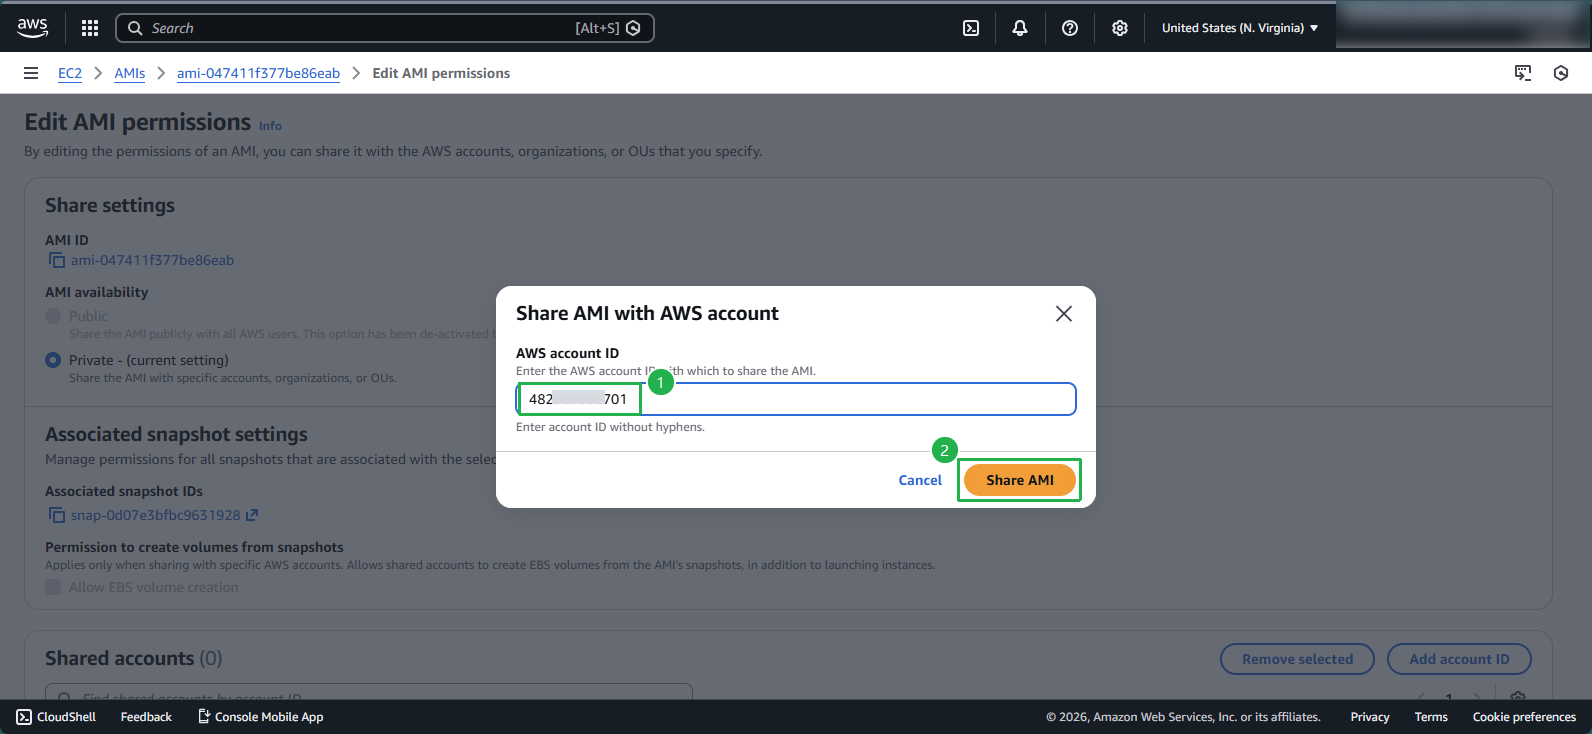
Enter the account details:
- Paste the account ID you copied in Step 1
- Click Share AMI
Confirm your settings:
- Review the configuration details
- Click Save changes
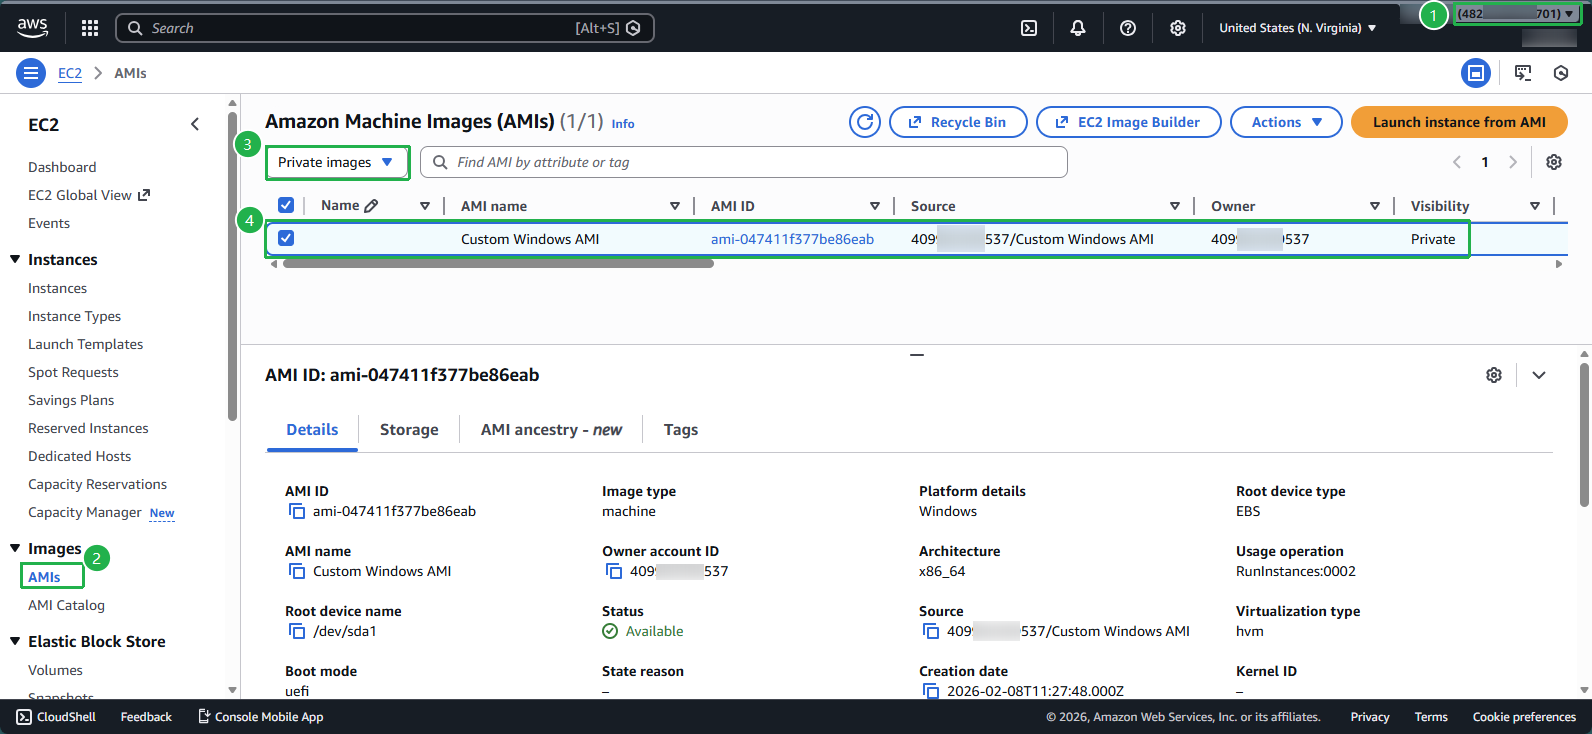
Step 4: Verify the Shared AMI
Sign in to your second AWS account:
- In the search box, enter
amiand select AMIs
- In the search box, enter
Change the AMI filter:
- By default, you’ll see the Owned by me view with no AMIs
- Click the dropdown menu (triangle icon)
Select the appropriate view:
- Choose Private images
Confirm access to the shared AMI:
- You should now see the AMI shared from your primary account
🔒 Security Note: When sharing encrypted AMIs, you must also share the AWS KMS customer managed key (CMK) used for encryption. By default, EBS volumes and snapshots are encrypted using KMS. To learn more about managing encryption keys, refer to the lab: AWS Key Management Service.
💡 Pro Tip: Each AMI has a sharing quota of 1000 entities, which can include organizations, organizational units, and individual AWS accounts. Plan your sharing strategy accordingly for large-scale deployments.
Congratulations! You have successfully shared an AMI with another AWS account. You can now proceed to launch EC2 instances from this shared AMI in your second account.