Create a Security Group for Windows Instance
Creating a Security Group for Your Windows Instance
ℹ️ Information: Security groups act as virtual firewalls that control the traffic allowed to and from your EC2 instances. In this section, we’ll create a security group specifically configured for Windows instances with the necessary ports for common Windows workloads.
Step 1: Navigate to Security Groups
Sign in to the AWS Management Console
- In the search bar, type VPC
- Select VPC from the services list
- In the navigation pane, click on Security Groups
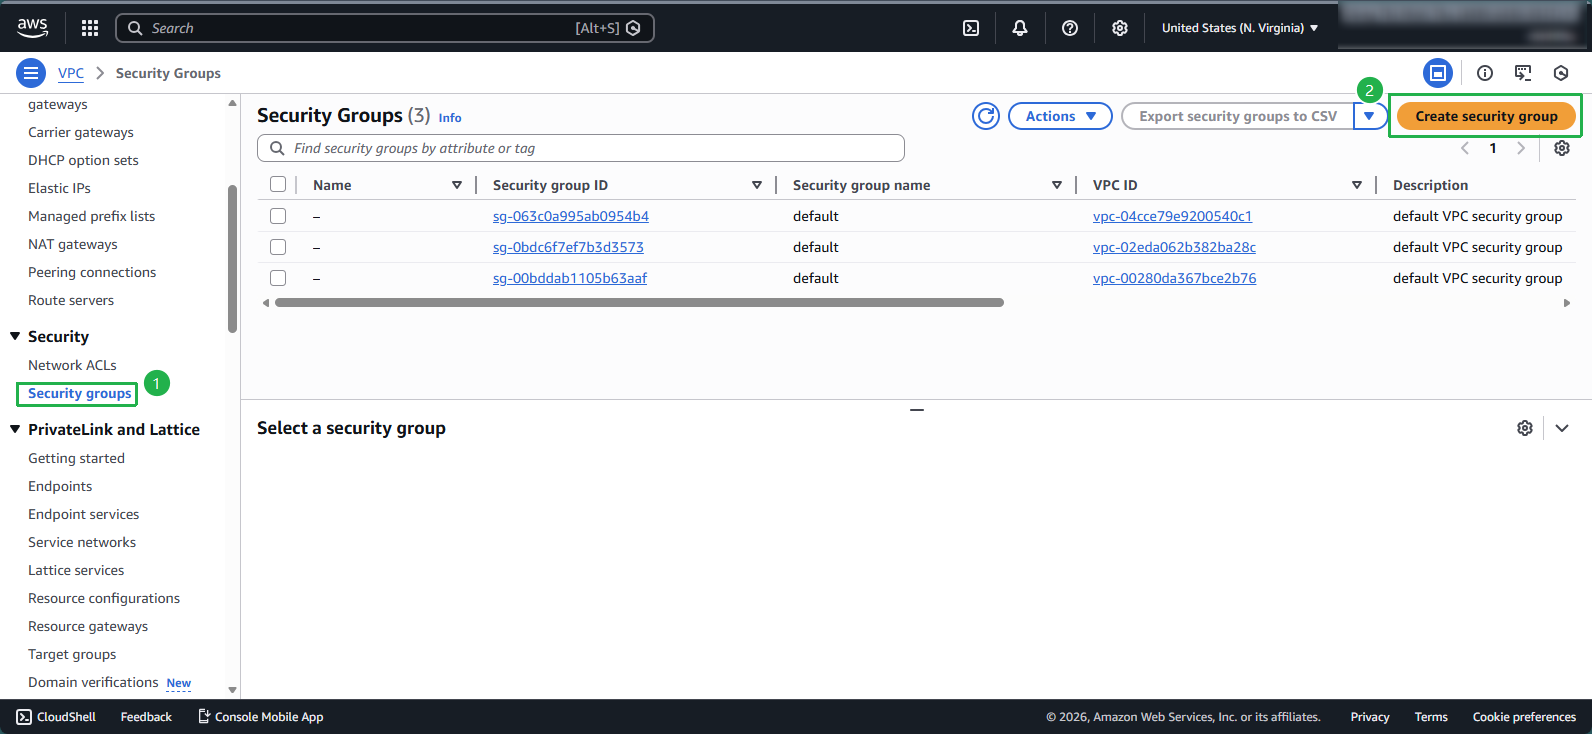
Step 2: Create a Security Group
Click Create security group and configure the basic details:
- Security group name: Enter
Windows-SG - Description: Enter
Security group for Windows instance - VPC: Select the previously created Windows-vpc from the dropdown
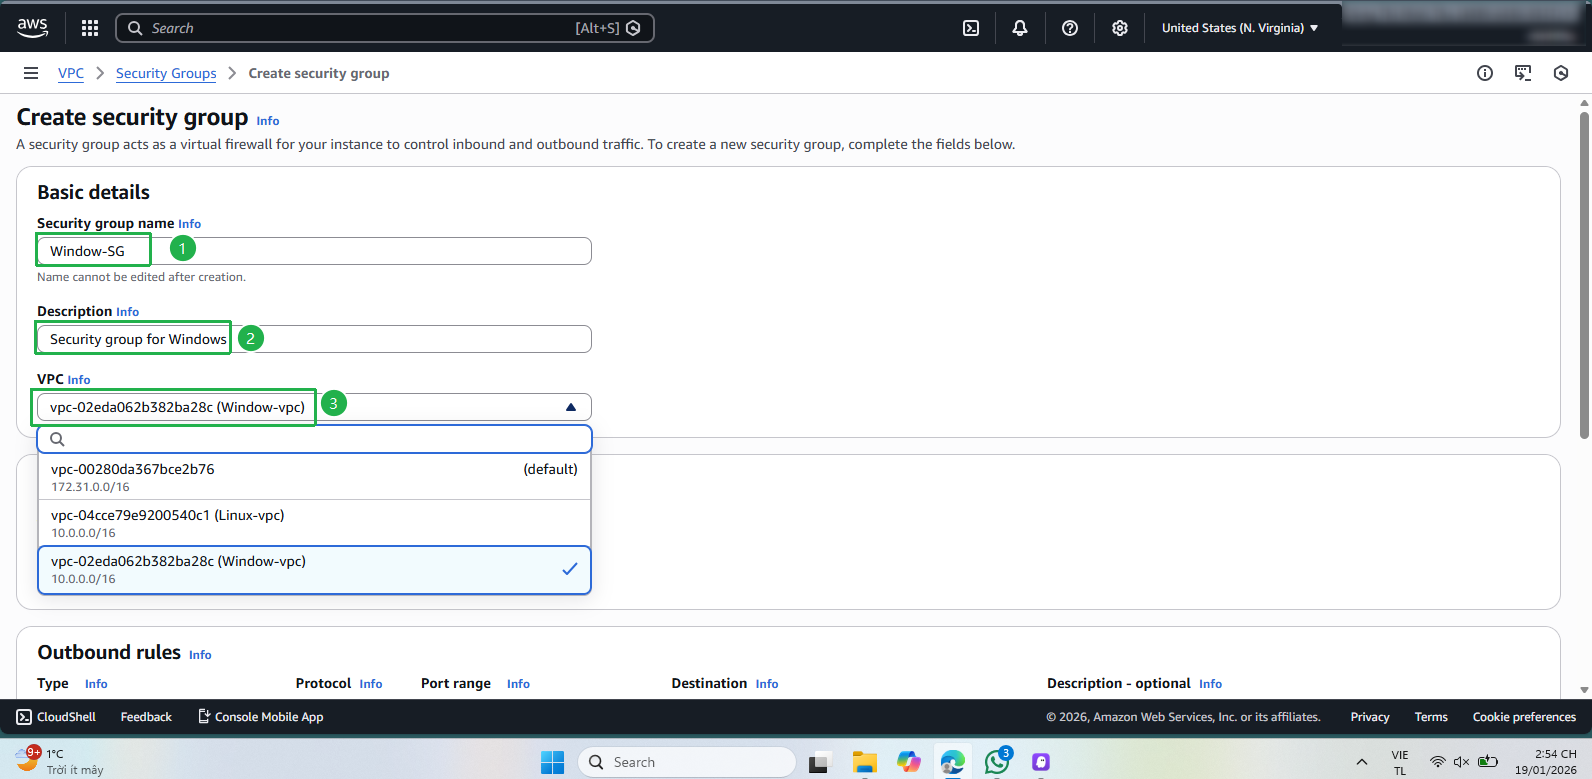
- Security group name: Enter
Step 3: Configure Inbound Rules
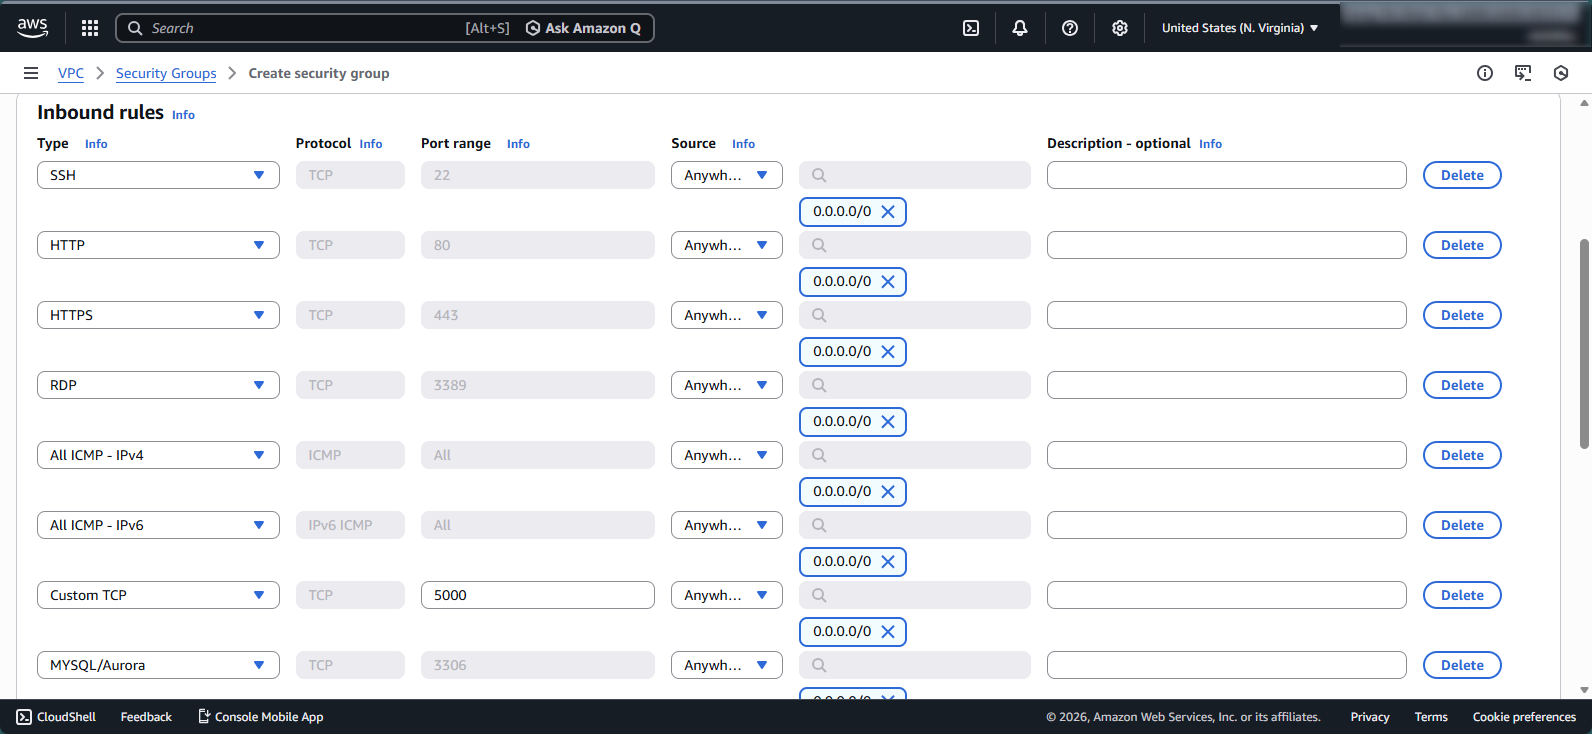
In the Inbound rules section, click Add rule to add the following rules:
- SSH (TCP/22): For secure shell access to your instance
- HTTP (TCP/80): For web server traffic
- HTTPS (TCP/443): For secure web traffic
- RDP (TCP/3389): For Remote Desktop Protocol connections to Windows
- All ICMP-IPv4: For ping and network diagnostics
- All ICMP-IPv6: For IPv6 network diagnostics
- Custom TCP (TCP/5000): For Node.js applications
- MySQL/Aurora (TCP/3306): For database connectivity
🔒 Security Note: When configuring security group rules, always follow the principle of least privilege by only opening ports that are necessary for your application to function. In production environments, you should restrict traffic sources whenever possible rather than allowing access from any IP address (0.0.0.0/0).
💡 Pro Tip: For each rule, you need to specify the following information:
Name: A name for the rule (up to 255 characters, including a–z, A–Z, 0–9, spaces, and ._-:/()#,@[]+=;{}!$*)
Protocol: The allowed protocol (TCP, UDP, ICMP)
Port range: For TCP/UDP, specify a single port (e.g., 22) or a port range (e.g., 7000–8000)
Source: The allowed traffic source, which can be:
- A single IPv4 address (e.g., 203.0.113.1/32)
- A single IPv6 address (e.g., 2001:db8:1234:1a00::123/128)
- An IP address range in CIDR notation (e.g., 203.0.113.0/24)
- A prefix list ID (e.g., pl-1234abc1234abc123)
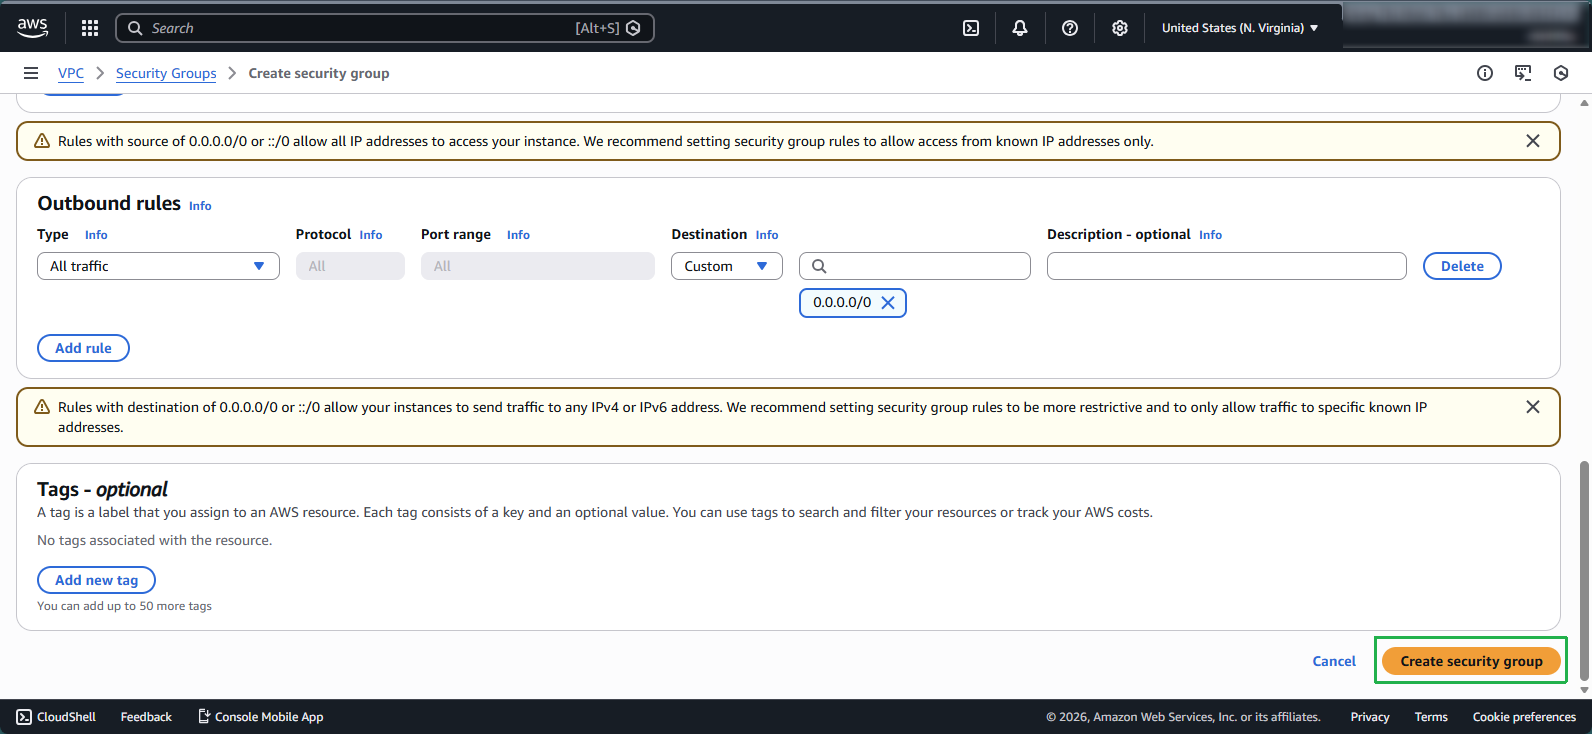
Step 4: Configure Outbound Rules and Tags
For Outbound rules, the default allows all outbound traffic, which is typically acceptable for most use cases
In the Tags section:
- Add appropriate key-value pairs to help identify and organize your security group
- Common tags include Name, Environment, Project, etc.
Click Create security group to complete the process
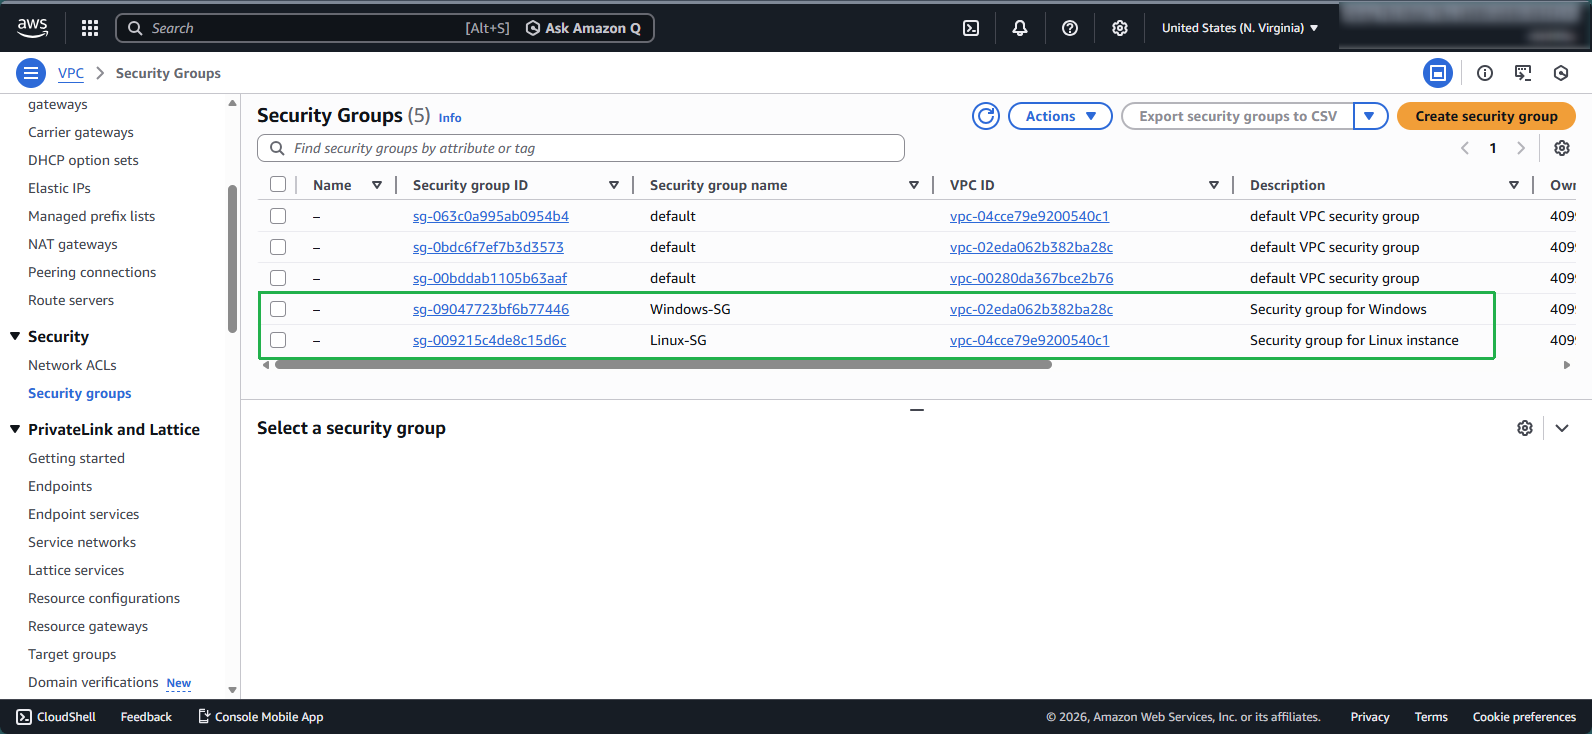
Step 5: Review Security Group Creation
Verify that your Windows security group has been created successfully

Step 6: Verify All Security Groups
- You should now have two security groups configured:
- One for your Linux instances
- One for your Windows instances
💡 Pro Tip: Use descriptive tags for your security groups to make them easier to identify when you have multiple security groups across different environments.